How to install a child seat
How to Install a Rear-Facing Only Infant Car Seat
Skip to main content
Car Seats and Booster Seats
How to Install a Rear-Facing Only Infant Car Seat With a Seat Belt With Lower Anchors
How to Install a Rear-Facing Only Infant Car Seat
- With a Seat Belt
- With Lower Anchors
How to Install a Rear-Facing Infant Car Seat With a Seat Belt
Installing the Car Seat Base With a Seat Belt
- Read your car seat’s instruction manual and your vehicle’s owner manual. Pay close attention to the information about your vehicle’s seat belt system, and how to “lock” the seat belt. Every seat and vehicle is different, which affects the way you’ll install your particular seat.
- Place the car seat base in the back seat of your vehicle.
- Carefully thread the seat belt through the rear-facing belt path. Check to make sure there are no twists in the seat belt.
- Buckle the seat belt.
- Lock the seat belt.
- Press down firmly on the car seat base and tighten. The base should not move side-to-side or front-to-back more than 1 inch.
- Make sure your car seat base is installed at the correct recline angle.
- Babies must ride sitting semi-reclined to keep the airway open.
- Most infant car seats have built-in angle indicators or adjustors to assist you.
- As your child grows, the angle may need to be adjusted, so be sure to read the manufacturer’s instructions.
- Attach the infant carrier to the base.
Fitting Your Child Correctly in the Car Seat
- Place your child in the car seat with the child's back flat against the car seat.
- Place harness straps over the child’s shoulders.
 Harness straps should lie flat, not twisted, and be placed through the slots located at or below your child’s shoulders.
 - Buckle the harness and the chest clip, and tighten until snug. The harness is snug enough when you cannot pinch any extra material at the shoulder.
- Bulky clothing or blankets can prevent a snug harness fit. Always buckle the baby in the seat first, and then place coats or blankets over the harness.
- If your baby needs support, fill the empty spaces with small, rolled blankets on each side of the baby’s shoulders and head.
- If there is a gap between the buckle and your child’s groin (common for young infants), try placing a rolled washcloth or diaper in the space for a more secure fit.
- Never put thick padding under or behind the baby unless it is recommended for use by the car seat manufacturer.
- Place chest clip at armpit level. This holds the harness straps in place on the child’s chest and shoulders.

Best Practice
When your child outgrows the infant car seat, switch to a convertible or all-in-one car seat and use it in the rear-facing position. These seats typically have weight and height limits for the rear-facing position that allow you to keep your child rear-facing longer. If a baby under 1 year old grows too tall or too heavy for an infant car seat, a car seat with a higher rear-facing size limit is strongly recommended.
How to Install a Rear-Facing Infant Car Seat With Lower Anchors
Installing the Car Seat Base With Lower Anchors
- Read your car seat’s instruction manual and your vehicle’s owner manual carefully. Pay close attention to the location of the lower anchors, and directions on how to use this vehicle hardware.
- Place the car seat base in the back seat of your vehicle. In a crash, the back seat is the safest place to be, and rear-facing car seats provide extra protection for your child’s head, neck and spine.
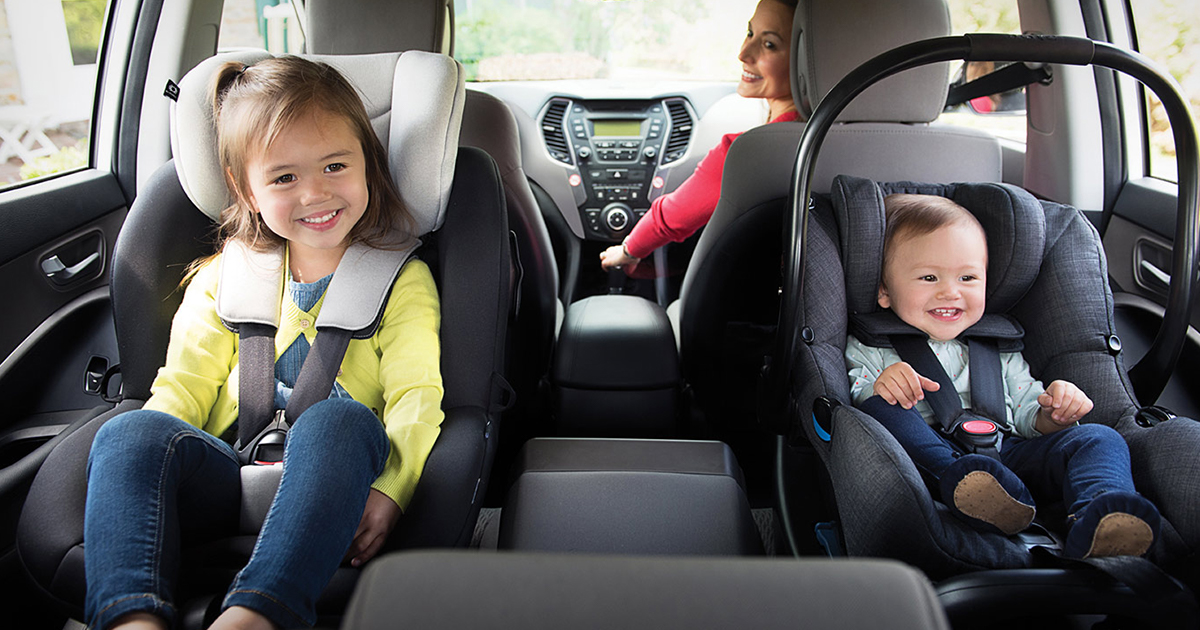
- Locate the lower anchors in your vehicle.
- Connect the lower anchor attachments on the car seat base to the lower anchors, making sure the straps aren’t twisted.
- Press down firmly on the car seat base and tighten the straps. You should not be able to move the car seat base side-to-side or front-to-back more than 1 inch.
- Make sure your base is installed at the correct recline angle.
- Babies must ride sitting semi-reclined to keep the airway open.
- Most infant car seats have built-in angle indicators or adjustors to assist you.
- As your child grows the angle may need to be adjusted, so be sure to read the manufacturer’s instructions.
- Attach the infant carrier to the base.
Fitting the Child Correctly in the Car Seat
- Place your child in the car seat with the child's back flat against the car seat.
- Place harness straps over the child’s shoulders. Harness straps should lie flat, not twisted, and be placed through the slots located at or below your child’s shoulders.

- Buckle the harness and the chest clip, and tighten until snug. The harness is snug enough when you cannot pinch any extra material at the shoulder.
- Bulky clothing or blankets can prevent a snug harness fit. Always buckle the baby in the seat first, and then place coats or blankets over the harness.
- If your baby needs support, fill the empty spaces with small, rolled blankets on each side of the baby’s shoulders and head.
- If there is a gap between the buckle and your child’s groin (common for young infants), try placing a rolled washcloth or diaper in the space for a more secure fit.
- Never put thick padding under or behind the baby unless it is recommended for use by the car seat manufacturer.
- Place chest clip at armpit level. This holds the harness straps in place on the child’s chest and shoulders.
Best Practice
When your child outgrows the infant car seat, switch to a convertible or all-in-one car seat, and use it in the rear-facing position.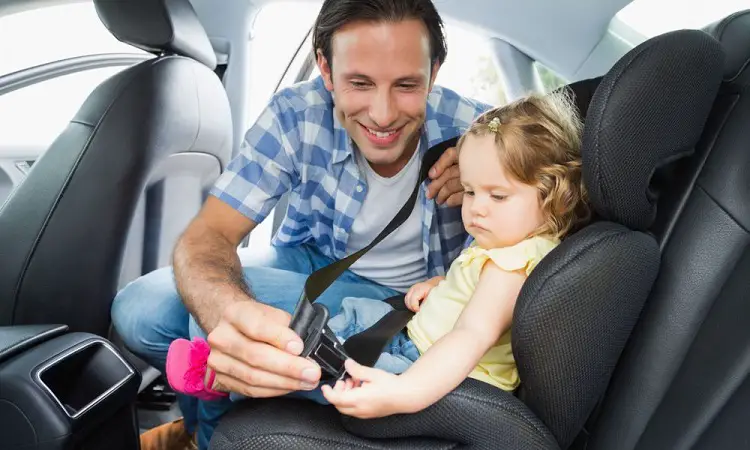 These seats typically have higher height and weight limits for the rear-facing position, allowing you to keep your child rear-facing longer. If a baby under 1 year old grows too tall or too heavy for an infant car seat, a car seat with a higher rear-facing height and weight limit is strongly recommended.
The Ultimate Car Seat Guide
Installing Basic Tip #1
Let us Help you install your car seat properly
Take time to read the owner manuals for both your vehicle and your car seat. If you would like help installing your car seat, a car seat technician can help. Safe Kids coalitions have car seat checkup events and inspection stations around the country. Find an event here. If there isn’t an event near you, look here for a certified child passenger safety technician (CPST) who can help you.
Installing Basic Tip #2
find the Best place in the car
The back seat is the safest place to ride for all children under age 13. But not all cars allow for a car seat in every place that has a seat belt. Check your car owner manual to see where you can put a car seat. Make sure that the car seat or booster seat for each child riding in the car is in the best possible place. Also, make sure other passengers in the car can ride safely.
Installing Basic Tip #3
Use the Seat Belt or LATCH
There are two ways to secure a car seat in a vehicle.
- One way is to use the vehicle seat belt. Place the seat belt through the car seat at the belt path. Arrows on the car seat or directions on the car seat label will show you the correct belt path to use. On all forward-facing car seats, use a top tether when securing the car seat.
- Another way is to use lower anchors and tethers for children (LATCH) to attach the car seat to the vehicle.
 Car seats have lower attachments that connect to the car’s lower anchors. On all forward-facing car seats, use a top tether when securing the car seat.
The seat belt and LATCH are both safe, but don’t use both at the same time. Choose the one that gives the car seat a snug fit. The next tip shows you how to get that snug fit.
Installing Basic Tip #4
Do the Inch Test
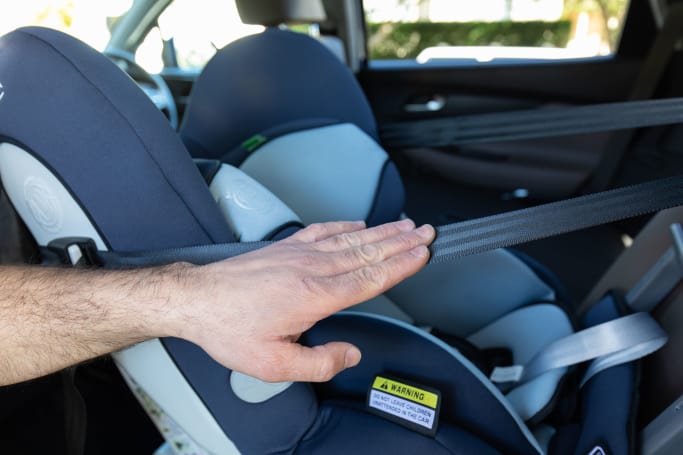
Does the car seat have a snug fit? Do the Inch Test to find out. A properly-installed car seat shouldn’t move more than one inch front to back or side to side when pulled at the seat belt path. This rule applies for forward-facing car seats and rear-facing car seats and when the seat is secured with either the seat belt or LATCH.
Installing Basic Tip #5
know Your Car Seat’s LATCH Weight Limits
Use LATCH only for children less than a certain weight.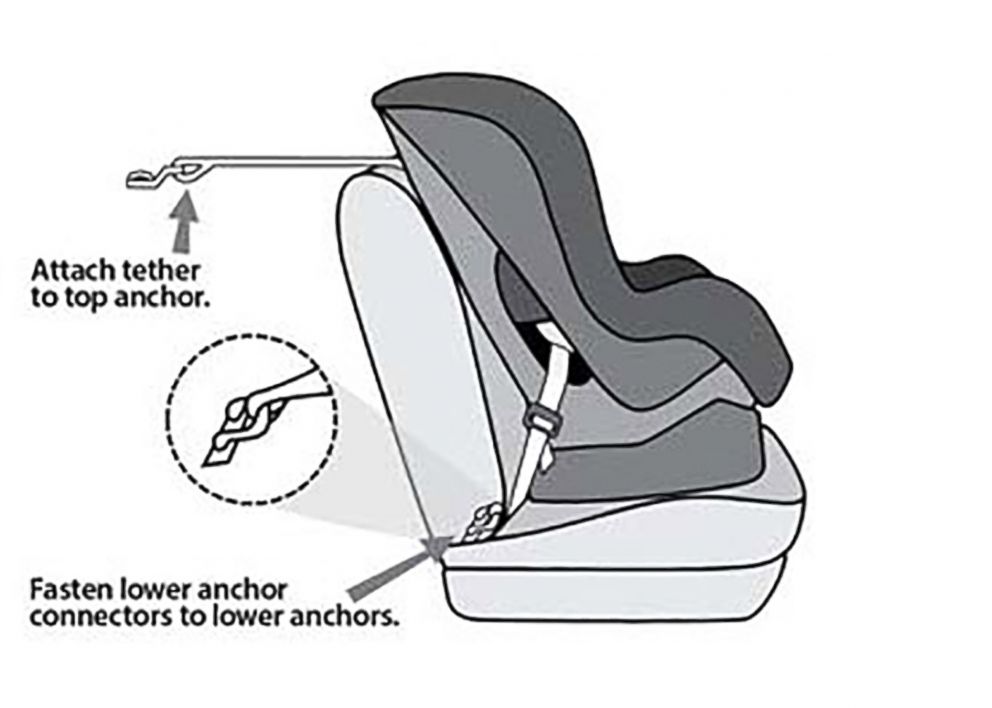 The car seat label lists the weight limit. When your child gets too big for LATCH, simply undo LATCH and secure the car seat with the seat belt and top tether.
Share these tips with friends and family!
Want tips for the kids in your care?
Check out car seat safety tips for your child.
Looking for more information?- Return home, find FAQs, or check the Glossary.
- Find a car seat installation event near you.
- Find your state law.
- Buying
- Installing
- Right Fit
- When to Change
Get Car Seat Safety Tips for Your Child
Fitting a child car seat
Driving with a child? Buying a child car seat is only half the battle. In order for it to really protect the baby, and not just serve as a talisman against fines, it must be installed correctly. Alas, sometimes there are difficulties with this. How to securely tighten the seat belt, why the Isofix mount needs additional support, and why turn the seat backwards - we understand the intricacies of transporting children in the car.
Installing the Isofix seat
If, when choosing a child car seat, you chose a model with Isofix locks, installation is noticeably easier. But it is by no means reduced to two clicks - even a simple and friendly Isofix mount has its own subtleties.
Any Isofix chair consists of the chair itself (bowl) and the base - the Isofix mount with the base mounted on it. This is convenient: the chair can be removed from the base for cleaning or turning 180 degrees, while the base remains fixed in the car.
The initial installation of the Isofix seat begins with the search for mating fasteners - metal brackets - in the back of the rear (in most cars - only the rear) seat. And this is not as easy a task as it might seem. Automakers, for the sake of design, disguise the brackets by hiding them with fabric plugs, or hiding them deep in the bowels of the seat.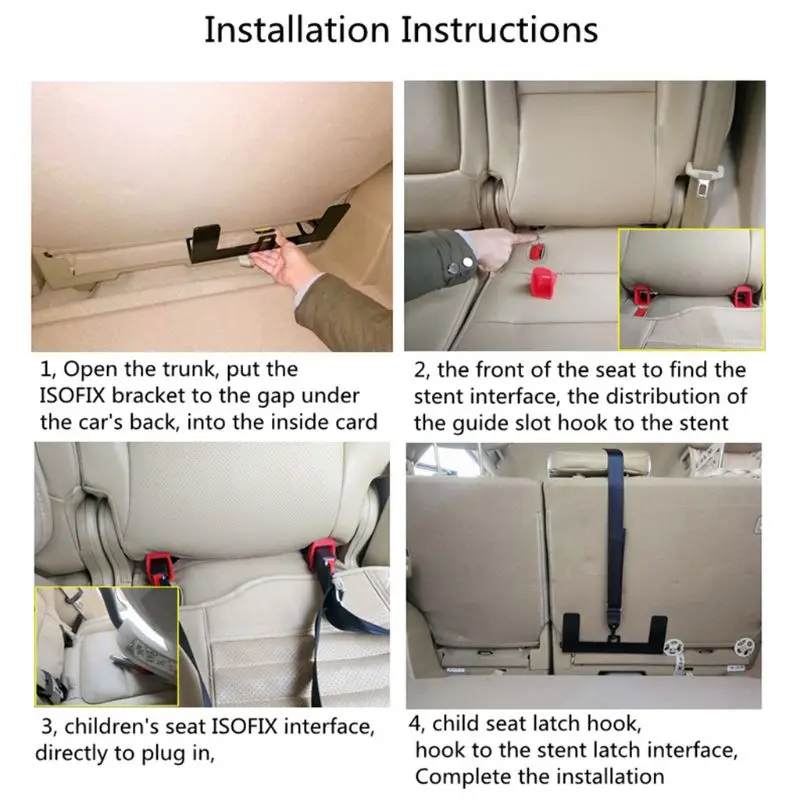 Feel for the brackets with your hand to accurately determine the installation location of the chair; labels with Isofix inscription on the upholstery will help in the search. Latch inscriptions are also suitable - the American fastening standard is compatible with European Isofix chairs. But trying to fix a chair with an Isofix base with a regular belt (for example, in someone else's car where there is no Isofix mount) is absolutely impossible.
Install the Isofix seat in the following order:
- Pull the Isofix anchors out of the seat to the maximum length. This is usually done manually, and a lever is provided in front of the chair to unlock them.
- Align the Isofix locks with the mating brackets in the car seat and push the seat against the seat back until both locks click.
- Re-tighten the Isofix adjustment lever and move the chair close to the seatback so that there is no gap between them.
- Verify by color indication that both Isofix locks are latched - the flags should be green.
- Set up and fix the additional fasteners that the chair is equipped with: a telescopic stop to the floor or the upper "anchor" strap.
Let's dwell on additional fasteners separately. The Isofix design requires one more attachment point, in addition to the two retractable locks. This is either the top "anchor" belt Top Tether, or a telescopic support ("leg") in front of the chair. They reduce the mobility of the seat and insure Isofix locks that are under heavy load in an accident.
The Top Tether is attached to a metal clip on the back of the backrest and hand-tightened to select the excess length. The telescopic support rests against the floor of the machine, fixing its length with a built-in lock. Be sure to use the seat's existing attachments to improve child protection.
Installing a seat belt
Compared to an Isofix seat, which requires appropriate fasteners, a seat belt is more versatile - it can be fixed with a regular seat belt, which is in any modern car.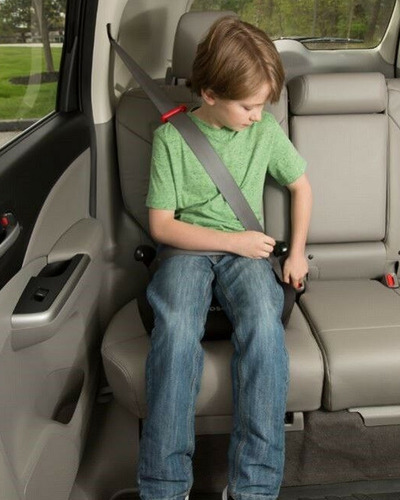 With one important caveat: only a three-point belt, which has an upper diagonal strap. Mounting a child seat using a two-point "airplane" belt, which is found in buses and trucks, is not allowed.
Installing a seat belt is more difficult than Isofix, so carefully read the instructions and seat belt routing diagram. Make sure that the belt lies strictly in the guides provided for by the design of the chair, does not wrinkle or twist - the efficiency of its work depends on this. After passing the belt, tighten it and fix it with clips on the chair body.
Front or back
The baby grows disproportionately: immediately after birth, the baby's head is much larger and heavier than the neck can support. This imbalance persists for about the first 15 months of life, and at this time - while the bones and muscles are actively growing - the child can be transported in the car only with his back forward so that an accidental nod of the head does not injure the neck. To do this, the chairs have the possibility of direct and reverse installation.
With Isofix chairs, everything is extremely simple: just remove them from the base and unfold the bowl, the method of attachment does not change. It is more difficult with seat belts - they have to be deployed completely, changing the way the belt is fixed. Check the instructions to do it right.
Until what age should a child be carried backwards? According to the old ECE rules - up to a year, according to the new ones - up to 15 months, but child safety experts are sure: the longer the better.
Best position for seat
Where is the best place to install a child seat in the cabin? The back row of seats is considered the most successful, and the side is right, closer to the curb (for right-hand traffic): there are no restrictions on the installation of the chair, and getting in and out of the baby will be safer. But the back row also has a minus - the lack of visual contact with the child. This is partly solved by installing a large interior mirror, but sometimes you have to install a chair in the front seat in order to better control the child.
Front seat mounting has a number of limitations. Firstly, there will almost certainly not be Isofix mounts, and you will have to install a seat belt. Secondly, you need to take into account the passenger airbag - it is made for an adult and, if triggered, can cause injury to a child. Therefore, when installing a child seat in front, move the seat all the way back, as far as possible from the cushion.
And to install the seat on the front seat back-first, the airbag must be completely disabled - its operation threatens the baby with serious injuries. In some cars, deactivation of the front passenger airbag is provided - look for the corresponding button in the glove compartment. If there is no such function in the car, you can put the chair backwards only from behind.
Fastening a child in a seat
Up to 3-4 years old, babies are fastened with built-in five-point seat belts, specially designed for preschoolers. But when the weight of the child exceeds 18 kg (age group II and above), you need to switch to regular car belts - only they can withstand the increased body weight. If at the same time a universal chair of groups I and II is used, then it needs to be transformed: remove the built-in belts and groin lining, and start fastening the child with a standard seat belt right on top of the seat.
Adjusting the straps
Children grow up quickly and when using the built-in straps, check the tightness every two weeks - periodically it must be loosened so that the straps do not put pressure on the shoulders. If 2 fingers of an adult pass under the straps in the chest area of the child, then the straps are adjusted correctly.
Check not only the tension but also the height of the belts. Usually, the chair has several holes for shoulder straps - rearrange them in proportion to the height of the child.
Conclusion
The main obstacle to the correct installation of a child seat is haste. Leave the house 15-20 minutes earlier if you are going to manipulate the car seat (installation, checking the belts) - this way you will be in time for your destination without compromising the comfort and safety of the child. As for the initial installation of a new chair, everything is not as difficult as it seems. The instructions for modern child seats contain detailed descriptions with installation examples and typical mistakes. For example, we took the illustrations for this article from the instructions for Carfort child seats - they are detailed, colorful and completely in Russian. Also, tips for the correct installation are printed directly on the seat shells - with careful installation without haste, it is almost impossible to make a mistake in installation. If you are not confident in your abilities, Hyperauto consultants will always help with the correct installation of the purchased chair.
Happy and safe family trips!
5 tips on how to install and secure a child car seat
Protecting your baby from all sorts of troubles and injuries falls entirely on the shoulders of parents, because what can be more precious than the health and safety of your own child? One of the points of such protection is the purchase of a car seat for a child's comfortable trips to shops or on vacation.
If the purchase of such an accessory has already been completed, it remains to figure out how to install and secure a child car seat in order to protect the child as much as possible in an accident. The article will talk about the various options for mounting car seats for all age groups. Following this instruction, you will be able to avoid installation errors and be 100% sure of the reliability of protection.
See also: TOP 10 best car seats for newborns (group 0+)
Installing an accessory based on the age of the child 1-2
A booster seat is a good alternative to a car seat. This compact seat with armrests and backless helps to lift the child to secure it with the car's regular belts. I wonder how to attach a baby booster? Its installation in a car does not differ from the installation of a child seat: with regular belts or with isofix. The booster is suitable for children from 3 to 12 years old. For newborns, this option is unacceptable.
Greater emphasis on safety
Proper installation of the car seat in the car does not guarantee the safety of the child. After all, it is important not only to securely fix the chair, but also to choose the optimal location for it in the cabin.
Many users tend to think that the seat should be behind the driver's seat. This choice is motivated by the lack of inertia in frontal collisions. But what about side impacts?
Experts who specialize in crash tests of safety seats in cars helped resolve this dilemma. According to them, the most suitable place for installation is the center of the rear seat, and here's why:
- during an accident, the child will be protected from broken glass fragments, because it is far from the windows;
- the baby will not be able to open the door, window while driving, which increases his safety;
- in the event of side collisions or deformation of individual parts of the car, the child will remain 100% unharmed.

Pay attention to the straps when installing the child car seat in this position. In no case should they be twisted or show signs of deformation. In order not to spoil the upholstery of the seats, it is better to purchase a protective mat before installation.
How to fix the car seat?
There are only three ways to install this accessory in the cabin:
1. Car seat belts . This option is good for a car without ISOFIX. Its complexity lies in some of the nuances associated with the design of the car seat and transport seats. To avoid errors during installation, you must clearly follow the instructions. In addition, it is worth considering that the chairs of group 0+ and 0+/1 are fastened with straps to the seat, and the child is additionally fixed by the internal straps provided in the chair model (according to the cocoon principle).
In a similar way, the child is fastened in a stroller, which article will help you choose: TOP-10 best baby strollers
2. ISOFIX mount. Provided in copies for babies weighing up to 18 kg. It consists of rigid latches that snap into place according to the lock principle. It connects to the plates placed between the seat and backrest. Such an installation is considered more reliable than belts, but is not without drawbacks. So, with a very strong blow, the lock can unfasten, and the chair can tip over.
3. Latch and Super Latch. This is an improved isofix that has been developed and adopted as a standard in the USA. In this case, the chairs are fixed to the seat not with metal locks, but with special belts. This fastening reduces the vibration of the car seat on uneven roads and increases the level of safety in an accident. One of the advantages of seats with this system is light weight (1.5-2 kg less) and compatibility with any car with isofix.
Each mounting option has its own characteristics, pros and cons, which means that it is not entirely correct to navigate when choosing a car seat only at this moment. It is also worth considering the comfort of the fit, the height of the seat, additional elements of protection.
If you are looking for recreational vehicles for older children, read an interesting article: How to choose a children's bike?
Car seat installation steps
As mentioned above, the installation process of the car seat depends on the type of attachment it is equipped with.
If this is a standard version with straps, then the installation takes place in several stages:
- first you need to move the front seat so as not to interfere with movement;
- position the car seat in the chosen place in the passenger compartment;
- Pull the seat belt through all the grooves provided in the seat;
- check the structure for looseness and play;
- seat the child, fixing him, as for a trip;
- look at the location of the straps (should not push, sag, be in the neck or too low).
If both the vehicle and car seat are equipped with an isofix attachment, it is sufficient to connect the locks and click them into place.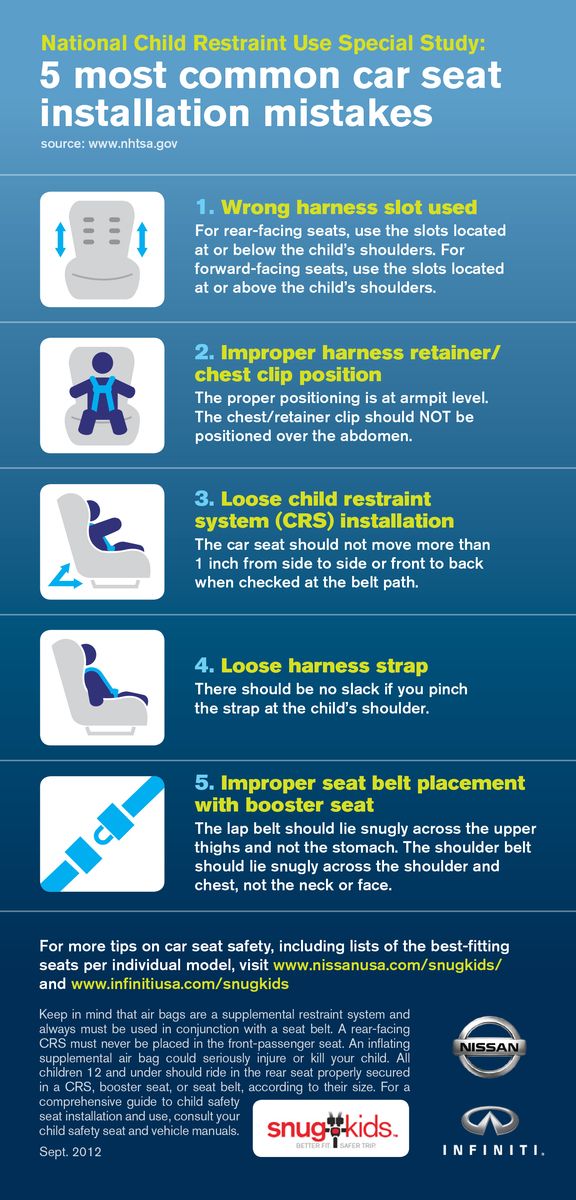 Armchairs with a base are installed in the same way. Is there a base included? It can be purchased separately. An example of a base for the BeSafeIZI GO X1 ISOFIX car seat.
Child Seat Regulations
Long trips can quickly bore a little fidget. In this case, he will unfasten his belts, dodge, jump or pull the chair. To avoid such situations, it is necessary to stock up on interesting toys and ensure the correct fit on the seat.
The latter can be achieved by following a few simple rules:
- The distance between the fixing straps and the body is at least 2 fingers. This will provide the child with comfort during movement and minimize the jerk on impact.
- Adjust the height of the headrest and padding so that the protection is as close as possible to the shoulders of the small passenger.
- If your chair has a footrest or a table, these items must be used.
Before placing the child directly in the seat, check each time that the seat is secure.


