How to help child wipe bottom
Teach Kids How to Wipe
Once your child is potty trained, teaching him or her how to wipe is the next step. Here are several things to keep in mind when you teach kids how to wipe, plus a simple activity you can do in the kitchen to help them practice wiping.
Teaching Kids How to Wipe
Teaching someone how to wipe their bottom is one of those things you never really think about until you become a potty-training parent. And then it becomes something you’ll think about often.
Whether you’re working with a potty training toddler or have an 8-year-old with an “itchy” bum, these tips will help you teach your child the proper way to wipe.
Use the right materials.
Kandoo Flushable Cleansing Wipes clean up to 30% better than toilet paper. The wipes pop up with the push of a button, making them perfect for little hands.
Added bonus? No more using too much (or too little) toilet paper. They’re also biodegradable and safe for sewer and septic systems.
Learning to wipe with Kandoo Flushable Cleansing Wipes can help your child get cleaner and become potty independent faster. Click here to download a coupon.
Go in the right direction.
Teach your daughters to always wipe from front to back. This is an important step that needs to be reinforced throughout the potty training process.
Demonstrate the proper technique.
Show your child how to hold the wipe flat in their hand (not wadded into a ball). And then walk them through the process of wipe, fold, wipe, fold, wipe until they don’t see anything on the wipe anymore. That’s how they’ll know they’re finished and ready to flush.
Practice makes perfect.
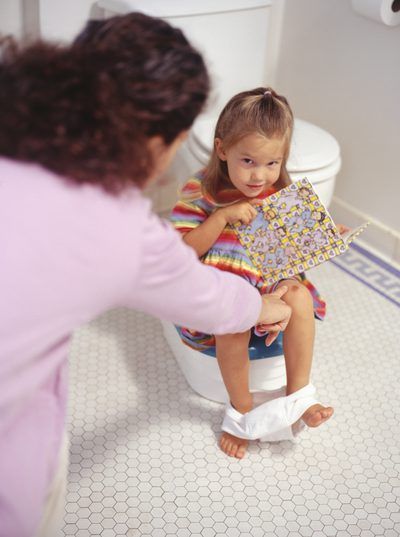
Every time your child uses the potty, have him try to wipe himself first. And then you can go in behind him to finish up. Giving him the chance to try every time he goes is a great way to practice.
Keep checking.
Even after your child has the confidence to wipe themselves, do a check here and there and reinforce any strategies or techniques as needed.
Practice Wiping in the Kitchen
If your child is a hands-on learner, this wiping activity will be right up their alley. It’s a little gross, but it’s a great demonstration that will have your little one wiping independently in no time.
1. Smear some peanut butter on a plate and gather your Kandoo wipes.
2. Have your child start with a Kandoo Flushable Wipe flat in their hand (not wadded up.) If they’re more comfortable, they can fold it over one time.
3. Instruct your child to wipe the peanut butter off the plate. After every wipe, tell them to check their wipe. If they see peanut butter, then they need to fold the wipe in half and wipe again.
4. Expect some giggles.
5. Have them repeat step 3 until all of the peanut butter is wiped from the plate.
6. Repeat this process as many times as necessary for your child to really get the hang of wiping independently.
Potty Training Doesn’t Have to Stink!
If you’re potty training your child, Kandoo is here to help. Follow the three steps below to receive all of the potty training support we have to offer.
1. Get Potty Training Resources
Visit Kandookids.com/PottyTraining for hacks and support on your potty training journey. From the very basics to how to handle potty training regressions, poop problems and wiping, we’ve got answers to your questions.
2. Sign up for our Potty Training Program
Need a little more help and support? Sign up for our FREE potty program. It’s full of step-by-step advice to walk you through the entire potty training process – from the first time you introduce the potty to how to throw a potty training party to celebrate your success at the end.
Sign up, and you’ll receive the most effective hacks on potty training including a step-by-step plan of action on when to start, supplies to buy, how to keep it silly, how to handle set backs and more! Click here to join now.
3. Stock up on Supplies – like Kandoo Flushable Wipes
Kandoo Flushable Cleansing Wipes clean up to 30% better than toilet paper. The wipes pop up with the push of a button, making them perfect for little hands. Added bonus? No more using too much (or too little) toilet paper.
Help your little one get a clean wipe every time with the Kandoo Potty Time Pack. From Kandoo Flushable Wipes to Kandoo BRIGHTFOAM® Hand soap – and even a potty training superhero cape – the Potty Time Pack has everything you need for potty training success.
If your child likes to be independent, the Kandoo Potty Time Pack can help. Click here to purchase it now with free shipping!
Pin It!
Read Next
How to Throw a Potty Training Party
Read Now >
Get one step closer to having independent kids
Sign up for exclusive tips & savings
This website uses cookies to improve your experience. Learn more or disable cookies.
Teaching children how to wipe| Andrex®
Previous Next
Content reviewed and approved by Amanda Jenner, the longest established and most experienced Toilet Training Expert in the UK today, and founder of the Potty Training Academy.
By the time your child has wowed you with their potty using prowess, you’ll find one more important step on this toilet training journey together – wiping.
Help your child learn how to keep themselves clean and fresh by teaching them to wipe their bottom once they’ve finished using the toilet or potty.
Because your little ones can’t see back there, for now it’s up to you to check they’re all clean. But by teaching them the right way to wipe their own bum, you can both be confident that they feel and are clean after wiping.
Some children might take longer to develop motor skills before they can wipe their bottom properly, but it’s only natural. What’s important is that you’re there to help boost their confidence while they work on it – and that you can help with wiping when needed.
This article covers:
When to start wiping training
Teaching your child to wipe their bottom properly
Wiping tips and tricks
When to start wiping training
If your child started potty training early in life, then they’ll be ready to begin wiping sooner.
One clear sign your child might be ready to start wiping themselves is when they tell you they’re finished. Knowing they’re done and ready to hop off the potty is a huge step. It means you can make your visits shorter and there’s less risk of using more toilet tissue than necessary in case your child wasn’t quite finished after all.
Even if your child isn’t ready to wipe their bottom yet, start wiping training from the time they first take to the potty. You may tend to wipe after a wee for both your little girl and boy – but feeling clean after a wee is a doddle compared to wiping clean after a poo.
Talk through what you’re doing as you wipe, so they start to associate wiping with that clean feeling. This way they’ll know the value of a proper clean - even before they try to do it themselves
Teaching your child to wipe their bottom properly
Teaching your child how to use toilet paper properly is an important step. Here’s how you can encourage them to do so and move towards toilet independence.
Unroll, tear and fold the paper
Check the toilet paper dispenser is within reach, or just encourage them to grab a loose roll that’s placed nearby. Show them how it tears easily and how to fold it.
Lay it flat
Get your child to practise laying the folded paper flat in the palm of their hand. Avoid scrunching – the idea is to cover as much of their bottom as possible and minimise the chances of getting poo on their hands.
Reach for the bottom
Make sure your child applies the paper to the correct area. This can be the tricky part, putting your child’s co-ordination and fine motor skills to the test.
Amanda’s Advice: Not all kids can reach their bums. This is not uncommon so don't worry. Continue to try and guide them until they can reach. This can be the case until they are at least six years old - it can take time
Wipe from front to back
An especially important step for girls, make sure your child knows it’s more hygienic to wipe from front to back.
The clean test
Check the paper to see if it’s clean and drop into the toilet.
Keep wiping until clean
Repeat the above until the paper looks clean.
Flush the toilet
Help your child achieve a sense of accomplishment by flushing away their poo.
Wash your hands
Always an important step, make sure it’s part of the ritual.
Boys and girls should both wipe from front to back. It’s the most hygienic option and provides a more effective clean. But it’s especially important that girls are aware they need to wipe from front to back. Poo contains bacteria that can cause urinary tract infections if it’s wiped into the urethra.
Wiping tips and tricks
Teaching your children how to wipe is straightforward, but mastering it takes time – especially while they’re still fine-tuning their coordination skills. Be patient and encouraging when they’re learning. Stress the importance of getting that clean feeling and your little one will see (and feel) the benefit.
There’s no need to get into the fine details at this stage, but take what your child knows about the importance of keeping away nasty germs through handwashing and baths and apply it further to having a clean bum. Context is everything – otherwise you risk the process of properly wiping becoming a chore, and they may resist doing it properly.
How much toilet paper should a child use? You might not know how much exactly is needed when a child wipes themselves clean, but you can show them it’s important not to waste it. One idea is to put a marker on the bathroom wall – if your little one unrolls the toilet paper past this point before tearing it off, make it clear that’s a waste.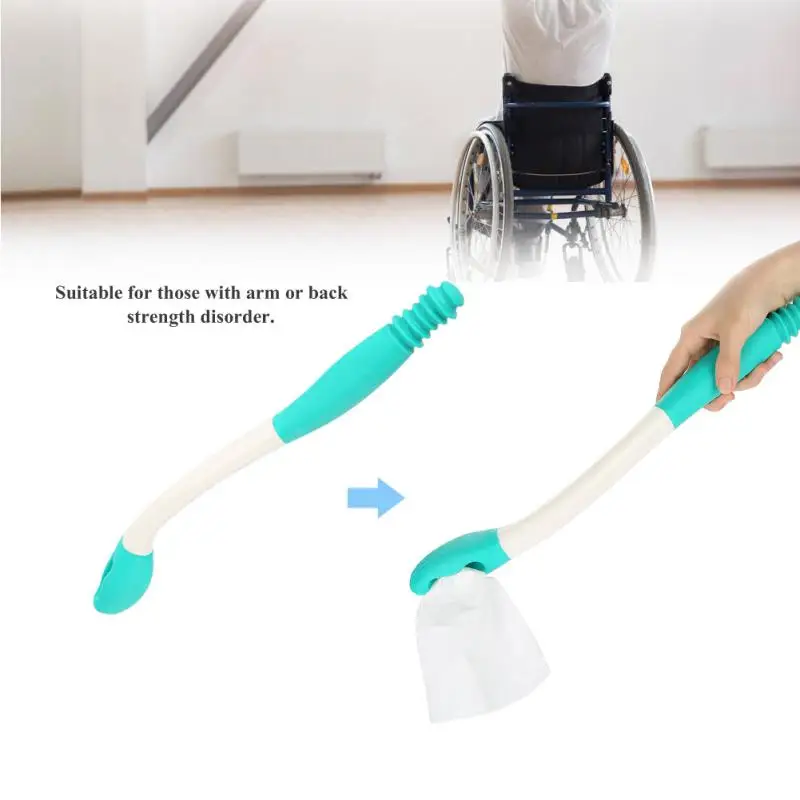
While getting little ones familiar with using toilet paper to clean their bums after a poo is important, you could encourage them to finish with a flushable wipe . That way you can both be confident of a more thorough clean. However, your child should understand that there might not always be the option to use a flushable wipe – if you’ve run out at home or are using different facilities. Achieving the same clean feel with toilet paper is just as important.
All finished?Getting your child to wipe themselves properly is not an overnight job. You’ll need to be on hand for a while to ensure they can do it themselves. When your child has finished wiping, encourage them to check with you that you’re happy with it.
You can either finish wiping with careful verbal feedback or congratulate them on a job well done. What’s important is that they’re aware of expectations – and you manage your own through coaching and support.
Teaching children how to wipe once they’re finished on the potty or toilet is a rewarding challenge – just like getting them on there in the first place was. Take heart that your child is showing the confidence to take care of such an important job and help them develop the skills they need to do so.
Previous Next
How to teach a child to swim - Lifehacker
July 17LikbezAdvice
Lifehacker has collected instructions for different ages.
Share
0How to teach a child to swim up to 3 years old
Water procedures with a baby are undoubtedly useful, and you can teach them from a very early age. However, they do not involve independent movement, which means they have nothing to do with swimming.
In addition, such exercises reinforce incorrect movements and body position. As a result, when later the child will master full-fledged swimming, he will have to be retrained for a long time.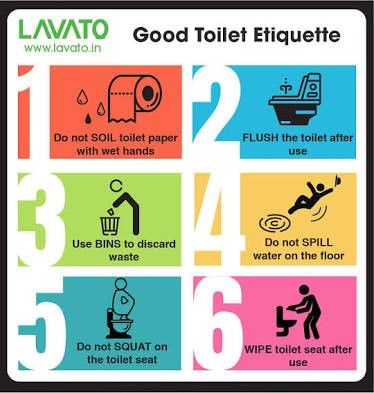 To lay the foundation for a young swimmer, you need to introduce him to the water element gradually and exclusively in a playful way.
The main task of parents at this stage is to help the child overcome the fear of big water. Ideally, you can try to teach him to immerse his face in water. Then the skills will come in handy for proper breathing. To do this, do the following:
- Engage with your child and toys in a shallow pool of warm, clear water.
- Splash each other. Do not be afraid to get water on your face and reassure the child so that he is not afraid of this.
- Blow bubbles together as you dip your face into the water. First with the mouth and then with the nose.
- Ask your child to squat down while dipping into the water and immediately jump up.
How to teach a child to swim from 3 to 5 years
Children at this age can already be taught to swim freely without any style, if you show restraint. Preschoolers are not able to concentrate for a long time and follow instructions, do things that are unusual for them, so learning should take place in a playful manner.
1. Choose the right place
The best way to teach your child to swim is in a pool or large tub like a jacuzzi. The sea is much less suitable due to salty water and waves that interfere. A river or lake is also not ideal: the water in them is opaque and cold, so it will be difficult for a young athlete psychologically.
Depth - waist-deep or slightly above to make the swimmer feel safe. The water temperature is preferably higher - 25–28 ° С. At the same time, until the child gets used to swimming goggles, moisture should not cause burning of the eyes if you open them at a depth.
2. Remove armlets and vest
Discard any equipment designed to keep you afloat. Circles, boards and other devices disrupt the balance of the body and prevent the baby from learning to float on their own.
When using a vest or sleeves, the child is pressed into the supports and raises his head high, straining his neck. You can really learn to swim only by diving under water, so it is important to immediately remove all watercraft.
3. Accustom your child to glasses
Like all the following steps, this one should be performed exclusively in a playful way, and even better, showing by personal example. Most likely, there will be no problems with five-year-olds, but younger children can be capricious.
Try on glasses for a child and note how they suit him. Constantly praise and admire him, even if you managed only to put the protection to his face and not put the elastic on the back of his head. Click on the glasses and show what a funny grunting sound they make, and offer to try it yourself. If the glasses are not fixed on the face, say "The eye is peeled off."
If the baby is afraid and does not want to wear the accessory, be friendly, do not push and be patient. Switch to fussing with toys and try again a little later. Little by little, after 5-10 fittings, he will give in, especially when he realizes how well he can see underwater with glasses.
4. Get used to the water
Before learning, the child needs to loosen up and stop being afraid of water.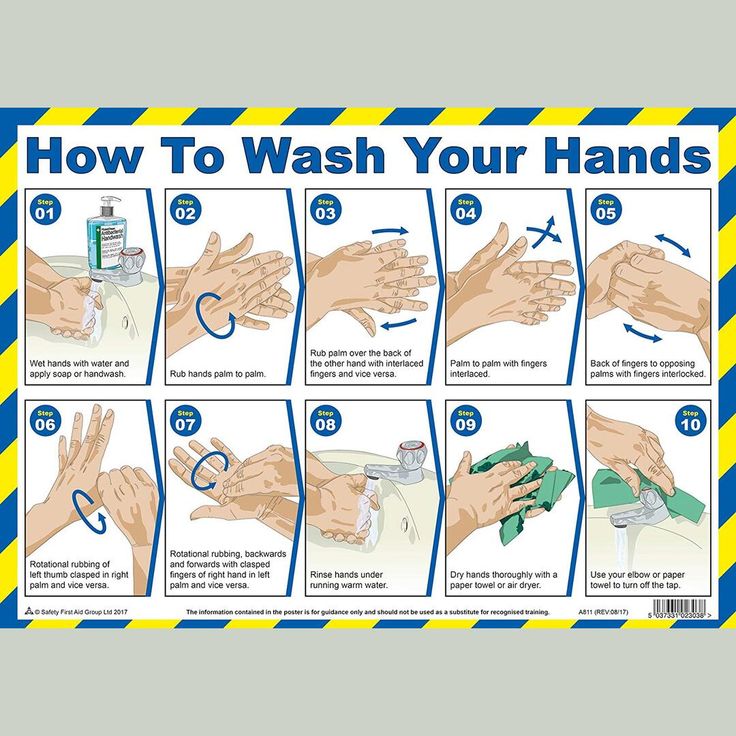 To do this, fool around a bit with him.
- Splash in shallow water, splashing with hands and feet.
- Hold hands and, dipping your face into the water, blow bubbles with your mouth and nose.
- Show each other tongues and make faces underwater.
5. Practice putting your face in the water
Learning to swim is all about putting your face in the water. It's not natural for a child, so you can't just tell him, "Do it like this." And this is where games come in.
- First spray so that the moisture gets on the trainee's face. You can water it little by little, showing that it is not scary and fun.
- Squat and jump at different depths so that when diving, the water reaches the child's lips, then to the eyes, and so gradually ask him to plunge for a second with his head. There is no need to close your eyes.
- Scatter the toys at a shallow depth so that they cannot be reached by hand without dipping head first and ask for a rescue or treasure hunt.

- When the child takes a sip of water and coughs, react calmly and cheerfully, making it clear that nothing bad has happened. Ask to exhale sharply through the nose, as if blowing your nose, and the remaining water will easily leave the nasopharynx, and with them the discomfort.
6. Learn to exhale into the water
The next step is to master the exhalation into the water. It is used in all strokes and is key to proper swimming technique. In part, the child is already familiar with this technique, blowing bubbles is exhalation.
- Continue to reinforce the skill by blowing bubbles at the edge of the pool. The preschooler must certainly do this with his nose, since the mouth is inhaled.
- The jumps and squats from the previous step will also help. Add to them exhalations into the water at the moment of immersion.
- For proper exhalation, ask the child to take a breath, cover his mouth with his hand and make a long “mmmm” sound with his nose.
7. Practice staying afloat
There are simple exercises for this - "jellyfish" and "asterisk", which are very popular with children. Their essence lies in hanging in the water while holding the breath and relaxing the neck.
How to do the jellyfish exercise
- Have your baby lie down on the water and lightly support him under the chest. The whole body and, most importantly, the neck are in a relaxed state, reminiscent of a jellyfish. You need to look at the bottom, not in front of you.
- To get your child to do this, come up with a treasure hunt game or something like that.
How to do the star exercise
- Place the young swimmer on the water and support under the chest with your hands. Ask him to spread his arms and legs, depicting a star.
- As in the previous exercise, lower your face into the water and relax your neck. Use to motivate the game.
- Another option that can be done for variety is the "asterisk" on the back.
8. Try sliding in the water
Now it's time to start moving. For this, there is a special “arrow” exercise, which is the basic pose in many swimming styles.
- Support the child under the chest and ask him to raise his arms above his head, and then lie down gently on the water, straightening his body and relaxing his neck.
- Once you have mastered this move, have the swimmer try all of the above on their own. Step back a couple of meters from the edge of the pool and tell them to push off with their feet from the side and move towards you.
9. Practice the leg movements
There are two options here: the freestyle movement, when the legs alternately move up and down, or breaststroke style - the legs are bent at the knees and the swimmer pushes off the water in the manner of a frog.
For children of this age, both options are correct. And it’s easy to understand which one is more suitable for a child if you ask him to swim a short distance and check which movements he will make intuitively - swings or pushes.
The essence of the exercise is to make an “arrow” and, when sliding, include the legs in the work. Both options, if possible, are best performed in the correct technique. See how it's done and demonstrate to your child on land or in shallow water.
- Crawl: legs almost do not bend at the knees, but move from the hip, the feet are maximally extended back. The movements are more like working scissors than riding a bicycle.
- Breaststroke: the legs are bent at the knees and slightly pulled towards you, the feet are pressed forward. Then they are bred to the sides and there is a sharp push.
10. Connect your hands
The easiest breaststroke for a small child is when the strokes are made with both hands at the same time.
However, it is not necessary to demand from the swimmer their impeccable performance. If it is too difficult for him, dog-like movements are allowed, when the strokes are made alternately and the hands, as it were, cling to the water.
The principle is the same. The movement starts from the “arrow” position, then the arms and legs are included in the work.
11. Teach your child to breathe
All the previous exercises are done while holding the breath, but you won't swim that far. Therefore, when the child has mastered the basic movements, you need to teach him to raise his head and inhale and not stop at the same time.
This should only be done through the mouth, because when breathing through the nose, drops of water can enter the nasopharynx and cause discomfort. Improve your breathing skills with fish games.
- "Thoughtful fish" - at a depth where the child does not reach the bottom, ask to push off from the side and slowly swim towards you, lowering your face into the water.
- “Curious fish” - have the child complete the previous exercise, and then, at your command, simply raise his head without inhaling. At this point, he must help himself by pushing off the water with his feet.
- “Amazing fish” — this time the baby needs to do the same, only when raising his head, quickly inhale the air through his mouth. You can first practice a sharp breath when emerging in a shallower part of the pool, where the water is up to the chest.
How to teach a child aged 5-6 years and older to swim
Older children perceive the learning process more effectively. They consciously complete tasks and practice exercises, so at this age you can teach a child to swim like an adult.
This is done according to the standard algorithm, which is described in detail in our article, or using express methods. For example, the system of trainer Denis Tarakanov allows you to learn how to swim in one or two lessons. Just ask your child to do the following exercises in order. Each about 10 times.
1. On the steps by the pool or in the children's pool, where the depth is 30-40 cm, ask the child to put his hands on the bottom and stretch to his full height. The whole body is submerged, only the head is above the water, the neck is relaxed. The swimmer should hold his breath and lie like this for 5-10 seconds, and then gently raise his face, inhale through his mouth and repeat the exercise.
2. Let the child do the same, but lower his face into the water and raise one of his hands, relying only on the second.
Shot: Denis Tarakanov / YouTube3. Repeat the learned move again, but now explain to the swimmer that he must remove both hands and hang like this in the water, counting to five to himself.
Shot: Denis Tarakanov / YouTube4. Ask the child to extend his arms in front of him at the moment of hovering and stay in this position for 5-10 seconds while holding his breath. After that, let him rest his hands on the bottom, raise his head to inhale through his mouth and repeat the exercise.
Shot: Denis Tarakanov / YouTube 5. Let the kid move away from the edge of the pool by 50–70 cm and, turning to face him, perform a new variation of the exercise. After inhaling, you need to gently push off from the bottom and slide with your arms outstretched forward, without lifting your face from the water.
6. Connect the legs: after the push, the child should gently dangle his legs without pulling his feet out of the water.
Shot: Denis Tarakanov / YouTube7. Now the hands are included in the work: let the young athlete row them like a dog or breaststroke. The main thing is to move them under water at the level of the face, but not under the stomach.
Shot: Denis Tarakanov / YouTube8. Ask the child to repeat the previous exercise, but while moving, gently raise his head above the water for a couple of seconds. It is not necessary to inhale, just fix the action to understand that it is not difficult.
Shot: Denis Tarakanov / YouTube 9. Finally, let the child push off and swim, moving his legs and arms, and then try to raise his head above the water and breathe in through his mouth.
For details on how to perform each exercise correctly, see the video:
Read also 👦🎒🏀
- 0018
- How to travel with your child without going crazy
- How to teach your child to ride a bike
- How to teach a child to roller skate
- How to learn the multiplication table quickly and easily
How to erase memories or forget unnecessary information
October 5, 2016Life
In the movie Eternal Sunshine of the Spotless Mind, lovers erased their memories of each other after a breakup. What once looked like science fiction is now a reality: we can actually erase our memories whenever we want.
Share
01. What are memories made of?
Memory is not a one-dimensional thought or idea. This is the sum of impressions from specific events in your past. You remember not a point in time, but many sensory details.
For example, if you try to remember a pleasant day on the beach as a child, more than just a picture of a river will come to mind. You will remember how warm the sand was, the smell of the wind and the taste of ice cream bought at the kiosk across the street.
Any of these sensations can become a trigger. When you buy a sundae, similar in taste to the one from childhood, you will be transported again to a hot day on a river beach.
Thus memories are inseparable from context.
2. How to manage memories?
Context is the most important factor for anyone who wants to learn how to manage their memories. After all, with its help you can fix the memory. The wider and brighter the context, the stronger we remember the event.
Let's go back to the memory of a hot day at the beach. It is desirable that you remember the details, the setting, the emotions and feelings. Then the context will be formed.
If you remember the light flow of river water, the warm sand of the coast, the hot asphalt of the path next to your umbrella and the creamy taste of ice cream, the memory of this day will remain very bright and complete for many years to come. The wider the context, the more varied the experience. It is he who we resurrect in memory when we recall a hot day spent in childhood.
So if we know how to use context to create a memory, can we find a way to erase our memory?
3. How can memories be erased?
The strategy of forgetting can be this: allow yourself to forget certain details of the event in order to destroy the memory completely.
To test this assumption, scientists conducted a study in which two groups of people took part. They had to learn words from two separate lists and look at photos of different landscapes at the same time to create context for the memory.
One group was told to approach the task very carefully: memorize the first list of words and only then move on to the second. The subjects from the second group were asked to first learn the words and then forget them. Then the volunteers had to repeat what they remembered.
The participants' brain activity was studied using functional MRI. It turned out that the subjects who forgot the learned words had a much lower level of activity in the part of the brain that is responsible for image processing. This group of participants simply let the words and images slip out of their memory.
When the brain tries to remember words, facts, images, it is constantly working to create context. When the brain tries to forget something, it initially rejects the context and abstracts from it. Therefore, a memory is created with difficulty and does not last long.
If we return to the example of the beach, we can say this: to forget this day, you should try to forget the taste of ice cream and hot sand under your feet.
4. Is it possible to delete a memory completely?
Does this method always work 100%? Of course not.