How many stitches to cast on for child hat
How many stitches to cast on for a hat
To be able to determine how many stitches you need to cast on for your hat you need to first know your gauge and the desired circumference of your hat. First I’ll explain how to figure out those numbers and in the last chapter, I’ll give you the formula for the stitch count.
If you are not into math you can also knit your hats top-down and figure out the stitch count as you go. Here you can find a free top-down hat pattern.
How do I know the desired circumference of the hat?
Measure your head or use a size chart
If you are knitting the hat for yourself measure your head around the widest part above your ears and over your hair. Make sure the tape measure is snug.
If you are not able to measure the circumference (for instance because you are going to gift the hat) you can use this hat size chart to estimate the measurements based on age and gender.
Calculate the dimensions of your hat
Now that you know the measurements of the head the hat is going to be knitted for you can calculate the dimensions of your hat. Plain stockinette or ribbed hats should be worn with a little bit of negative ease meaning that the circumference of your hat should be smaller than the circumference of your head otherwise the hat will be sloppy. The rule of thumb here is that the hat should have approximately 10% of negative ease. You get this number by multiplying the circumference of your head with 0.9.
For instance, if the circumference of my head is 22″ (56 cm) the circumference of the had should be approximately 19.8″ (50.5 cm).
How do I know my gauge then?
What is gauge in knitting
In knitting, gauge means simply how wide one stitch is. The wider one stitch is, the less you need them to produce a piece of fabric that is for instance 4″ (10 cm) wide. Because it’s tough to measure the width of one stitch accurately, gauge is usually reported in stitches per 4″ / 10 cm or stitches per 1″.
Let’s take an example. If your gauge is 32 sts / 4″ (10 cm) the width of one stitch is 0.125″ (0. 313 cm) and you need 32 stitches to produce a piece of fabric that is 4″ wide. If the stitch is narrower, let’s say 0.1″ then you need 40 stitches to produce a piece of fabric that is 4″ wide.
Did you know that it’s very likely that your gauge with certain needles changes over time
Did you know that it’s very likely that your gauge with certain needles changes over time as your technique develops? Usually, beginners tend to be tight knitters so they need bigger needles than the average knitter and when time goes by and they become more confident their stitches get looser and they need smaller needles to get the same gauge.
Also, the material (plastic, wooden, metal, etc.) and the type of the needles (circular, dpns etc.), as well as the yarn (material, yardage, plies), have an effect on the gauge.
How do I measure my gauge?
The only way to know your gauge is to swatch which many people don’t like because the swatches end up being useless (unless you knit hats top-down).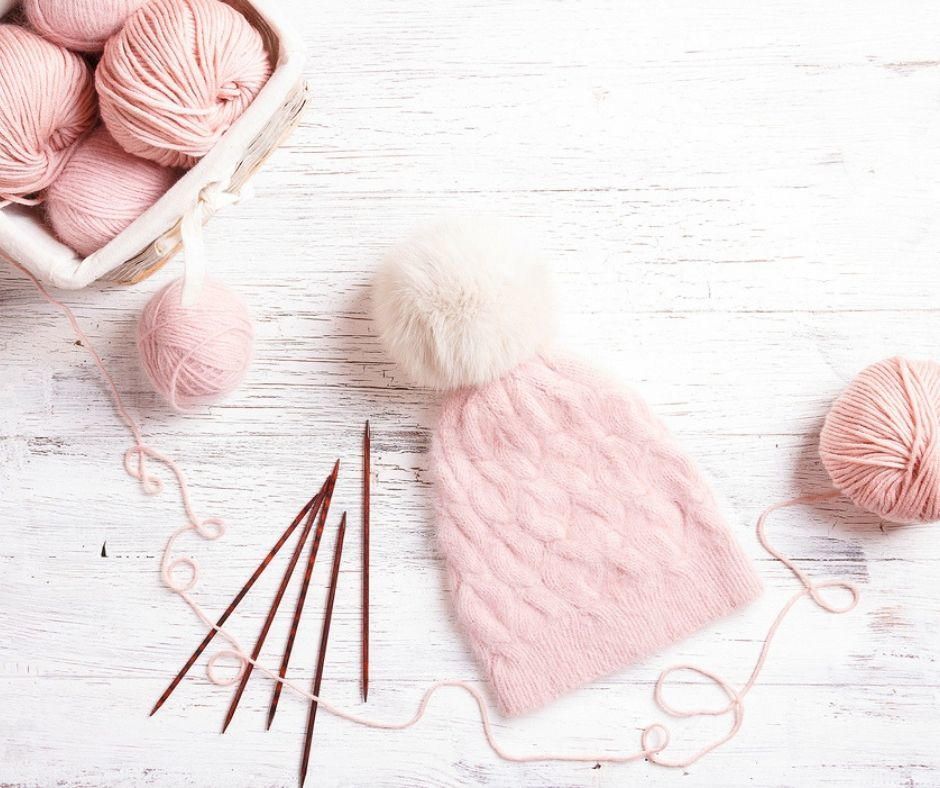 But getting your gauge right is super important if you want a hat that fits well. To get a reliable measurement knit the swatch in the round and make it big enough.
Let’s take an example. I want to knit a hat with a circumference of approximately 22″ (56 cm). I usually knit a DK-weight basic hat with US 2.5 (3 mm) needles and I get gauge 23 sts / 4″ (10cm). With the previous numbers, I need a total of 22″ / 4″ * 23 = 126 sts for my hat. However, a quick look at Ravelry reveals that quite many people get gauge 21 sts / 4″ (10cm) with that needle size, and to produce a similar hat they would need 22″ / 4″ * 21 = 116 sts.
Now, if I went to Facebook and asked a person with that much looser gauge how many stitches should I cast on, the circumference of my hat would end up being 116 (her stitch count) / 23 (my gauge) * 4″ = 20.2″ which is 1.8″ (4.5 cm) more than I wanted to. That is quite much.
The formula for getting the correct stitch count
Now that you know your gauge and the desired circumference of your hat, you can make the calculations and determine the number of stitches you need to cast on.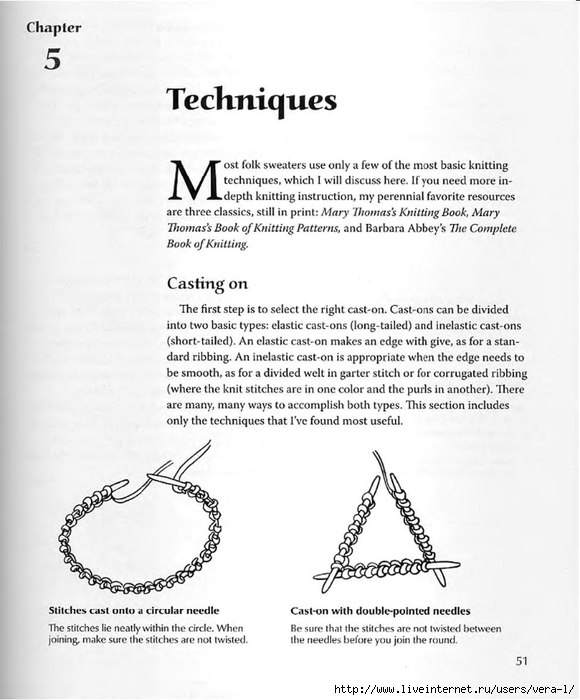
If you have measured your gauge in stitches per 4″ use the formula below:
The circumference of your hat / 4 * (stitches per 4″) = total stitch count
For instance, my gauge is 23 stitches / 4″ and I want the circumference of my hat to be 22″ the calculation will be:
22 / 4 * 23 = 126 stitches (round up or down to next even number)
Or if you prefer centimeters (22″ = 56cm) and you have measured your gauge in stitches / 10 cm the formula looks like this:
The circumference of your hat / 10 * (stitches per 10 cm) = total stitch count
How to Resize a Hat Knitting Pattern Up or Down
Once you are confident with knitting patterns, you may want to resize a project. For example, you may want to size an adult hat knitting pattern down to a child's size or make a hat that's written for a baby for an older child.
The good news is that most hat knitting patterns are relatively easy to resize. The only trick comes with intricate pattern stitches, cables, or colorwork that you might have to adjust to make the hat look right.
Basic Hat Pattern Resizing Steps
The same concepts hold no matter what kind of pattern the design uses:
- Figure out the size you want.
- Knit a gauge swatch.
- Multiply the stitches per inch by the inches required to get an approximate cast on number.
- Refine as needed to fit with the stitch pattern and the decrease pattern, or change the rate of decrease as needed.
- Decide how long you want your hat to be.
- Knit and enjoy your new hat.
It's easier with simple patterns where the math isn't complicated.
Gauge Math
Your gauge is the number of stitches per inch you knit with your combination of needles and yarn. Multiply your gauge by the number of inches needed to get the number of stitches to cast on. Gauge x Inches = Stitches Needed
Sizing Down
First, take a look at an easy hat pattern and try to make it smaller. A good pattern to start with as an example is the scarf hat, a simple stockinette stitch hat with a garter stitch edge.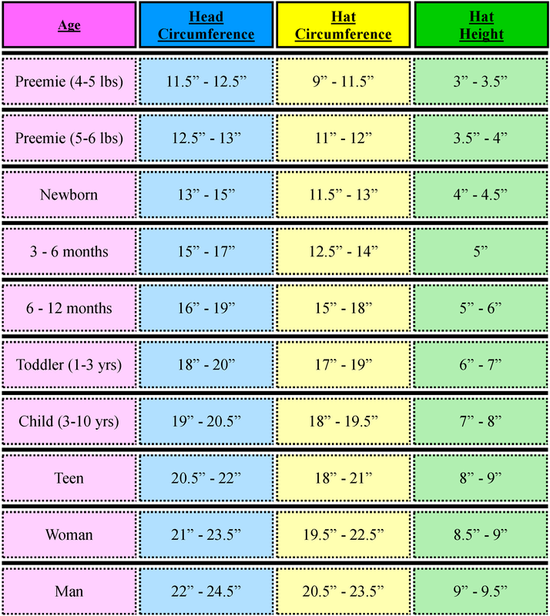
This hat is intended to fit a teen or small woman, but what if you wanted to make one for a five-year-old child?
Sizing hats can be a bit tricky because everyone's head is a different size and grows at a different rate. You can use the charts at Bev's Country Cottage as a general guideline if you don't have the person you're knitting for nearby to measure.
The chart tells us that a five-year-old should have a head that's between 19 and 20 1/2 inches. Since that age group is four to 10, somewhere closer to 19 inches would probably work. Because hats are stretchy, you can knit one that's 1 1/2 inches smaller than the actual head circumference and it will still fit just fine.
The chart also suggests the hat should be 8 1/2 inches deep. On this particular hat, you could go shorter than that because the scarf serves as earflaps (the teen sized hat is only 7 1/2 inches, for example).
Now that you have your measurements, you should knit a gauge swatch to see how many stitches per inch you're getting with your chosen yarn and needles.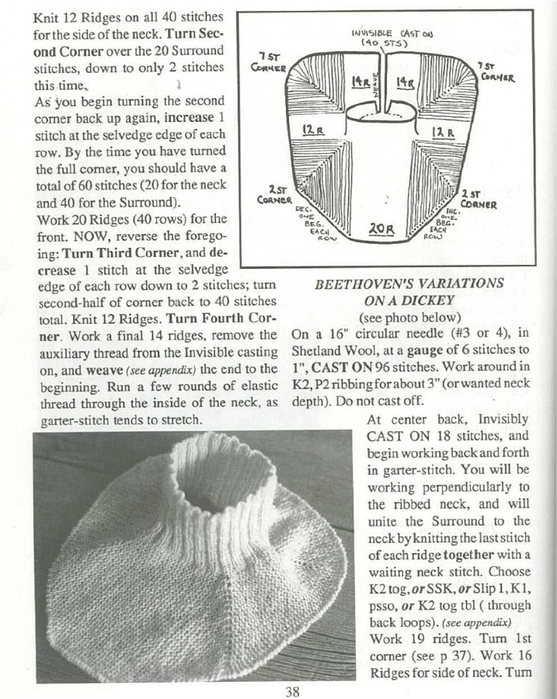 Because you're basically rewriting the pattern, you can choose a yarn that gives you a different gauge and then adjust your math accordingly.
For the sake of ease, though, let's assume you have five stitches in 1 inch, just like the pattern suggests. If you want to knit a hat that's 19 inches around, you will cast on 5 stitches per inch times 19 inches, for a total of 95 stitches.
Does that number work for the rest of the pattern? Given that this hat is made of garter and stockinette stitches, it does. That's because neither of those stitch patterns relies on a certain multiple of stitches.
The number also works with how the decreases are written. Decreases on the original pattern start with a knit three, knit two together round, which requires multiples of five to come out evenly. Since 95 divides evenly by five, this pattern will work with no changes other than to the number of stitches cast on and the length of the hat. You might have to add or subtract a couple of stitches to make a different pattern work.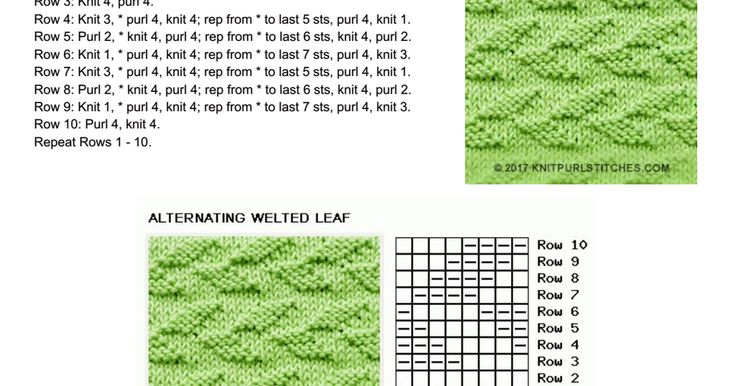
Sizing Up
Working in the other direction uses pretty much the same method. This time look at the seed stitch baby hat and assume you want to knit it for a one-year-old child.
Going back to the sizing chart, the circumference of a toddler's head can range from 18 to 20 inches. The finished hat can be 17 inches to allow it to stretch to fit. The chart also suggests 8 inches for the length.
You would knit a gauge swatch. Using the example of five stitches per inch, you would multiply five stitches per inch by 17 inches to get 85 stitches needed.
For both the ribbing and the seed stitch used in this pattern, we need a number of stitches that divides by two, which 85 does not. You can either go up or down a stitch, though, and you'll be fine. Try 84 stitches.
Looking at the shaping, in the first round the decreases show a wide variety of decreasing options. You might want to get out your calculator and see what 84 divides evenly into. The answer is four, so the easiest thing to do would be to skip that first round of decreases and start with a round of work two, work two together (which takes up four stitches each time).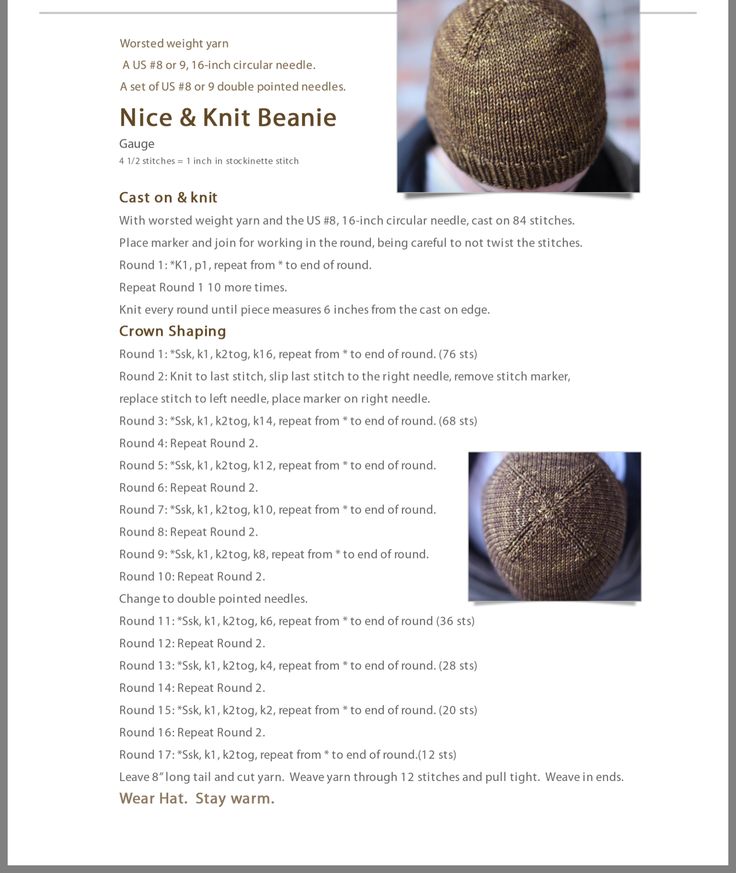 It won't make a huge difference in the finished hat.
How many loops to cast on a hat - the secrets of calculating the width and height
Every knitter knows that the main task is not to make a mistake with a set of loops. After all, any thing you like, knitted with your own hands, will only become unique when it sits perfectly. This applies to all types of knitwear - from socks to hats.
However, it often happens that both the threads and the knitting needles are matched, everything seems to be done correctly, and the knitted hat turns out to be either too big or too tight for the head. And what a pity! Everything has to start over.
To prevent this from happening, on the eve of work, you need to calculate how many loops to cast on the hat.
Contents
- Taking measurements
- Knitting a sample and a little trick for correct calculation.
- My secret, how much to recruit loops
- The calculation of the elastic band
- Height
- Table will help
- Why do you need
We remove the measurements
9000 9000, having made how to calculate the loops for knitting the cap, you can connect it ( male, female, children's), a pattern that fell in love.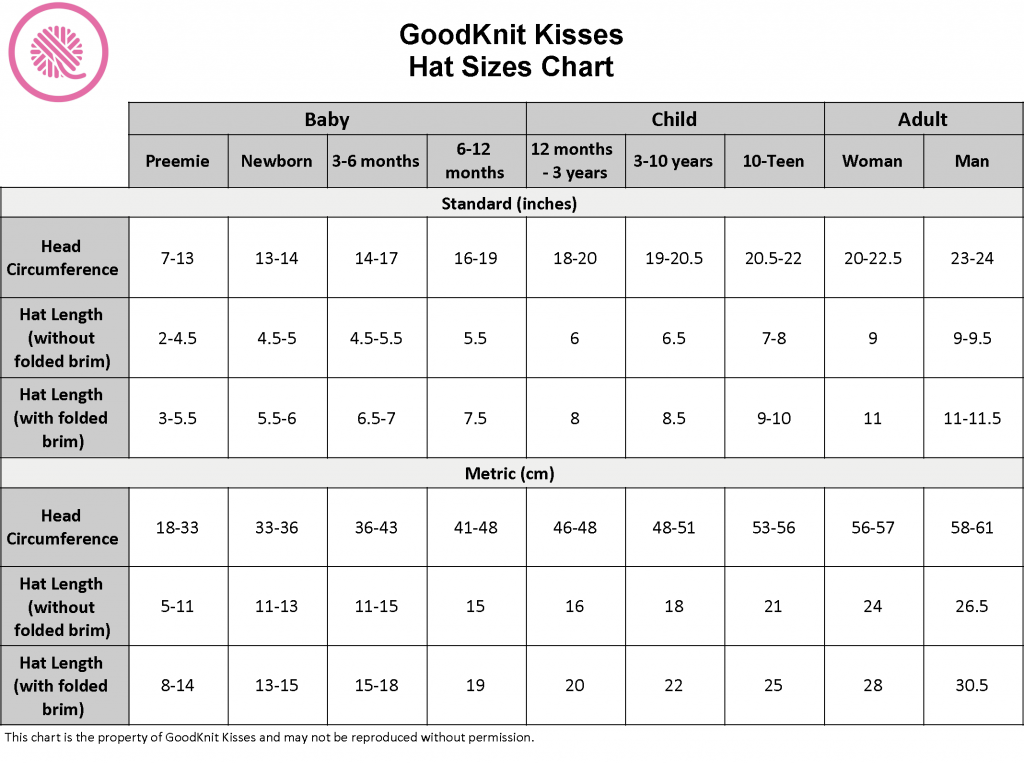 But first of all, you need to make a head measurement. Such data will be needed to calculate the loops.
As a rule, the following measurements are taken:
- head circumference - measured in a circle along the line from the eyebrows to the back of the head;
- distance from crown down to the most convex part of the head.
Knitting pattern and a little trick for correct calculation.
To count the stitches correctly, pick up a small number of stitches on the needles (20, 25 - it doesn't matter. You can focus on the pattern repeat and dial in proportion to it) and knit about 7-10cm.
Classic method: measure how many centimeters wide the sample is. Let's say that we scored 20 loops, and knitted a height of 12cm. Let's calculate, for example, a women's hat size 56.
We make up the proportion:
20p - 12cm
X - 56cm
20 x 56 / 12 = 93p
This is the standard calculation for a knitted cap. But, as my personal experience shows, it is not always possible to calculate correctly.
My secret how many stitches to cast on
We do the same as in the first case. We measure exactly the same.
And now we slightly stretch the sample and again measure it already in the stretched form. It turns out: 20p, and the width is 14cm.
Again we calculate the number of loops with a proportion.
20 sts - 14 cm
X - 56 cm
20 x 56/14 = 80 sts.
Compare, according to the first calculation, you need to dial 93p on the cap, and according to the second - 80.
Based on my practice, you need to dial the average value between these two values.
(93 + 80) / 2 = 86.5 p. Round up to 86 loops.
You can use this calculation for knitting hats, cardigans, sweaters, etc.
My advice: this calculation is longer, but this way you will not be mistaken and knit exactly according to the circumference of your head.
This math works if you need to knit a hat over your head. To calculate the loops of models that hang slightly behind, use the first classic method, because the model assumes some volume.
Often inexperienced knitters tend to knit the pattern tightly and the base knit more loosely. Try to stick to the original density!
So, we have calculated the loops for knitting the main pattern of the hat. If the model consists of one pattern, then the calculation of the set of loops can be completed.
Elastic band calculation
If your hat has an elastic band, then it must also be calculated. This is done in exactly the same way. We knit a sample from a small number of loops, measure it and count it. In most cases, the elastic band for the hat (so that it fits better to the head) is knitted with thinner knitting needles. And the sample you should knit with this size of needles.
We measure the elastic band in a stretched state!
After the rib is knitted, on the last row, add stitches evenly to the value you calculated for the main pattern.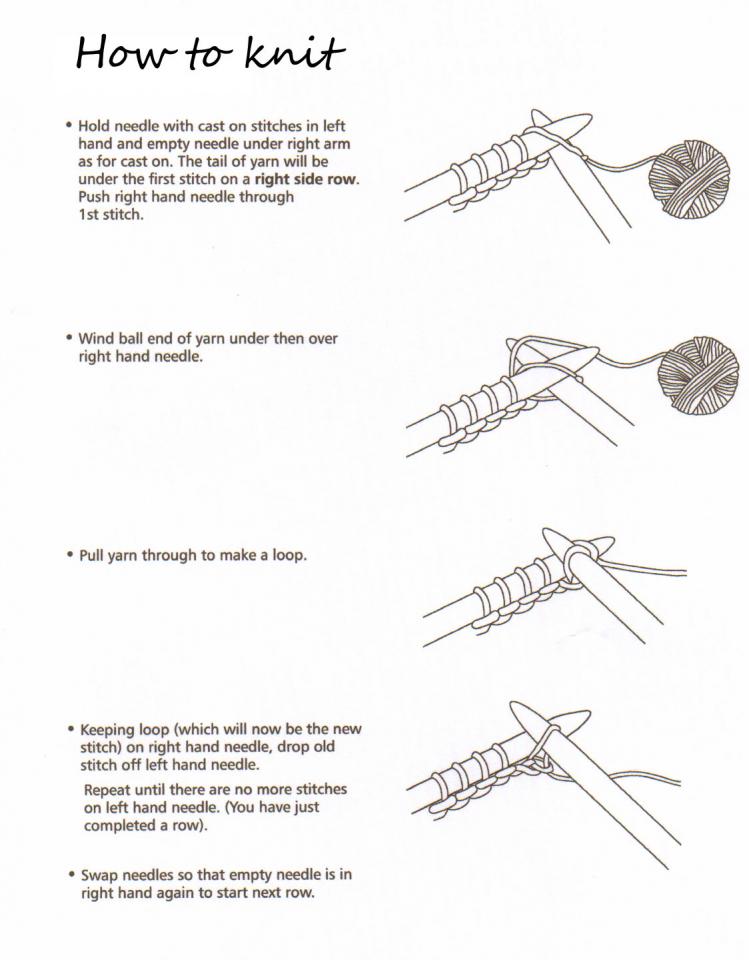
Height
There are two height measurements for a hat: the height of the hat itself and the height of the beginning of the decrease.
First - measure the distance from ear to ear and divide it in half. This is the height of the hat if you are knitting a low model over the head. In elongated hats, beanies, caps, the length can be completely different and is usually indicated in the description of the style.
To calculate the height (depth) of the beginning of the decrease, we need 2 measurements:
- from the lobe of one ear, through the crown, to the other ear;
- head circumference (forehead and nape circumference).
Calculate the radius: dividing the volume of the head by 3.14 and dividing this value by 2.
For example, for a knitted hat for a woman measuring 54cm:
54 / 3.14 / 2 = 8.6cm Round to 9cm.
Calculate the height of the beginning of the decrease: In our example, the distance from the lobe of one ear to the other is 43cm. This value must be divided by 2, then subtract the radius of the cap.
43 / 2 - 9 = 12.5 cm - This is how many centimeters you need to knit before decreasing.
The table will help
There are cases when it is not possible to take measurements for one reason or another. In this case, how to calculate the loops for a hat with knitting needles for an adult or a child? It turns out it's even easier. There are special tables for the ratio of sizes of knitted hats. They use standard indicators.
What the header will be, the tables cannot foresee. But they can serve as a kind of guide for your knitting of a headdress.
Depth Chart for Children
Depth Chart for Adults
Let's do one more calculation to fix the material:
Cast on 25 sts.
Density of the sample of the main pattern: 25p = 9cm
Slightly stretch the sample, density: 25p = 11cm
Calculate the number of loops for the main pattern:
25 x 58 / 9 = 161 loops.
in a slightly stretched form: 25 x 58 / 11 = 132p
Calculate the arithmetic mean:
(161 + 132) / 2 = 146.5 Round up to 147 loops.
Calculate how many stitches to cast on for rib:
Cast on 25 stitches on thinner needles. The density of the sample in a stretched form:
25p = 10.5 cm
25 x 58 / 10.5 = 138 p.
Why you need it
No one can ever guarantee that by choosing a pattern for a hat and buying exactly the same quality yarn as indicated in the recommendation for knitting it, you will get the size you need. There may be several reasons for this.
Patterns often indicate the density of knitting: the number of loops in one centimeter. And how to get such a density, even with the perfect selection of yarn and knitting needles, when each knitter has her own “handwriting”: one knits almost all things with a loose knit, and the other is dense, tightening the loops. And you can’t get away from it - this is how a person is used to it.
And the yarn itself seems to be chosen correctly, but it does not always behave in the same way. There are many nuances, everything is very individual.
Knitting the pattern is not difficult at all, however, it will help to avoid unpleasant moments of tying in the future and, of course, save a lot of time. Only the correct calculation of the loops for the hat will allow you to knit it exactly according to the intended size the first time.
I would like to believe that my advice on how to start a knitted hat will come in handy and help you avoid unforeseen situations in this useful and pleasant business.
Knit with pleasure, easy loops for you!
Calculation of knitting a children's hat according to measurements and age
Usually, knitting a classic-shaped hat consists of two parts: knitting the bottom for the crown of the head and directly knitting the hat itself along the length of the head circumference.
There are usually no problems with the last part: it is enough just to determine the required number of loops according to the pattern.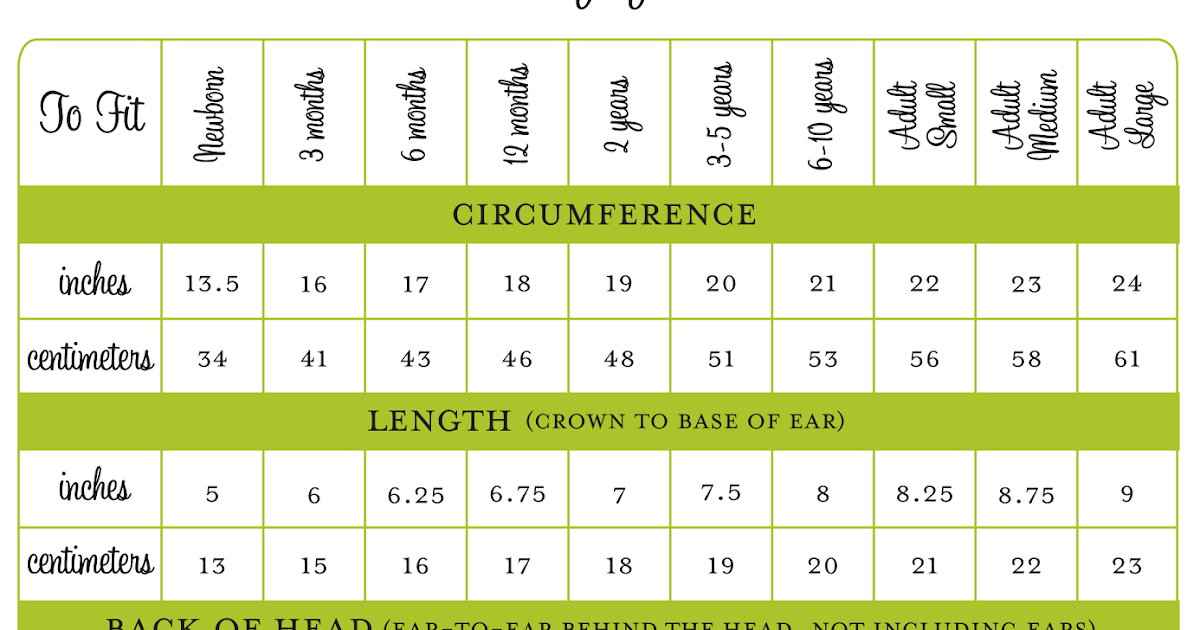
It is much more difficult to understand how high the hat should be knitted before the decrease, how long to do the decrease? Or if knitting from the crown - what diameter should the bottom be, so that then you end up with the desired volume of the cap?
It turns out that just two measurements and one division operation are enough to find the answer to these questions!
So, in order to calculate the knitting of a children's hat , it is necessary to determine three quantities.
1. Measure the circumference at the widest point of the head. Then subtract about 4-6.5 cm, depending on how tight the hat should fit and how much the pattern that the hat will knit with stretches. This will be measure A.
2. Measure the length from the crown of the head to the forehead (just above the eyebrows) - measurement B.
3. Using a calculator, divide measurement A by 3.142. Measure B will be obtained, which determines the diameter of the bottom of the cap, necessary to obtain a given volume.
That's how Pi came in handy for knitting! Indeed, everything ingenious is simple!
However, this calculation is suitable not only for children, but also for adults.
However, it is not always possible to take measurements. In this case, approximate data by age come to the rescue.
| Age | Head height | Bottom diameter |
| 0 — 3 months | 13cm | 9cm |
| 0-6m | 14cm | 10cm |
| 6-18m | 15.5 cm | 12 cm |
| 18 m. - 3 y. | 18 cm | 13.5 cm |
| 2 - 6 y.See | 14.5 cm | |
| 3 - 8 years old | 19.5 cm | 15.5 cm | 8 - 16 years old | .5 cm | 16.5 cm |
| 16 - a small adult | 17 cm | |
| Medium adult | 23 cm | 18 cm |
Source
Calculate the diameter of the bottom 9000 9000 all simple. To determine the diameter of the bottom, we need to remember the math. Divide the circumference of the head (circumference) by the number Pi (3.14) and subtract 1-1.5 cm. This will be the required diameter of the circle of our hat, after which we stop making increases and knit vertically. But in order for the cap to fit better on the head, many masters recommend that the last two rows, necessary to achieve the desired diameter, alternate with rows without increments. For example. We knit the product with double crochets. One row is about 1 cm. That is, for each row our product adds 2 cm. The diameter we need is 13 cm. When the diameter of the circle reaches 9cm, we begin to alternate rows: we knit 1 without increments, 1 with increments, then again without increments and again with increments. After that, we begin to knit straight to the desired length. Well, since the conversation turned to the length, let's try to calculate it.
Product length.
In this case, we will do without complex numbers. Mathematics for the third grade. The circumference of the head should simply be divided by three. If we have a skullcap that barely reaches our ears, we don’t make any additions at all. If the hat is up to the middle of the ear, we add 1.5-2 cm, if the ears need to be closed completely, then the increase will be 3 cm. Such practical mathematics. Experience has shown that the calculation was correct. At least my customers were happy. Hope the advice helps you too. Good luck warming up for winter!
Source: http://shkolazhizni.ru/archive/0/n-49756/
Measure the volume of the child's head. For a tight cap, 2-3 cm is taken away. Then a sample is made. According to the sample, the number of loops is calculated.
The depth of the cap to the earlobe is calculated by the formula - OD/3+2(3) see
Where OD is the circumference of the head. Number in brackets for exhaust gas over 50 cm.
Calculation of the maximum diameter of the bottom of the cap: from the formula of the circumference C=2πR=πD, where С is the circumference, R is the radius, D is the diameter, π is the constant Pi(3.