How to sterilize
How to Sterilize Baby Bottles (7 Safe Methods)
Do you ever wonder if your baby’s bottle is really clean?
With babies’ immature digestive tracts and vulnerable immune systems, it’s important to make sure you’re not unknowingly introducing harmful bacteria into their little bodies through their bottles.
Sterilizing your baby’s bottles is a great way to make sure they’re safe, but the process can seem overwhelming or intimidating.
Thankfully, it doesn’t have to be. When it comes to sterilizing bottles, there are lots of ways to go about it.
Having extensively researched this topic, we’ve written this guide to show you how to sterilize baby bottles, explaining the benefits of each method and what you need to know to get started.
Table of Contents
- Why Should I Sterilize Baby Bottles?
- What Can Happen if I Don’t Sterilize Baby Bottles?
- What Are the Different Sterilization Methods?
- Which Sterilization Method Is Best?
- How Often Should I Sterilize Baby Bottles?
- Are Bottles the Only Thing That Needs Sterilizing?
- Things to Avoid While Sterilizing Bottles
- How Do I Sterilize Baby Bottles?
Why Should I Sterilize Baby Bottles?
When babies are born, their brand new digestive and immune systems are unaccustomed to the millions of bacteria we come into contact with every day. While some immunity passes from mother to baby during pregnancy and breastfeeding, babies’ immature systems are still considerably more susceptible to infection from new and unfamiliar germs (1).
For this reason, some experts recommend that parents sterilize baby bottles for the first few months of life. This will kill any germs, bacteria, or viruses that may be lurking in a bottle’s nooks and crannies, and keep your baby from getting sick.
Sterilizing your baby’s bottles is especially important if:
- You’re using secondhand or hand-me-down bottles for the first time.
- Your baby was born prematurely or has health problems.
- Your baby has been ill.
- Your home does not have safe, clean drinking water.
What Can Happen if I Don’t Sterilize Baby Bottles?
If bottles are not properly sterilized, your baby can be exposed to bacteria and germs that can cause:
- Gastroenteritis (stomach flu).
- Food poisoning.
- Diarrhea.
- Vomiting.
- Hepatitis A.
- Rotavirus.
Even if your baby can fight off the germs or bacteria associated with these illnesses, common side effects of the symptoms of vomiting and diarrhea include dehydration, which can be very dangerous for babies (2).
What Are the Different Sterilization Methods?
There are several ways to sterilize your bottles. These include:
- Microwaving the bottles.
- Boiling them in water.
- Sterilizing in cold water.
- Using an electric steam baby bottle sterilizer.
- Using a UV sterilizer.
- Washing in the dishwasher.
- Using a diluted bleach solution (make sure you follow proper instructions for this method to avoid causing harm to your baby).
Bottles should always be washed to remove any food particles before sterilizing.
Which Sterilization Method Is Best?
The result of all sterilization methods is a healthy, sterilized bottle. Aside from that, your optimal choice will depend on your lifestyle.
If you prefer the cheapest option
You might want to consider:
- The microwave method.
- The boiling water method.
- A diluted bleach soak.
- The dishwasher method.
If you prefer chemical-free options
You might want to avoid:
- A diluted bleach soak.
- Sterilizing in cold water with a sterilization tablet.
If you want ease and convenience
You might want to consider:
- The UV sterilizer.
- An electric steam sterilizer.
- A microwave steam container.
If you have limited counter and storage space
You might want to avoid:
- The UV sterilizer.
- The electric steam sterilizer.
- The microwave steamer.
If you are traveling
You might want to consider:
- The cold water method.
- A travel-sized UV sterilizer.
How Often Should I Sterilize Baby Bottles?
You don’t have to sterilize your baby’s bottles after each use. A good, thorough cleaning should keep them safe for your baby. However, it’s a good idea to occasionally sterilize your bottles in these situations:
- When they’re brand-new — before you use them for the first time.
- If your baby has been sick (especially with an oral illness like thrush).
- If you notice build-up inside the bottles or nipples.
- If you live or are traveling in an area where tap water is not regulated.
- If you get your water from a well, it may be a good idea to sterilize with every use (3).
Are Bottles the Only Thing That Needs Sterilizing?
Anything that goes in your baby’s mouth or is used to feed your baby should be sterilized. This includes:
- Bottles.
- Nipples.
- Bottle rings or accessories.
- Pacifiers.
- Feeding accessories.
- Breast pump parts (check with your manufacturer about recommended sterilization methods).
The good news is that although parents may be advised to sterilize their baby’s bottles for the first few months, it’s not considered necessary after that.
Things to Avoid While Sterilizing Bottles
The process of sanitizing your baby’s bottles is pretty easy and straightforward, so the risk of causing any harm to your baby is minimal. There are a few things to keep in mind, though.
- If sterilizing with steam or boiling water, be careful you don’t burn yourself — and don’t try to hold your baby while doing it. Even though it seems harmless, steam is far hotter than boiling water.
- If you sterilize with a bleach solution, make sure it’s appropriately diluted. Never sterilize your baby’s bottles in undiluted bleach. Bleach is a potent chemical that can be fatal if ingested.
- If your baby’s bottles contain BPA, you may want to consider using a no-heat method of sterilization or switching to BPA-free bottles. When plastic containing BPA is heated, the chemicals can leach into the milk (4).
How Do I Sterilize Baby Bottles?
Regardless of the sterilization method you choose, the first step is always to clean your bottles in hot, soapy water to remove milk residue. After your bottles are cleaned and rinsed, you can move on to sterilizing them.
1. Use the Microwave
- Make sure your microwave is clean.
- Fill your baby’s bottles halfway with water.
- Set them in the microwave.
- Place nipples, rings, and accessories in a glass bowl filled with water deep enough to cover them.
- Microwave on high for a minute and a half.
- Allow bottles to cool sufficiently before removing them from the microwave.
You can also purchase products (like this one) designed specifically for sterilizing baby bottles and other accessories in the microwave. Microwave sterilizing bags are also available.
2. Boil Them in Water
- Place your bottles in a large pot of water.
- Push down any bottles floating on the surface that are not submerged — placing a spoon on them should work fine.
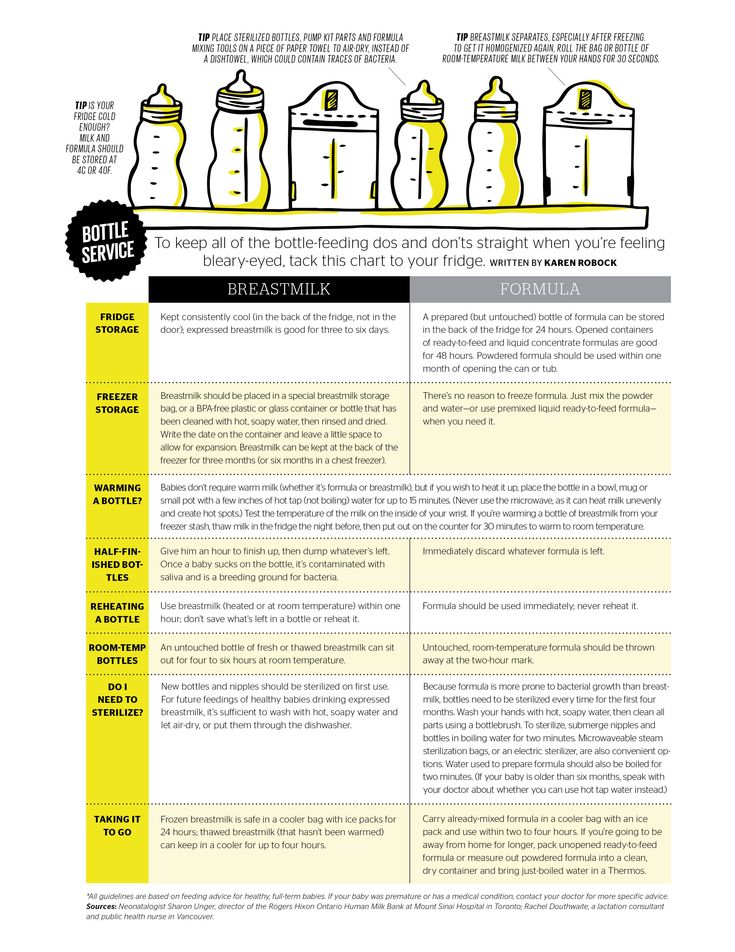
- Place the pot on the stove, and turn on the burner.
- Once the water is boiling, set a timer for 10 minutes.
- After 10 minutes, remove the bottles and accessories using tongs.
- Place on a bottle drying rack.
When using this method, check with your bottle’s manufacturer to ensure the boiling-water method will not harm your bottles. It could cause plastic bottles to melt or glass bottles to crack if they weren’t manufactured to withstand this level of heat. The heat can also cause nipples and pacifiers to break down more quickly.
3. Use Cold Water
If you’re traveling, a lightweight and convenient option is a sterilization tablet. This is a product manufactured specifically for bottles, allowing you to sterilize them using cold tap water when microwave and boiling water are not available.
- Fill a container with enough water to cover your bottles.

- Add your sterilization tablet and allow to sit according to the manufacturer’s directions.
This method can be done using either a sterilization solution (liquid) or tablet (solid). If you’re traveling by air, consider the tablet over the solution due to restrictions on liquids during air travel.
4. Use an Electric Steam Sterilizer
If you’ve got countertop space, an electric steam sterilizer may be an easy solution for you.
- Place your bottles in the sterilizer.
- Add water according to the device’s instructions.
- Press the start button.
5. Use a UV Sterilizer
This may be one of the simplest options of all. Germs, bacteria, and viruses are eliminated using the power of ultraviolet light.
- Place your bottle in the sterilizer.
- Press the start button.
If you’re traveling, there are portable, single-bottle UV sterilizers available that could give you peace of mind on your travels.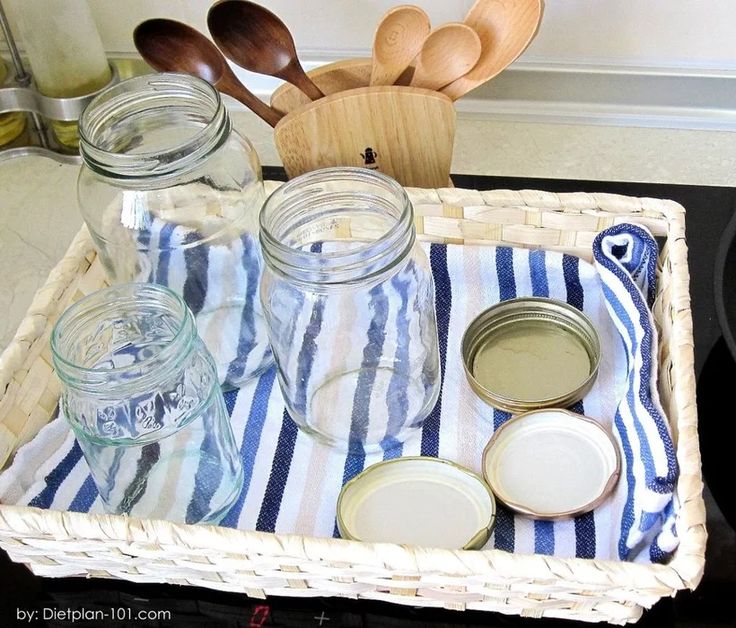
6. Run Them Through the Dishwasher
This method has a caveat: not all dishwashers are capable of producing heat high enough to sterilize bottles.
Check if yours has a sanitize cycle and NSF/ANSI Standard 184 Certification (5). You’ll need to check with your manufacturer or your owner’s manual to see if your dishwasher has this certification. If it does, you can use it to sanitize your baby’s bottles by doing the following:
- Place the bottles in the top rack.
- Place any nipples, rings, pacifiers, and other accessories in a dishwasher basket.
- Run a sanitize cycle.
7. Soak Them in a Diluted Bleach Solution
- Fill a container with one gallon of water.
- Add two teaspoons of bleach.
- Mix well.
- Place bottles, nipples, and accessories into the solution.
- Allow the bottles to soak for two minutes.
- Run the bleach solution through the nipples.
- Scrub using a baby bottle brush.

- Air dry.
Feedback: Was This Article Helpful?
Thank You For Your Feedback!
Thank You For Your Feedback!
What Did You Like?
What Went Wrong?
Cleaning and sterilising baby bottles
Cleaning and sterilising baby bottles | Pregnancy Birth and Baby beginning of content4-minute read
Listen
It’s essential to properly wash and sterilise the feeding equipment when you’re bottle feeding. You'll need to clean and sterilise each bottle, teat and screw cap after every feed. It’s important that you continue sterilising everything until your baby is 12 months' old.
Why is it important to clean and sterilise my baby’s bottles?
Babies have immature immune systems so they aren’t strong enough to fight off a range of infections.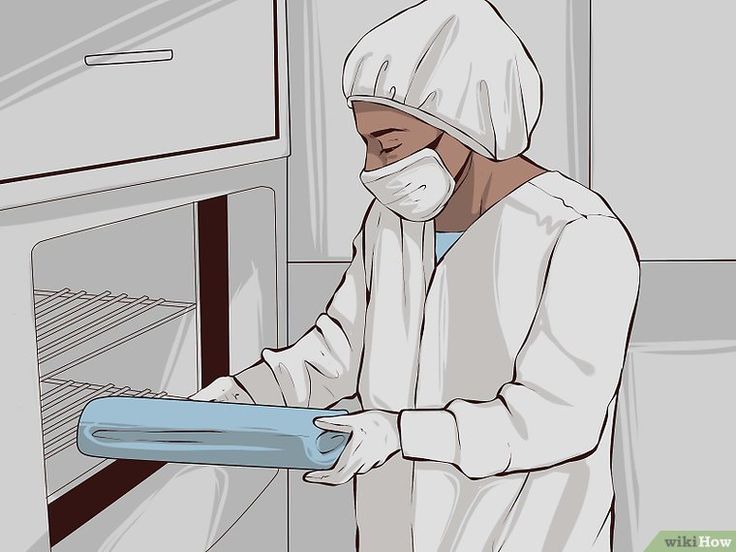 One important way to support them in staying healthy is to reduce the chances of their getting sick in the first place.
Milk is the perfect medium in which bacteria can grow. This is why it’s important to sterilise all feeding equipment and keep formula cold until just before feeding your baby.
What equipment needs cleaning and how often?
You need to clean and sterilise all bottle parts, teats and screw caps.
- Separate all parts of the bottle and pull the teat out of its screw cap.
- Use hot water and dishwashing detergent.
- Clean all areas of the bottle with a bottle brush, including the thread where the cap screws on.
- Remove any milk still sitting in the teat or the hole with a teat brush.
- Squeeze hot, soapy water through the teat hole, then do the same with clean water to rinse the teat.
- Make sure to rinse the bottles and equipment well.
Get a new bottle brush once the bristles are worn. They need to be stiff enough to remove all the milky residue from the inside of the bottle.
How to sterilise feeding equipment
Even if bottles and teats look clean, they might still carry germs to your baby so it’s essential to sterilise your feeding equipment properly.
There are 3 ways to do this: boiling, steam sterilisation and chemical sterilisation.
If you’re breastfeeding and only need to sterilise a bottle occasionally, the boiling method may be good enough. It’s also cheaper than buying a steam steriliser. If you’re expressing and/or bottle feeding, then a steam steriliser might be the best option.
The boiling method
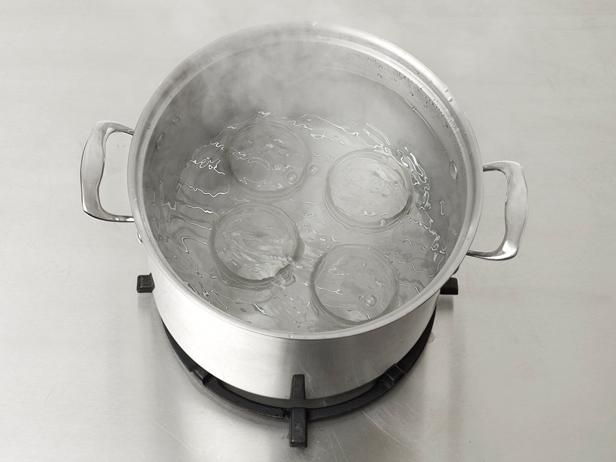
- Put all parts of the cleaned bottle, including teats, in a large saucepan.
- Cover the equipment with tap water.
- Make sure all air bubbles are out of the bottles and that they are fully submerged under the water.
- Bring the water to the boil.
- Boil for 5 minutes.
- Let the feeding equipment cool in the saucepan before taking it out.
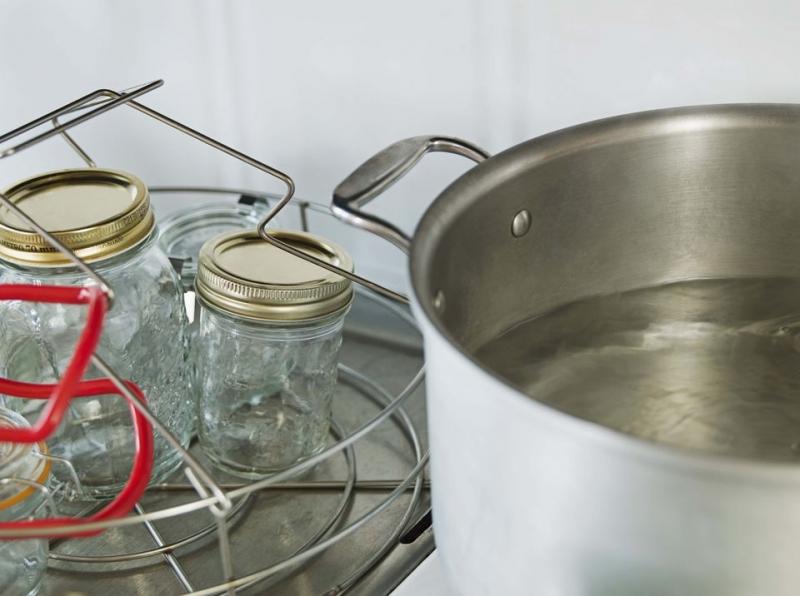
- Place all the feeding equipment in a clean container and put it in the fridge.
 Make sure the container is covered firmly with a lid.
 - You can store everything in the fridge for up to 24 hours.
The steam sterilisation method
Steam sterilisers are popular because they work quickly, are cheap to use and are very effective. They heat water to boiling point and the steam kills the bacteria. Some steam sterilisers are designed to operate in a microwave.
- Place the clean bottles and feeding equipment in the steriliser.
- Make sure there’s enough room between each bottle, teat and screw cap for the steam to circulate around all surfaces.
- Follow the manufacturer’s directions about how much water to add.
- Turn on and push the button to start. If you’re using a microwave steriliser, place the steriliser in the microwave and turn on for the correct time.
- Wait until the sterilisation cycle has finished and the light goes off.
- Store all sterilised feeding equipment in a clean, lidded container in the fridge.
- Sterilise all equipment again if you haven’t used it within 24 hours.
The chemical sterilisation method
Be careful when using chemical sterilisation. Many methods use bleach, which can also bleach clothing and surfaces, and irritate the skin, if spilt.
Antibacterial chemical sterilisation solutions are available in liquid and tablet form. They need to be prepared exactly as directed on the container.
- Make sure you have a container that’s large enough to hold your baby’s bottles and feeding equipment.
- Use the recommended amount of tap water to prepare the sterilising solution.
- Submerge all bottles and feeding equipment in the solution. Make sure there are no bubbles left in the bottles.
- Leave the equipment in the solution for the recommended time – there’s no need to rinse the solution off after sterilisation.
- Throw out the solution after 24 hours and wash out the container before preparing a new batch.
Wash your hands before handling sterilised feeding equipment
Make sure you wash and dry your hands before you handle sterilised bottles and teats.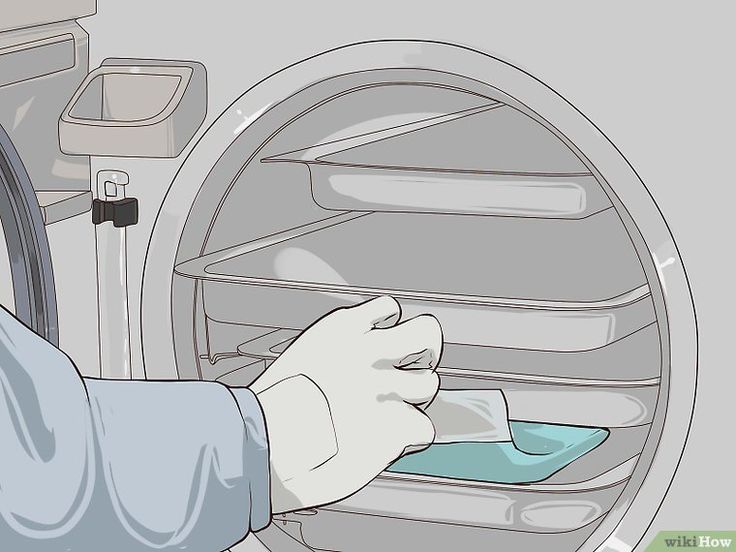 It’s easy to contaminate equipment just by touching it with unclean hands.
Sources:
Child and Youth Health (Feeding your baby), Raising Children Network (Bottle feeding: cleaning and sterilising equipment), Karitane (Bottle Feeding)Learn more here about the development and quality assurance of healthdirect content.
Last reviewed: September 2020
Back To Top
Related pages
- Expressing and storing breast milk
- Making formula – dos and don'ts
- Feeding your baby with formula
- Breastfeeding your baby
Need more information?
Bottle-feeding: cleaning & sterilising | Raising Children Network
Bottle-feeding your baby? Find out what equipment you need – bottles, teats, rings and caps – plus how to clean and sterilise it all.
Read more on raisingchildren.net.au website
Baby formula & bottle-feeding for babies | Raising Children Network
Baby formula is the only safe alternative to breastmilk for the first 12 months. All Australian cow’s milk-based formulas meet strict standards. Read more.
Read more on raisingchildren.net.au website
Breastmilk & breastfeeding: benefits | Raising Children Network
Breastmilk – designed by nature for human babies. Breastmilk and breastfeeding have many health and practical benefits for mothers and babies. Read more.
Read more on raisingchildren.net.au website
Feeding your baby with formula
Learn about formula feeding for your baby, how is it different to breastmilk, why formula feed and what do if your baby is allergic to formula.
Read more on Pregnancy, Birth & Baby website
Dummies: advantages, disadvantages & tips | Raising Children Network
Dummies soothe some babies and help them settle. But dummies can be a hard habit to break, and babies also need help to manage them. Get tips for dummy use.
Read more on raisingchildren.net.au website
Expressing breastmilk & storing breastmilk | Raising Children Network
You can express breastmilk by hand, or with a manual or an electric pump. Store expressed breastmilk in special bags or containers in the fridge or freezer.
Read more on raisingchildren.net.au website
Disclaimer
Pregnancy, Birth and Baby is not responsible for the content and advertising on the external website you are now entering.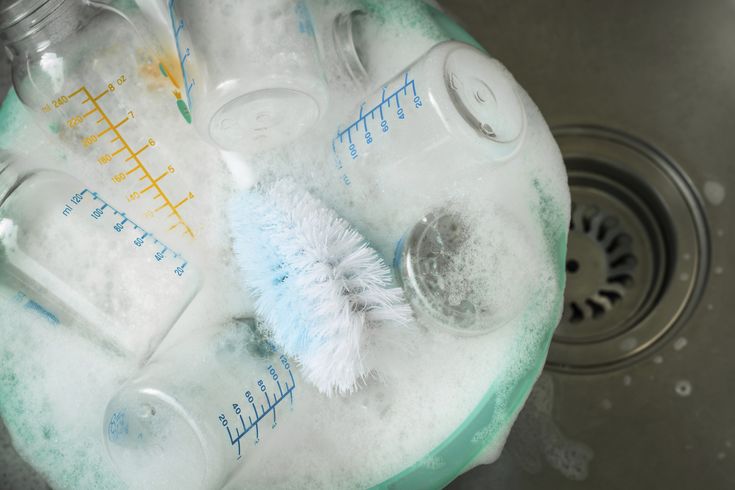
Need further advice or guidance from our maternal child health nurses?
1800 882 436
Video call
- Contact us
- About us
- A-Z topics
- Symptom Checker
- Service Finder
- Linking to us
- Information partners
- Terms of use
- Privacy
Pregnancy, Birth and Baby is funded by the Australian Government and operated by Healthdirect Australia.
Pregnancy, Birth and Baby is provided on behalf of the Department of Health
Pregnancy, Birth and Baby’s information and advice are developed and managed within a rigorous clinical governance framework. This website is certified by the Health On The Net (HON) foundation, the standard for trustworthy health information.
This site is protected by reCAPTCHA and the Google Privacy Policy and Terms of Service apply.
This information is for your general information and use only and is not intended to be used as medical advice and should not be used to diagnose, treat, cure or prevent any medical condition, nor should it be used for therapeutic purposes.
The information is not a substitute for independent professional advice and should not be used as an alternative to professional health care. If you have a particular medical problem, please consult a healthcare professional.
Except as permitted under the Copyright Act 1968, this publication or any part of it may not be reproduced, altered, adapted, stored and/or distributed in any form or by any means without the prior written permission of Healthdirect Australia.
Support this browser is being discontinued for Pregnancy, Birth and Baby
Support for this browser is being discontinued for this site
- Internet Explorer 11 and lower
We currently support Microsoft Edge, Chrome, Firefox and Safari. For more information, please visit the links below:
- Chrome by Google
- Firefox by Mozilla
- Microsoft Edge
- Safari by Apple
You are welcome to continue browsing this site with this browser. Some features, tools or interaction may not work correctly.
How to sterilize jars with blanks correctly on Webspoon.ru
How to sterilize blanks in jars
Summer and autumn are the time when housewives actively replenish their stocks of all kinds of blanks: compotes, salads, pates, pickled vegetables and mushrooms, vegetable sets for making borscht. So that the prepared products do not deteriorate, they can be sterilized.
Sterilization is one of the ways to kill microorganisms that contribute to spoilage of prepared foods. You can sterilize both the jars themselves with lids and jars filled with blanks. Sterilizing full jars of stock is one good way to keep your stock safe and sound for the winter.
The blanks can be sterilized in a pot of water or in the oven. If you will sterilize jars in water, then consider some nuances:
- put a cloth folded in 5-6 layers, a towel, a wooden grate or a special wooden circle on the bottom of the pan;
- the water that you pour into the pan must correspond in its temperature to the temperature of the workpiece in the jar. If the water is too hot or too cold, the jar may burst;
- fill jars with blanks no higher than the lower level of the “neck” of the jar;
- the water in the pan should reach the "shoulders" of the jar;
- Sterilize blanks by placing the lids on top of them, but do not screw them on. Thus, during sterilization, the lid itself is additionally sterilized;
- after boiling water in a saucepan, the fire should be reduced. The water must not be allowed to boil violently. With rapid boiling of water, there is a possibility that it can get into cans with conservation;
- if the recipe does not specifically indicate how long it takes to sterilize this particular blank, then we sterilize the jars according to the following scheme:
0. 5 l - 10-15 minutes;
1 l - 20-25 minutes;
3 l - 30-35 minutes.
- After sterilization, screw the jar tightly and turn it upside down. In some cases, the jar can additionally be wrapped in a blanket and left to cool completely;
- leave the jars from the workpiece for 2-3 days in plain sight and only after you make sure that everything is rolled up well, the lid does not let air through, and the workpieces feel normal, put the jars with twists into storage in a cool place.
Recipes with water ingredient
Recipes with cucumber ingredient
We need:
- Saucepan
- Wooden grate
- Jar with lid
- Kitchen towel
How to sterilize blanks step by step instructions with photo
Step 1Link
To sterilize winter blanks in water, we need a saucepan, a jar with a lid, a wooden grate, a kitchen towel and water.
Step 2Ref
Place a wooden rack or cloth folded several times or a towel on the bottom of the pot.
Step 3Reference
Fill jars with blanks. Banks should be filled no higher than the bottom rim of the can.
Step 4Reference
Put the jars in a saucepan and fill it with water. Water should reach the "shoulders" of the jar.
Step 5Reference
Cover jars with lids but do not screw on. Bring water to a boil and sterilize for the time indicated in your recipe.
Step 6 Ref.
Using a kitchen towel, remove the jars. Screw on the lids and turn the jars upside down. Leave the jars to cool completely.
How to sterilize jars for blanks / 3 easy ways - an article from the section "How to pickle and pickle" on Food.ru
Sterilization of jars for home canned food is no less important step than choosing or washing products for blanks. A poorly sterilized jar will negate all the efforts spent, because the food in it can deteriorate, and the container itself can burst. But we know three ways that even a novice "conservative" can handle: effective, safe and fast, such that enough for 2-3 favorite songs on the radio.
Method 1: Ignite the jars in the oven
Put the jars in a cold oven at a short distance: they should not touch each other so that the glass is not damaged when heated. It's okay if the jars are wet after washing - put them neck down: on a wire rack or on a baking sheet, and metal lids for twisting there.
First preheat the oven to 100°C: mark 20 minutes and gradually raise the temperature - first to 150°C and ending at 180°. After that, you can turn off the oven and let the jars cool right in it, or put them on a clean towel.
Temperature differences can cause hot jars to burst, so you can only take them out of the oven with a dry oven mitt: by the way, ordinary work gloves with “pimples” on the palms will also work.
Method #2: Microwave jars
Microwaves can hold fewer jars than ovens, but this method allows you to sterilize them in just a few minutes.
Turn on the microwave oven at maximum power. Place clean jars inside, 1/10 filled with water. Run the microwave for 5-7 minutes: during this time, the water in the jars should boil, and condensation will appear on their walls. Carefully remove the jars, drain the water and dry them upside down on a clean towel.
Metal lids cannot be sterilized in the microwave, they must be placed in a pot of boiling water for 10-15 minutes.
Method #3: Boil jars on the stove
You will need a large saucepan. If there are a lot of jars, take several pans. Fold the jars and lids, fill so that cold water covers the containers for blanks. Banks can be placed, or you can put them on their side - the main thing is that they are completely in the water.
Bring water to a boil. Boil jars and lids for another 15 minutes, and then carefully remove them from the water and leave them to dry on a clean towel with the bottom up. Do not store sterilized jars for a long time - dust and bacteria from the air can get into them, and then the sterilization will have to be repeated.