How to create a kindle account for child
How to Set Up a Kindle Child Account (And Keep Your Books Off Your Child's Kindle!)
Last updated on by Abi Johnson
This article may contain some compensated links. Learn more.
Are you wondering how to set up a Kindle child account? Or are you wondering: “How do I keep my books off my child’s Kindle?” If so, this is the guide for you!
This step-by-step guide will show you exactly how to set up a child account on a Kindle Paperwhite, so you can keep your books separate from your child’s Kindle…and make sure your child only has access to the books in your account that you want them to have access to.
What Is a Kindle Account for Kids?
A Kindle account for kids is a way to set up a child profile on your Amazon account (using your Amazon Household) so you can share media from your account with your child. But the nice thing about a child account is that you can give your kids access to some of the media/books from your Amazon account, without necessarily giving them access to all the media in your account.
Essentially, this method creates a sub-profile that does not have access to any media on your account until you grant access. Using a child profile allows you to give your child access to any books you own or any library books you send to Kindle, so it functions pretty much the same as an adult account…but you just have the extra step of having to approve and send content to their child profile before they can access it.
A child account also limits other actions, like browsing the Kindle store and buying books, so your child cannot just use your account and payment methods to buy books from their Kindle.
If any of these are issues you have encountered or are worried about with your child, then setting up an Amazon Kindle child account is definitely the way to go! Read on to learn exactly how to do this.
How to Set Up a Kindle Child Profile
Follow the step-by-step guide below to set up your child’s Kindle in no time! I set up a child account on my Kindle Paperwhite, but you can use this method on other Kindle models as well.
1. Open Kindle and tap “Settings”
Your first step is to open the Kindle device you want to set up with a child profile and then tap “Settings” from the top bar or from the menu.
2. Tap “Household & Family Library
Once the settings menu comes up, tap “Household & Family Library.”
3. Tap “Add New Person”
Next, you need to tap “Add New Person” at the bottom of the screen.
4. Click “Add Child”
At this point, you’ll be given the option to add an adult to your household or to add a child. Click “Add child.”
5. Set Up or Enter Your Parental Controls Password
Next, you’ll be prompted to enter your parental controls password (if you already have one created). Or, if you haven’t yet created a password, then you should be prompted to set one up at this point.
This is the password you will use when you want to add books to the child profile or exit the child profile on the Kindle. So if you want to make sure that your child does not have access to all the media in your account, then you will want to make sure you choose a password they do not know.
Note that when the child profile is live on the Kindle, you must enter this parental control password to exit out of the child profile and enter the full adult account, so if your child doesn’t know this password they can’t leave their child profile and access your full Amazon account. So assuming you don’t wish for your child to access your full account, then it’s important they don’t know this password.
6. Add Your Child’s Name and Date of Birth
Next, you’ll be prompted to enter your child’s name and date of birth. Enter this information and then it’s time to move on to the last step!
7. Add Books to Your Child’s Account
The final step is to add books to your child’s Kindle profile. You can do this directly from the Kindle device, from the Parent’s dashboard on Amazon, or from your Amazon Household. This is the step where you get to choose which media from your account you want your child to have access to.
Of course, you can also add more books later (when you buy new books or download new books from the library). To do this, you will simply open settings on the Kindle, click “Household & Family Library” (as in step 2 above), and then click the person symbol next to the child profile to open the “Library” and choose which books to grant access to.
However, at this initial setup stage, once you’re ready for the child profile to go live you will click “Start” and it will launch the child profile that is safe for your child to use. Remember, you will need your parental controls password to exit once the child profile starts, so you don’t have to worry about your child accessing content from your Amazon library that you don’t want them to.
And that’s how to keep your books off your child’s Kindle! Have questions or struggled with one of the steps above? Feel free to leave your questions in the comments!
If you want to talk with a live Amazon representative, check out this step-by-step guide to getting in touch with Amazon customer service!
- Share
- Tweet
Amazon Kids and Kids+ explained
The Amazon Kindle has established itself as a leading reading device and where you have reading, you hopefully have eager children.
Although real books, on paper, as well as using public libraries, should be something that all children experience, there's no denying that a Kindle has something to offer.
But a Kindle device, hooked into an Amazon account, offers a great deal of connectivity that you probably don't want your child to have. There's a web browser for starters, as well as, potentially, your Amazon account through which they can buy books with wanton abandon.
Whether you're buying a new Kindle specifically for a child, or letting them use one you already have, here's what you need to consider when setting-up a Kindle for your kids. Here we're talking specifically about Kindle ebook readers, rather than Fire tablets, although in many cases, the same information applies. There's also a specific Kindle Kids Edition and Kindle Paperwhite Kids which will also talk about below.
SQUIRREL_12855726
Account decisions
A Kindle needs to be registered to an Amazon account - this is how you get the content onto it.
If you're getting a new Kindle specifically for a child, then you need to decide whether you're going have it linked to their own Amazon account, or to your account.
A personal account?
If the child/Kindle has a personal account, then that account needs an email address as well as a payment method, which probably isn't what you want to do. You could opt for a pre-paid credit card, however.
Using this means you can have a small value for some initial book purchases without having to worry about them emptying your bank account. You can always top up that pre-paid card for future purchases, but this is a rather convoluted approach.
Keep it on your account
If you opt to have the Kindle on your account (or have a child use your Kindle/old Kindle/a Kindle Kids Edition), then you'll have to make sure you use parental controls to ensure they don't spend on your account, which makes things much simpler. There there is Amazon Kids and Kids+ - previously called Fire for Kids or FreeTime - to consider as well.
This is how Amazon has really designed this arrangement to take place, specifically to cater for kids in an Amazon household.
Parental controls
Kindle has plenty of parental controls which is good place to start. If you're giving your child a Kindle, you can opt to close off the major access points to the internet: web browser, Kindle Store and Cloud.
Each of these can be disabled, with parental controls getting password protection. That means you can, for example, disable the web browser and Kindle Store on that device, but leave access to Cloud. Cloud is where your Kindle purchases are stored when not downloaded to a device - it's your complete online catalogue of content.
You can shut everything off, so you know that your child only has access to the content on the device and can't go exploring. The Kindle is still connected to the internet, there just aren't any access points from the device.
This is a better option that simply turning on Aeroplane mode, because books will still sync, and importantly, you can still send books to the Kindle from the Kindle Store on your computer's browser or phone. You can also send documents to the Kindle using the email address assigned to your Kindle device, for example coursework packs from school.
This means you can put the Kindle in the hands of your child and buy books and have them delivered to their device to read. They will just appear on the home page.
The problem with all of this is that - if your Kindle is registered to your account - then all the books you own or buy will then be available to download to your child's Kindle through the library, which is where Amazon Kids comes into play.
Amazon Kids
Amazon has a system for children called Amazon Kids. This is, essentially, a locked down area specifically for them. Using Amazon Kids means you can have "your" adult/parental side of the device fully connected and "their" child side safely locked down with only appropriate content visible.
The name changed to Amazon Kids in 2020 having previously been called Fire for Kids or FreeTime.
Amazon Kids lets you setup a child account (or accounts) and then assign books to them from your collection. Using Kids means you're buying those books on your account and sharing them, rather than buying them through an Amazon account in your child's name.
Importantly, however, once you're in Amazon Kids, you need a password to get out, so it's a safe area for your child.
Pocket-lintFrom within Amazon Kids the navigation controls work very much as they do elsewhere, so you can still go home, search, and change some settings, but it's all behind that safety barrier. There are awards and you have a reading target to encourage children to read regularly, if you have a child who works better with these types of motivations.
Progress through books will also be tracked separately from your reading. If you both want to read The Hobbit, for example, your child's progress will be tracked separately from yours. If you simply used the same account and were reading the same book, it would be constantly trying to sync that book to the furthest read page, which isn't ideal when two separate people are reading it.
Importantly, unlike only locking down a device with the parental control settings above, you still have to assign that content to Amazon Kids for your child - and this is a key point. From a practical point of view, you can send content to a Kindle devices from a browser - so if you're shopping in the Kindle Store when you buy something you can elect to send it to that device.
However, it's only then on that device, not in the Kids area for a child. That then has to be done on the device itself by the parent. You have to log out of the child's area, select the books from the library you want to add to Amazon Kids and then return to the Kids area to see all those books in a safe environment again.
Cleverly, you can turn on Amazon Kids on a device and leave it in that state most of the time. Restarting the Kindle from with in the Kids area sees it returning to Kids: the only way out is to plug in the password.
The other point to note about setting up Amazon Kids, is that you're basically creating those children as users on your account - and those can then be used on other Amazon devices too, like the Fire tablet.
We've mentioned there are two versions of the Kids service - and Kids+ will give you child access to a range of content selected by Amazon that's within an appropriate age range, so that child can find and select their own books. This makes it easier because you don't have to then allocate titles to that child for them to read - but while the content is safe, there's no knowing if it's content your child actually wants to read - we talk about that a little more below.
Households and Family Library
Family Library is a Kindle feature that let you share content with family members. It's a convenient way for you to share or manage the content you have, and you only have to buy things once.
To have a Family Library, you need to create a Household. This can consist of two adults, each with their own Amazon account, and up to four children. These child accounts are setup using Amazon Kids.
As a Household can't accept more than two Amazon accounts (notionally two parents) it is a disadvantage to have a child's Kindle with its own Amazon account, as that third account can't be accommodated and you can't share content through the Family Library. (Of course not all Households will have two parents, or might not have two parents who want to share content.)
However, once you have a Family Library setup, the two adult accounts can manage the content the children get access to. That means one adult can buy the content and the other can add or remove it from their own account if they need to.
Once you have adults and children in a Household, it's really easy to manage content through a browser. In your account settings > Manage Your Content and Devices you can see all your Kindle books and who in your household gets access to them.
What about the Amazon Kindle Kids Edition?
Amazon launched the Kindle Kids Edition very much following the model that it has used for its Fire Kids Edition tablet - it's a standard Kindle, with a case, 2-year warranty and a 1-year Amazon Kids+ subscription.
The device itself is the entry-level Kindle and there are no software differences on this device to any other Kindle - it all uses the same software features that we've talked about above. That potentially means that you can save yourself some cash by opting for this Kindle instead of the specific Kids Edition - it is about $/£20 cheaper.
SQUIRREL_12855514
However, what the Kids Edition does is bundle in these additional extras. The case is probably worth about $/£20, while the no-quibble warranty will be of interest if you have kids who are likely to break it. Then you have Amazon Kids+, which gives you a 1-year subscription to kids content. This has usually costs from $4.99 or £3.99 a month - so if that's the way you want to go, there's some advantage in buying into the Kids Edition bundle.
Pocket-lintAmazon Kids+
Beyond the hardware and the software on these devices, there's also a subscription option that Amazon offers. Amazon Kids+ is like supercharging the content on your Kindle and giving you access to a range of books for your child that are appropriate for their age.
There's a cost - and the costs vary based on whether you're a Prime subscriber or not. Originally there was a cheaper option for one child, but Amazon has now stabilised the offering for up to four children, with a simpler pricing structure.
The big huge advantage that these subscriptions offer is that they give the child access to this content, so they can browse and find things to read. If you have an older child that means you don't have to find all the books, buy them and then give your child access - they can just find stuff to read at their leisure.
The best thing about these subscriptions is that they universally apply across both Kindle and Fire tablets (so on the tablet you can access movies or games that are age appropriate) and you can then basically leave them to it.
What's the best child Kindle setup?
The range of options and approaches means that settings can be tailored to the age of your child and how much autonomy you want them to have. For the younger children, you'll want their Kindle registered to your Amazon account, but with all the parental controls engaged, so there's no access to your account, Cloud or the web browser.
Then you'll want to use Amazon Kids for that child. If they are getting their "own" Kindle device, you can then remotely control the content they get access to. You can gift books by simply buying them and assigning them to their device, but you'll have to then manually add them to the child's area on the device itself.
You remain in control of content at all times and can easily remove books that they've finished with or outgrown. Importantly, if you're buying it through your account, it's your content and you can then share it with younger members of the family. Equally, as a child grows older, using a Household, you can still share older content in the future you might have bought for yourself.
Beyond that, if you have avid readers in the family, then a subscription to the Kids+ service is well worth it. Kids' books are expensive and they will often read them in a day or so - so the ongoing access to lots of books is a definite advantage.
Most of the features are available on recent Kindle models, but sadly aren't yet available through the Kindle apps and some older devices.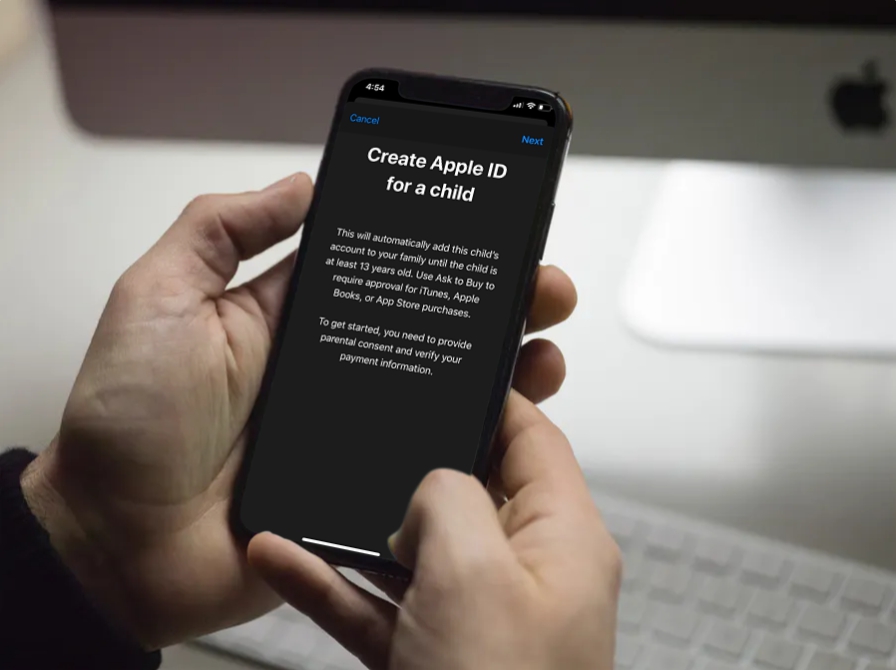 You can check full compatibility here.
Setting Up Your Child's Kindle Account - Tips for Parents
If you're considering buying your child a Kindle e-reader, Pocket-Lint's Rick Henderson has some great tips on how to set it up before handing your child a new gadget.
While it will never replace paper books as a real alternative for a child, the Amazon Kindle e-reader has many features that are ideal for younger readers. nine0003
To get started, you can buy and download a large number of books to read to your youngest children. As they get older, they can use the device to purchase and download their own games without taking up shelf space.
'How to' set up kindling for your child
However, setting up a Kindle for a child can be confusing. Or you may just not know what's wrong.
That's why we've put together this handy guide on what to consider when introducing an Amazon Kindle reader to your kids for the first time. nine0003
We're talking specifically about Kindle e-readers here, not Fire tablets, although the same information applies in many cases.
Register an account
Your Kindle must be registered with an Amazon account.
If you are purchasing a new Kindle specifically for a child, you need to decide whether you will link it to their own Amazon account or to your account.
If the child/Kindle has their own account, then that account will require an email address as well as a payment method. You don't want to hand over your credit card, so you can use a prepaid card to set up your Amazon account. nine0003
By using this facility, you can get a small benefit on some of your initial book purchases without worrying that they will empty your bank account. You can always top up this prepaid card for future purchases.
If you choose to use a Kindle on your account (or ask a child to use a Kindle), you need to make sure you use parental controls so they don't spend money on your account, or use the FreeTime feature. nine0003
Parental Controls
The Kindle has a lot of parental controls, which is a good place to start. If you give your child a Kindle, you can turn off the main Internet access points: web browser, Kindle Store, and Cloud.
Each of these can be disabled and parental controls will be password protected. This means that you can, for example, disable the web browser and Kindle Store on this device, but leave Cloud access. The cloud stores your Kindle purchases when not downloaded to your device—it's your complete online content catalog. nine0003
You can disable everything to let you know that your child can only access content on the device and cannot explore it. The Kindle is still connected to the Internet, there are simply no hotspots from the device.
This is a better option than simply turning on Airplane Mode because the books will still be synced, and importantly, you can still send books to your Kindle from the Kindle Store in your computer's browser. You can also send documents to your Kindle using the email address assigned to your Kindle, such as coursework packages from school. nine0003
This means you can give your child a Kindle, buy books and have them delivered to the reader. They will just appear on the home page.
What is Kindle FreeTime?
However, Amazon has a system for kids called Rekindle Free Time. This is, in fact, a closed area especially for them. Using Kindle FreeTime means you can fully connect "your" adult/parent side of the device, and lock "their" side safely with only their content. nine0003
Kindle FreeTime allows you to set up a child (or number of children) and then assign books from your collection to them. Using FreeTime means you buy these books on your account and share them instead of buying them through your Amazon account in your child's name.
However, it's important to note that once you're in FreeTime, you'll need a password to log out, so this is a safe area.
Navigation controls work the same way in FreeTime as they do elsewhere, so you can still go home, search, and change some settings, but it's all behind that security barrier. There are rewards and you have a reading goal to encourage kids to read regularly. nine0003
Book progress will also be tracked separately from your reading. For example, if you both want to read The Hobbit, your child's progress will be tracked separately from yours. If you were just using the same account and reading the same book, it would constantly try to sync that book to the furthest reading page, which isn't ideal when it's being read by two different people.
It's important to note that unlike the parental control settings above, you still need to assign this FreeTime content to your child. This can be done on the device itself or through the browser, so you can easily buy books and assign them to children, but this is by design. nine0003
You can enable FreeTime on your device and leave it that way most of the time. When restarting Kindle from FreeTime, it returns to FreeTime: the only way out is to enter the password.
Household and Family Library
Family Library is a new Kindle feature that allows you to share content with family members. It's a convenient way to share or manage the content you have, and you only need to buy things once.
To have a family library, you need to create a household. It can be made up of two adults, each with their own Amazon account, and up to four children. These child accounts are configured with FreeTime.
Since a household cannot accept more than two Amazon accounts (two parents), having a Kindle with their own Amazon account is a disadvantage because a third account cannot be hosted and you cannot share content through the Family Library. (Of course, not all households will have two parents, or may not have two parents who want to share content.)
However, if you have a Family Library Setup, two adult accounts can control the content children access. This means that one adult can buy content and another can add or remove content from their account as needed.
If you have adults and children in the family, managing content through the browser is very easy. In your account settings must Manage content and devices you can see all your Kindle books and who in your family has access to them. nine0003
What is the best Kindle setup for kids?
The variety of options and approaches means settings can be adapted to your child's age and the degree of autonomy you want them to have. For younger kids, you want their Kindle to be registered with your Amazon account, but with all parental controls turned on, so no access to your account, cloud, or web browser.
Then you'll want to use FreeTime for this child. If they get their "own" Kindle device, you can remotely control the content they access. You can gift books simply by purchasing them and linking them to their FreeTime account. nine0003
You are always in control of the content and can easily delete books that are out of stock or have grown. It's important to note that if you buy it through your account, it's your content and you can share it with younger family members. Likewise, as the child gets older using the household, you can still share older content in the future that you may have purchased for yourself.
How to set up and use your Kindle Paperwhite
Have you just received a new Kindle Paperwhite? You've made a great choice - the Paperwhite offers the best combination of features and value for money. and you'll love using eReader But if you don't know how to start using your device, you've come to the right place.
Read on to learn everything you need to know about using the Kindle Paperwhite, including how to set it up, get the most out of it, and fix common problems. nine0003
1. Unpack and set up your Kindle Paperwhite
Open the box and you'll find only a few items inside:
- The Kindle Paperwhite e-reader (hereinafter referred to simply as Kindle or Paperwhite for short).
- microUSB 2.0 cable (charger not included).
- A Quick Setup Guide that basically just tells you to plug in and turn on your Kindle.

- Warranty/Legal Information Guide. nine0094
You may notice that the USB charger is not included in the package. Amazon assumes shoppers are sitting around as many phones, tablets and other devices use them. If you don't have one, you can buy a basic one from Amazon or just charge your Kindle with your PC. It only needs to be charged every few weeks, so don't keep it tied to the wall all the time.
Get your Kindle online
Connect your Paperwhite and let the battery fully charge. When you're ready, press and hold the power button at the bottom and turn it on. In a second, you will see the beginning of the installation process. Click on your language and then give your Kindle another moment to load. If you see a screen flash, don't worry - it's a normal part of e-ink technology refreshing.
Tap the screen when you see the Kindle welcome message. First, you need to connect your device to your home Wi-Fi. Press Connect to Wi-Fi", and your Kindle should find the name of your local network. Touch it, and then use the keyboard to enter the network password.
Connect to Amazon and other accounts
Now that your Kindle is online, you need to connect it to your Amazon account. Assuming you have, click Use an existing Amazon account . If you don't, click Create a new account and follow the instructions there. Enter your Amazon account email and password, then click Register . Those who use two-factor authentication, use two-factor authentication. on your Amazon accounts, you will see a prompt to enter the code after clicking the Register button. If you see an error, make sure you entered your email address correctly, as it's easy to make a mistake.
Once your Amazon account goes through, you will see message Hello prompting you to set the device time. If you're in the US, it will probably default to Pacific Time, so tap the prompt here and set the correct time for your region. Then click Continue setup .
You're almost there! The Paperwhite will then ask you to connect your Facebook and Twitter accounts to your Amazon account. It allows you to share wishlists, testimonials, and more. If you don't want to do this, press Connect later - this is optional.
There is another account that Amazon wants to connect to - Goodreads. This free service allows you to keep track of the books you read. and want to read. It lets you chat with friends and offers personalized recommendations when it learns a bit about your preferences. Click " Connect an existing account", if you are already using the service, " Create a new account", if you don't have it, or Skip to switch to Goodreads.
Finally, you'll see an offer to try Kindle Unlimited, Amazon's all-to-read service. It costs $10 per month and lets you choose from over a million books if you're a subscriber.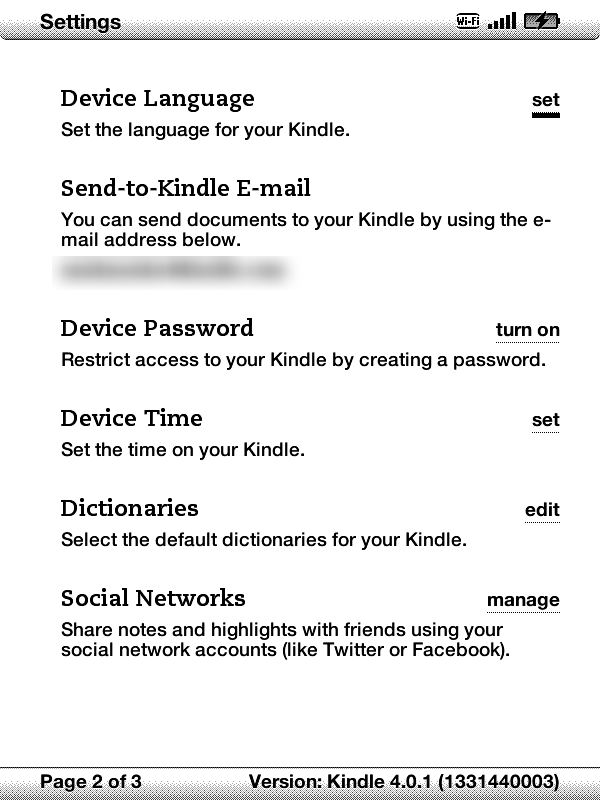 You can start a one month free trial, but we don't think this service is really worth it Click No, to sign up now.
Navigation Basics
OK - no more connecting accounts! The Kindle Tutorial concludes with a brief overview of the navigation features, which we'll summarize here:
- The toolbar at the top of the screen lets you navigate your Kindle. If you don't see it (for example, when you're reading a book), tap at the top of the screen to open it.
- Click the Home icon, to return to your homepage with current books and links to new ones. nine0094
- Use Back, to go back one step to where you just were. For example, if you were on the Top Sellers page and clicked on a particular book, clicking the Back button would take you back to the Top Sellers page.
Press the quick action icon (gear) to quickly set the settings:
- flight mode will stop all wireless communications.
 to prevent your device from connecting to Wi-Fi. This is useful for saving battery when you know your device won't be online. nine0094
 - Sync My Kindle will update your device with any purchases from other devices in your Amazon account. This also happens automatically in the background.
- Use the light bar to adjust the backlight from 0 (off) to 24 (max). If you're having trouble touching a particular square, touch the left sun icon to decrease the brightness by one and the right icon to increase it by one. nine0094
- Touch the mechanism All settings, to open the full menu settings , which we will talk about later.
- The main screen displays your latest books on the left, the ones you just downloaded and read.
- To the right of House you will find the books that are your Amazon Wish List.
 It also contains your Goodreads wishlist and any free samples you've uploaded. nine0094
 - The lower part of house shows recommendations for you.
This will take you to the main screen. You are now ready to buy books and read them on your Kindle!
2. Using Your Kindle
Now that your Paperwhite is fully set up, you probably want to start reading some books, right? Here's how you do it...
Buying a book
Amazon's library of Kindle books is huge. No matter what genres you are interested in, you are sure to find something you like. nine0003
Press the Store button at the top of the screen to view. You'll see featured titles at the top, as well as bestsellers, new releases of and more in the store. Click Browse Categories, if you are looking for a specific genre. In addition, you can click on the search bar and look at the book at any time.
Once you've found a book you'd like to read, click on it to view the product page. This will show you how many pages the book has, when it was released and more. Scroll down for a short description and reviews to make sure it's what you're interested in. If you're unsure, many books have the option " Sample Sample", so you can start reading the name before you buy. Click this button and your Kindle will bring the sample to your home screen.
When you're ready, click " Buy for $X", to buy the book. This is a one touch process, so be careful not to hit it by mistake! When you buy a book, you will see a Cancel button that you can click if the purchase was accidental. Then, in a moment, your Kindle will download your book to your device and you can start using it. nine0003
All your purchases are stored in the cloud for your Amazon account. This means you can download them to Kindle reader apps on other devices. or, if needed, redownload them to your Kindle. If you don't have much money to spend on Kindle books, there is plenty of free content out there. and here!
Of course, since your Kindle can only display black and white images, it's better to buy art books or anything else with lots of physical color pictures. nine0003
Reading a book
Once you have loaded your book, go back to the main screen and you will find it on the left side. Click My Library, to view all your books if you don't see it. Click on your book and it will go into reading mode.
As you might expect, reading the book is actually quite easy. Click anywhere on the right side of the screen to go to the next page. Similarly, touch the left side of the screen to return to the page. You can click on the top of the screen to open a toolbar that offers the same features Home , Back and other options we discussed earlier.
However, while in a book, the toolbar allows you to adjust several reading options to make the process more enjoyable. Click the icon Aa, to change the font settings. You can choose from several font styles and sizes. Click the heading of page nearby to adjust line spacing, margins, page orientation, and text alignment. nine0003
Finally, the heading " Reading Progress" lets you change the little indicators at the bottom that let you know how far you've progressed in the book. By default, this setting is set to Location , which displays Loc 123 in the lower left corner while reading. Page numbers have little to no bearing on Kindle books due to the many ways to change what is displayed on the screen. So location provides another way to track your progress.
If you don't find this useful, you can change this to page in book , remaining time in chapter or remaining time in book .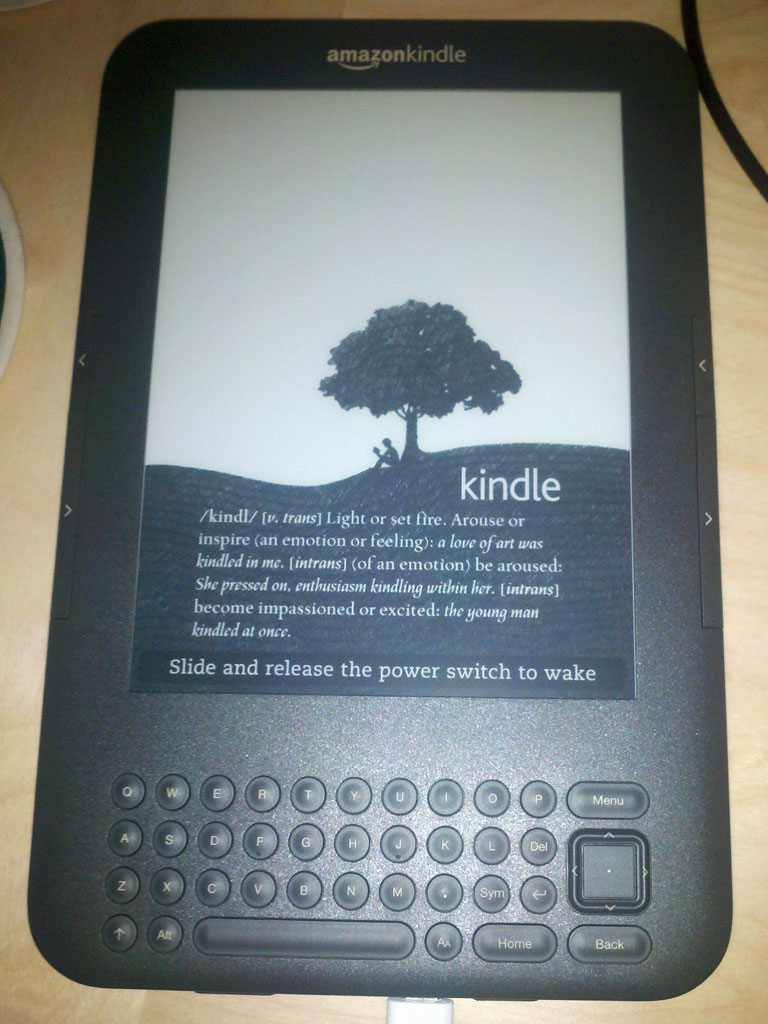 At the bottom right, your percentage of progress in the book will be displayed.
3. Advanced Tools
So now you know how to access books on your Kindle, but there are many more tools and ways to go beyond the basics. Let's take a look at them so you can take full advantage of the Kindle. nine0003
Kindle FreeTime
Want your kids to read more often? Letting them use your Kindle is a great way to do this. A feature called Kindle FreeTime allows you to restrict access to the store and web browser. Your children can only read the books you have specified. To get started, click the Menu three-dot button on the right side of the toolbar and tap Kindle FreeTime .
Press Get Started , then you will need to adjust a few parameters. Set a parental control password if you don't already have one, then enter your child's basic information to create their profile. You can then select the books in your library that you allow your child to read. If you like, you can customize their access to achievements (which reward them for reading) and change their daily reading goal from 30 minutes.
When it's time to read them, just go to Menu > Kindle FreeTime and ask your child to choose their name. To log out, go to Menu > Log out Kindle FreeTime and enter your password. Check out the Amazon Kindle FreeTime Unlimited plan if your kids are avid readers.
Vocabulary Builder
Go to Menu > Vocabulary Builder, to access this handy tool. While reading, you can press and hold any word to find its definition. Each time you do this, your Kindle adds the word to this list for later review. Here you can click on the words to view their definitions or work on some of the flashcards. to finally deal with them. nine0003
Experimental browser
Did you know that your Paperwhite includes a basic web browser? It is not intended for gaming or watching videos, but will work for casual web browsing. No wonder Flash doesn't work here and everything is in black and white. However, if you want to read a blog or check the news with your Kindle, it's possible. And if you need to go somewhere, check out the most important sites for Kindle owners. nine0003
Built-in dictionary and highlight
Are you not sure what a word means while reading? No problem - just press and hold it for a moment and you'll see a popup with its definition. Slide the box to go to the Wikipedia page on the word, as well as the translation utility. about the translator To launch the complete dictionary, press the three-dot menu button under the highlighted word and press Open Dictionary .
When you long press on a word, you can also press the Highlight or Note buttons to mark passages for later. Use the handles around the text to select exactly what you want. To select directly, simply swipe across the text.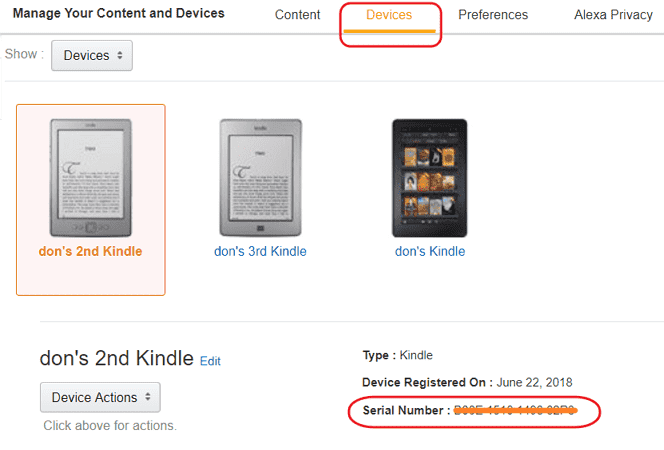
Quick Navigation
Press the Go to button on the top toolbar and you can navigate to another location in the book. You can go to top or content or enter a specific location / page number. Click Notes, to view the highlights and notes you added earlier.
You can also bookmark pages without having to use scraps of paper. Click in the top right corner of any page to open the bookmark menu. You will see a list of other bookmarks; click the icon + (plus), to bookmark the current page. If you click on an old bookmark, you will see a preview of that page and you can click on it to return there. Whenever the current page is bookmarked, you will see a black bookmark in the top right corner. nine0003
To scroll through multiple pages at once, touch the top of the screen to open the toolbar. At the bottom of the screen, you will see two buttons. The left one lets you view one page at a time when you use the slider to scroll to a specific location. Click to the right and you will see a grid of all the pages of the book. Scroll with the slider below and tap the page to go to it.
Either way, click X in the top right corner to close and return to the original page. nine0003
X-Ray
X-Ray is a feature that Amazon describes as "getting to the bones of the book." It is not available for all editions, but it still helps a lot. Open the toolbar and click on X-ray (next to Go ) to access it.
This feature will find prominent clips in the book, as well as important people, terms, and images. Press " People" or " Terms" and you will see how many times certain characters and terms are mentioned. You can use this to quickly get a feel for the book's main ideas, or to refresh your memory of who the character is if you forget.
Less time to remember past events means more time to read, which is always a good thing.
Goodreads
Click the Goodreads icon on the toolbar to open its interface. You can rate the titles you've read and get new recommendations if you're looking for something fresh. nine0003
4.
Settings Settings Your Kindle has several options that you should tweak to your liking for best results. Let's take a look at what they are doing. To access them, tap on the settings gear at the top of the screen and select All settings . You can also press the menu button from the three dots and select Settings .
My account
Under " My Account " you'll find several options to personalize and connect your Kindle to different networks:
- Device Name: Change the default [Name's] Kindle to something else if you want .
- Personal information: add some information to identify your device.
 You can add your email address or phone number here to make it easier to get them back if lost. nine0094
 - Social networks: If you have not previously connected to Facebook, Twitter or Goodreads, you can do so here.
- Unregister device: use this to disconnect your Kindle from your Amazon account. Useful if you're selling or upgrading your Kindle.
- Special Offers: allows you to hide special offers that may not be suitable for certain audiences, or hide personalized recommendations. nine0094
- Send-to-Kindle Email: allows you to view a special email address where you can send PDF files and other documents. Anything that receives this mailbox will appear on your Paperwhite.
Household and family library
Here you can create a household. This allows you and one other adult, as well as four children, to join to create a family account. accounts. accounts. Using this feature, you can share books between your Kindles. You obviously have to add another user to your account in order to use this. nine0003
wireless
Visit this section if you need to change your wireless settings. When you open it, you will see all the Wi-Fi networks nearby and can join them just like you did during installation.
Device Settings
These settings allow you to customize how your Kindle works:
- Device Password: Set a password to prevent other people from using your Kindle without permission. nine0094
- Device Time: If your Paperwhite's time is incorrect, correct it here.
- Device Information: View basic information about your device such as serial number, firmware version, and available disk space.
- Update your Kindle: Install the latest software update for your Kindle. It should automatically do this when charging in sleep mode, but you can use this to manually test it.
 If this option is grayed out, you are in the know. nine0094
- Reboot: Turn Kindle on and off again. You should do this if your device seems to be sluggish. after prolonged use.
- Reset Device: this will delete all content on your Kindle and restore it to factory default settings. Do not do this unless you are selling or giving away your device!
Advanced settings: change some advanced settings:
- Home Screen Appearance: Disable this setting to disable suggested content on the Home screen.
- Whispersync for Books: enabled by default, this is an Amazon feature to sync your progress across devices. This allows you to pick up your Kindle where you left off, such as an iPad. Saving this also maintains your notes.
- Delete Wi-Fi passwords. If you have saved any Wi-Fi network password in Amazon for convenience, you can delete it here.
 nine0094
Reading Options
Check these options to change settings that may affect your reading experience:
- Refresh Page: is disabled by default, if you enable this option, Kindle will completely refresh the screen every time when you turn the page. This can help with "ghost" images, but will also negatively impact battery life. We recommend disabling this option if ghost images do not affect your reading. nine0094
- Next in series: with this enabled, when you are almost done with the book, you will see an invitation to buy the next in the series.
- Language Learning: This allows you to enable the Word Wise feature to help you with unfamiliar words, as well as the Vocabulary Builder feature, to help you learn words. We have discussed both of these elsewhere in the guide.
- Notes about this book: Switch popular highlights and public notes, which show popular excerpts and notes highlighted by other users.
 You can also disable the About This Book popup that is displayed when you open a new book for the first time.
Languages and Dictionaries
If you want to use your Kindle in a different language, take a look at the following options:
- Language: Change the language from the one you set when you received your Kindle. nine0094
- Keyboards: add a keyboard for a second language.
- Dictionaries: Set dictionary to as default. for each language on your device.
Parental Control
If you have young children and want to protect them from adult content about Kindle, you can set it here:
- Kindle Freetime: Set up the FreeTime feature we talked about earlier. nine0094
- Restrictions: Turn off access to the web browser, Kindle Store, Cloud, and Goodreads to limit what your children can do.
 Disabling any of these requires setting a parental control password.
 - Change password: Change the parental control password . It looks greyed out if you don't already have a password set.
Be aware that your child may find a way to bypass parental controls. which your children can bypass parental control software. which your children can get around
legal
If you're really bored, you can read 339 pages on legal. But you should probably find a better book to read instead.
5. Miscellaneous
We've covered the entire setup process and just about everything you can do with your Kindle Paperwhite. There are just a few extra bits you need to know before you leave.
About electronic ink
Your Kindle has an electronic paper screen (read more on Wikipedia). This means it looks like real paper, unlike a traditional tablet or phone screen. Plus, the front-lit display means the light is on the page, not in your eyes.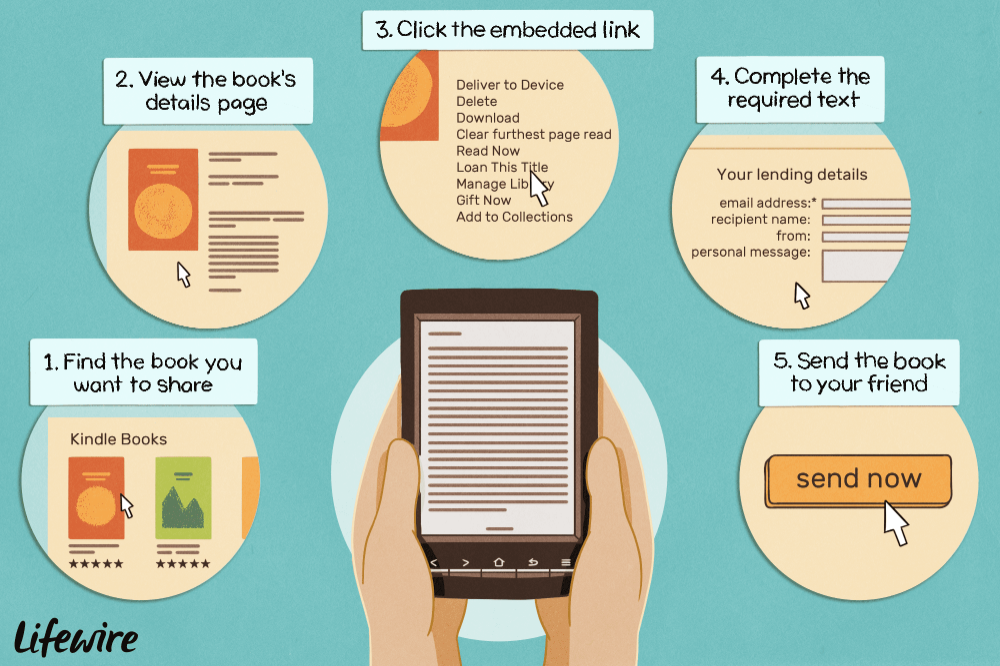 This way your eyes are much less strained and you don't have to worry about blue light keeping you up at night. nine0003
You also don't have to worry about e-ink burning on the screen. When you put your Kindle to sleep, it displays the splash screen, but the image doesn't change. An e-ink screen displaying a static image consumes little to no battery power - redrawing the page is what uses energy. Sometimes you may notice a "ghost" image when you refresh your screen. This is normal and refreshing the screen a few more times will clear it. nine0003
Sleep and Shutdown
Your Kindle will automatically go to sleep if you do nothing for a few minutes. When you are done using it, you must put it to sleep manually. You can do this by pressing the power button on the bottom of the device. When you press it, the "Special Offer" splash screen appears and your backlight turns off. If you have a magnetic case for your Paperwhite, closing the lid will also activate sleep mode. nine0003
Convinced my mother that her Kindle is voice activated so all I hear in the dead of night is "off" "off" "off"
— Cavo Sanatra (@Allie_gatah) June 15, 2016
You can completely turn off your Kindle by pressing and holding the power button for about five seconds. When the power is off, the screen turns off. However, you don't need to do this unless you plan on turning your Kindle off for a long time. In sleep mode, the device consumes the least battery power - the backlight is off and a static image is displayed. nine0003
If your Kindle gets cold, press and hold the power button for 10 seconds or more until it restarts.
Battery Life
Amazon claims the Paperwhite's battery life is "weeks". More specifically, the product page says:
One charge lasts six weeks, based on half an hour per day of reading with wireless off and lighting set to 10.
Battery life varies by lighting and wireless usage. nine0003
You will probably not be far from an outlet for several weeks. But just in case, there are a few steps you can take to minimize battery usage. If you're not downloading a book or using a browser, leave Airplane Mode enabled so your Kindle doesn't try to communicate with the Internet.
Also, turn down the brightness of your device as much as possible. In bright light, you probably won't need light at all.
Storage space
The Kindle Paperwhite has 4 GB of built-in memory. While that doesn't sound like much, a Quora user has dialed in the numbers to come up with an approximate number of books you can store. In short, he found that the average eBook is about 1.87MB. Considering that about 3 GB of space on your Kindle is usable, that means you can store about 1,600 books.
So don't be afraid to take samples and risk deals - your Kindle can hold them! nine0003
Wi-Fi / 3G
You probably bought the Wi-Fi-only Kindle because it's cheaper. If so, you can only download books and surf the Internet when you are connected to a Wi-Fi network. Models with 3G access can download new books if they have a signal.
Word Wise
Word Wise is a useful feature that helps you with difficult words. Open a book, then tap the top of the screen to open the toolbar. Press button menu of three dots, and then click Word Wise . It is disabled by default; change the top slider to On, to turn it on.
Your Kindle will now show synonyms for compound words so you don't have to manually pull up definitions. You can even use your Paperwhite for language learning to learn a language from if you like.
Special Offers
Unless you paid extra to remove them when you bought Kindle, you will receive special offers as a screensaver on your device. They also appear at the bottom of the home screen. They alert you to Kindle deals and other Amazon specials. You might like the variety of splash screens and the ability to easily see the latest offers, but if you don't, you can remove them for a one-time fee of $20. nine0003
Go to the Amazon content and device management page on the web. Click the " Your Devices" tab and find your Kindle in the list. Click the button with three dots in the Actions section , then click Edit in the section Special Offers . You will see a notification about special offers; click Unsubscribe Now, to charge $20 to your default payment method. If you want to remove specials for free, some have had success simply by contacting Amazon customer support to remove them. nine0003
While you're here, you should also click Set as Device to the default for your Kindle. This will automatically deliver the content you buy online to your Paperwhite.
6. Troubleshooting Kindle Paperwhite
You may encounter some problems while using your Paperwhite. The most common issues are collected here so you know what to do when they pop up. nine0003
Ghost Images
As we mentioned in the manual, the e-ink screen can sometimes leave a faint image of what was on the screen before. Unlike burn-in on smartphone screens, this is temporary and should not cause you concern.
Refreshing the screen will remove any ghost image. To do this anywhere, just tap the top of the screen to open the toolbar, then tap it below it to close the toolbar. As you read, your book will update the display every few pages. nine0003
Can't connect to Wi-Fi
Once you've added a Wi-Fi network to your Paperwhite, it should automatically connect when you're in range. But if it doesn't connect, you may need to add the connection manually. To do this, open the toolbar and tap All Settings . Look at the Wireless tab and make sure your current network is listed with a checkmark next to it.
If you see a check mark but still can't connect to a network, click the name of the network. Your Kindle will then ask if you want to forget this network. Select Yes", and then reconnect by touching it again and entering your password.
If you're still having problems, try restarting your Kindle and your home router to make sure the problem doesn't go away.
Synchronization not working
Amazon Whispersync allows you to sync reading across devices. So if you've read a few pages of a book on your iPad, Amazon will sync that progress to your Paperwhite so you can pick up where you left off. nine0003
If this does not work properly, make sure you are online as we discussed above. When your Kindle is in Airplane Mode, it does not connect to the Internet and does not sync this information.
Also check that Whispersync is enabled. Go to the Your content and devices page, then go to the Settings tab. Scroll down and make sure device sync is enabled . You should not turn this off unless you and the other person are reading the same book using the same account. This is very handy if you don't fall into that particular use case. nine0003
Books out of order
If you want the books in your library to be displayed in a different order, press My Library on the main screen. In the top right corner you will probably see Recent . You can change this to Title or Author if you prefer. You can also click on the heading All items and change the display from grid view to list view . nine0003
Forgot password
Adding a password to your Kindle means you can't sign in without entering it. If you added it and forgot the password, you can reset the device using a special code. Please note that this will delete all your personal information and content on the device. But since everything is synced to your Amazon account, you can re-download all your books in no time.
To enter the master reset code, touch the password field and enter 111222777 . This will reset your device to factory settings. Refer to the beginning of the manual for instructions on how to set it up again.
Convert EPUB to Kindle Format
Kindles use the MOBI format, but EPUB is more common on the Internet for free eBooks. Your Kindle cannot read the EPUB format natively, but with a quick conversion, you can make sure these books work on your Kindle.
The tool for the job is Caliber . Install it on your computer for free and then you can go through the process of converting EPUB books. Press Add books" at the top and select the books you want to convert from your computer. Then select a book from the list and choose Convert Books. Make sure that Output Format in the upper right corner says MOBI , and click OK .
Give Caliber a minute and you can save the updated book to your PC. The best way to send them to your Kindle is via email. Visit the Manage Content and Devices page and click the 9 tab0069 Your devices ". Select your Kindle and click the button below Actions next to it. You will see a pop-up menu with the email address @ kindle.com .
Any Kindle-supported document you send to this email will appear on it. This is much more convenient than connecting a USB cable to the device and transferring them manually. Wait a bit and you'll see your latest MOBI books ready to be read on your Kindle.
What will you read first? nine0089
If you've come this far down the page, you should know everything you need to know about setting up and using your Kindle Paperwhite. We've covered setting up your device, buying and reading books, using advanced features, changing your settings, and various odds. If you have a question that is not answered in this guide, go to section My Library on the Kindle home screen and find the Kindle Paperwhite 9 User Guide0070 .
