How to cpr child
How to resuscitate a child
This page provides the full detailed cardiopulmonary resuscitation (CPR) sequence for infants (babies under 1 year old) and children.
It's highly recommended that every parent or carer goes on a first aid course, as it makes this process much easier to understand and remember.
If a baby or child is unresponsive and not breathing normally, call 999 and start CPR straight away.
When you call 999 for an ambulance, you should be given basic life-saving instructions over the phone, including advice about CPR.
Child and baby CPR steps
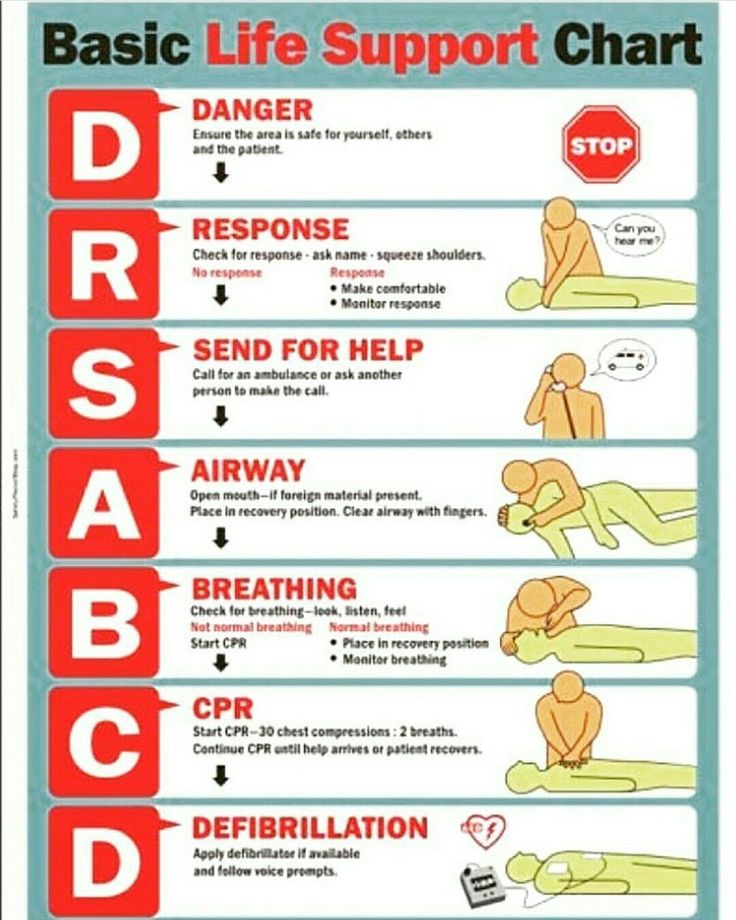
1. Ensure the area is safe
- Check for hazards, such as electrical equipment or traffic.
2. Check your child's responsiveness
- Gently stimulate your child and ask loudly: "Are you alright?"
3a.
- Leave them in the position they were found in (provided they're not in danger).
- Check their condition and get help if needed.
- Reassess the situation regularly.
3b. If your child does not respond
- Call for help.
- Carefully turn the child on their back.
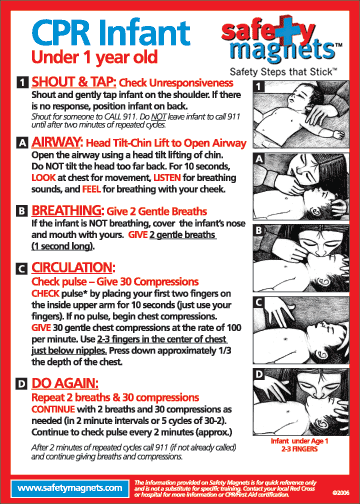
If the child is under 1 year old:
- Ensure the head is in a neutral position, with the head and neck in line.
- At the same time, with your fingertips under the point of your child's chin, lift the chin. Do not push on the soft tissues under the chin as this may block the airway.
If the child is over 1 year old:
- Open your child's airway by tilting the head and lifting the chin.
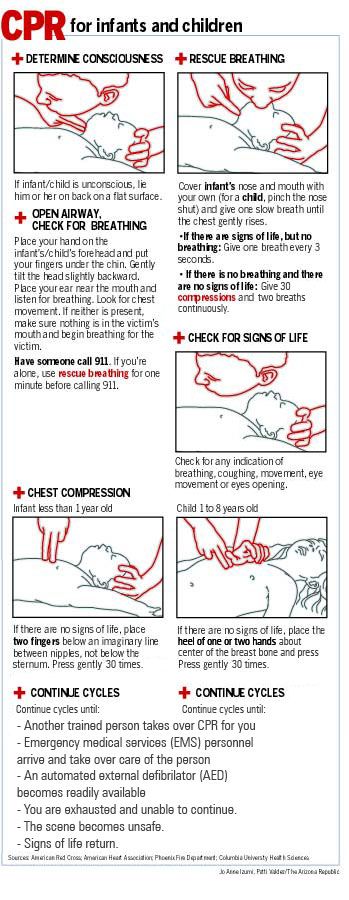
- To do this, place your hand on their forehead and gently tilt their head back.
- At the same time, with your fingertips under the point of your child's chin, lift the chin. Do not push on the soft tissues under the chin as this may block the airway.
If you think there may have been an injury to the neck, tilt the head carefully, a small amount at a time, until the airway is open. Opening the airway takes priority over a possible neck injury.
4. Check their breathing
Keeping the airway open, look, listen and feel for normal breathing by putting your face close to your child's face and looking along their chest.
- Look for chest movements.
- Listen at the child's nose and mouth for breathing sounds.
- Feel for air movement on your cheek.
Look, listen and feel for no more than 10 seconds before deciding that they're not breathing.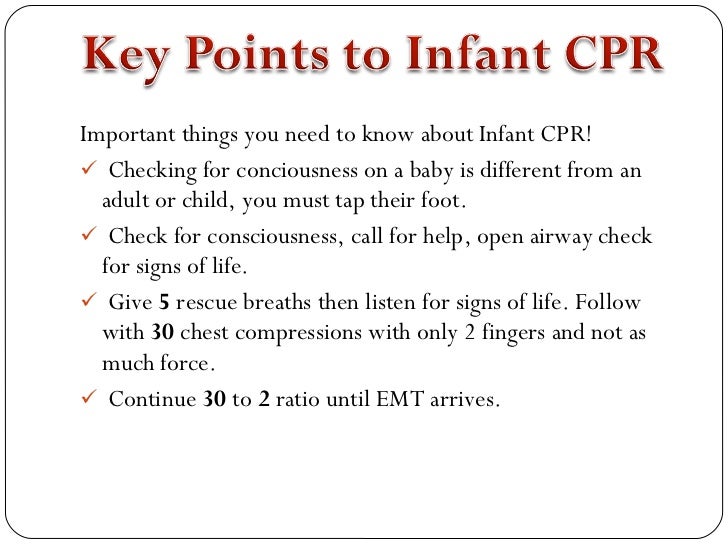 Gasping breaths should not be considered to be normal breathing.
5a. If your child is breathing normally
- Turn them on their side.
- Check for continued breathing.
- Send or go for help – do not leave your child unless absolutely necessary.
5b. If your child is not breathing or is breathing infrequently and irregularly
- Carefully remove any obvious obstruction in the mouth.
- Give 5 initial rescue breaths (mouth-to-mouth resuscitation).
- While doing this, note any gag or cough response – this is a sign of life.
Rescue breaths for a baby under 1 year
- Ensure the head is in a neutral position and lift the chin.
- Take a breath, then cover your baby's mouth and nose with your mouth, making sure it's sealed.
 If you cannot cover both the mouth and nose at the same time, just seal either with your mouth. If you choose the nose, close the lips to stop air escaping.
 - Blow a breath steadily into the baby's mouth and nose over 1 second. It should be sufficient to make the chest visibly rise.
- Keeping their head tilted and chin lifted, take your mouth away and watch for the chest to fall as air comes out.
- Take another breath and repeat this sequence 4 more times.
Rescue breaths for a child over 1 year
- Tilt the head and lift the chin.
- Close the soft part of their nose using the index finger and thumb of the hand that's on their forehead.
- Open their mouth a little, but keep the chin pointing upwards.
- Take a breath, then place your lips around their mouth, making sure it's sealed.
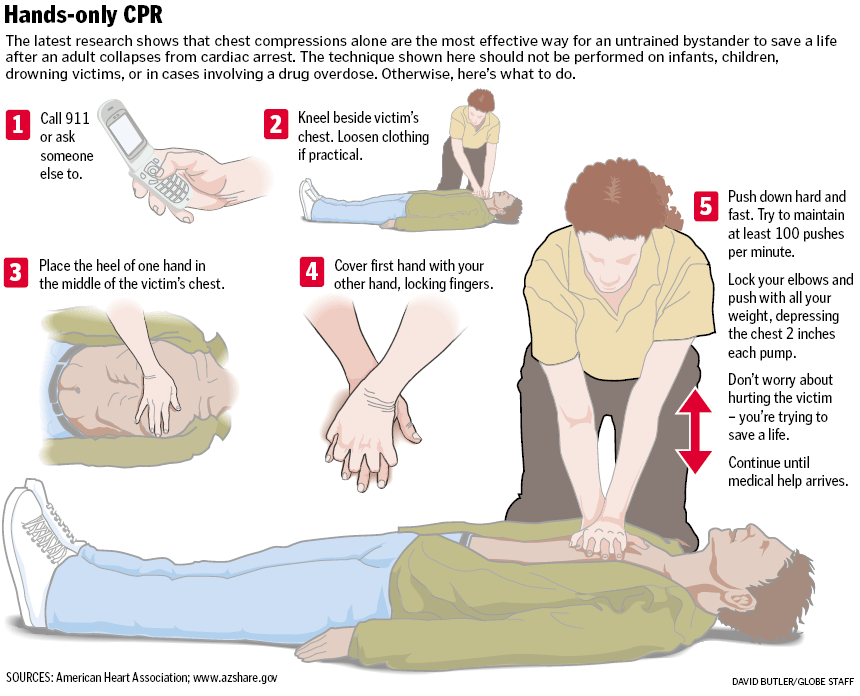
- Blow a breath steadily into their mouth over about 1 second, watching for the chest to rise.
- Keeping their head tilted and chin lifted, take your mouth away and watch for the chest to fall as air comes out.
- Take another breath and repeat this sequence 4 more times. Check that your child's chest rises and falls in the same way as if they were breathing normally.
5c. Obstructed airway
If you have difficulty achieving effective breathing in your child, the airway may be obstructed.
- Open the child's mouth and remove any visible obstruction. Do not poke your fingers or any object into the mouth.
- Ensure there's adequate head tilt and chin lift, but the neck is not overextended.
- Make up to 5 attempts to achieve effective breaths (enough to make the chest visibly rise).
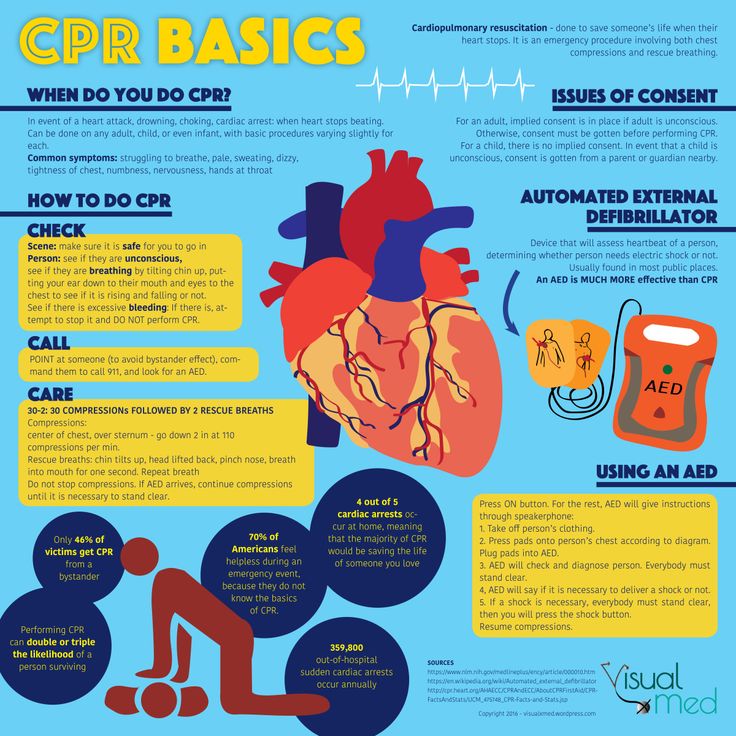 If this is still unsuccessful, move on to chest compressions combined with rescue breaths.
6. Assess the circulation (signs of life)
Look for signs of life. These include any movement, coughing, or normal breathing – not abnormal gasps or infrequent, irregular breaths.
Signs of life present
If there are definite signs of life:
- Continue rescue breathing until your child begins to breathe normally for themselves.
- Turn the child on their side into the recovery position and send for help.
- Continue to check for normal breathing and provide further rescue breaths if necessary.
No signs of life present
If there are no signs of life:
- Start chest compressions immediately.
- Combine chest compressions with rescue breaths, providing 2 breaths after every 30 compressions.
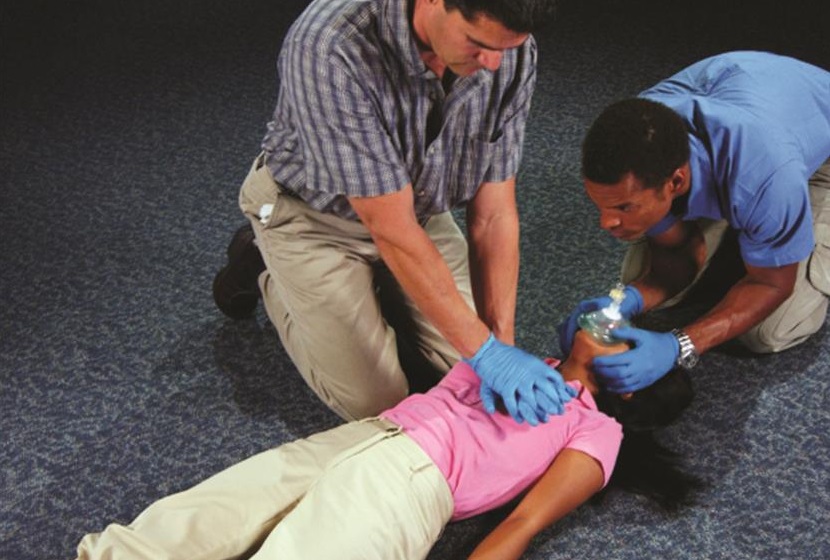
7. Chest compressions: general guidance
- To avoid compressing the stomach, find the point where the lowest ribs join in the middle, and then 1 finger's width above that. Compress the breastbone.
- Push down 4cm (for a baby or infant) or 5cm (a child), which is approximately one-third of the chest diameter.
- Release the pressure, then rapidly repeat at a rate of about 100-120 compressions a minute.
- After 30 compressions, tilt the head, lift the chin, and give 2 effective breaths.
- Continue compressions and breaths in a ratio of 2 breaths for every 30 compressions.
Although the rate of compressions will be 100-120 a minute, the actual number delivered will be fewer because of the pauses to give breaths.
The best method for compression varies slightly between infants and children.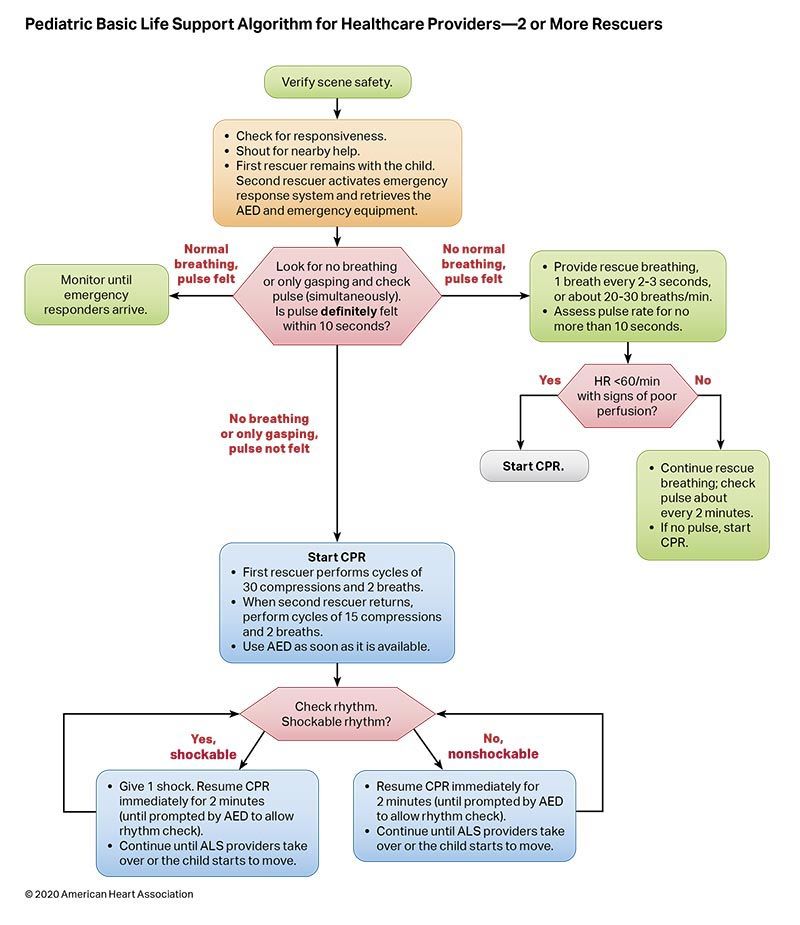
Chest compression in babies less than 1 year
- Do the compressions on the breastbone with the tips of 2 fingers, not the whole hand or with both hands.
- The quality (depth) of chest compressions is very important. If the depth of 4cm cannot be achieved with the tips of 2 fingers, use the heel of 1 hand.
Chest compression in children over 1 year
- Place the heel of 1 hand over the lower third of the breastbone.
- Lift the fingers to ensure pressure is not applied over the ribs.
- Position yourself vertically above the chest and, with your arm straight, compress the breastbone so you push it down 5cm, which is approximately one-third of the chest diameter. The quality (depth) of chest compressions is very important.
- In larger children or if you're small, this may be done more easily by using both hands with the fingers interlocked, avoiding pressure on the ribs.

If you had no response to your call for help and you're alone, continue resuscitation for about 1 minute before trying to get help – for example, by calling 999.
8. Continue resuscitation until
- Your child shows signs of life – normal breathing, coughing, movement of arms or legs.
- Qualified help arrives.
Further information on first aid
- St John Ambulance: How to do baby CPR
- St John Ambulance: How to do CPR on a child
- British Red Cross: First aid training courses
Page last reviewed: 28 September 2022
Next review due: 28 September 2025
How to Perform Child and Baby CPR
Your browser's Javascript functionality is turned off. Please turn it on so that you can experience the full capabilities of this site.
-
Although you hope you'll never use cardiopulmonary resuscitation (CPR) for a child or infant, it's important to know the steps so that you can help in the event of a cardiac or breathing emergency. And although you may have taken a class in child CPR, it's a good idea to keep the steps handy so that the information stays fresh in your memory. With our printable step-by-step guide, you can access the child and baby CPR steps anytime, anywhere. Simply print them up and place them in your car, your desk, your kitchen or with your other first aid supplies, then read over them from time to time to help maintain your skills.
Find a Class
Before Giving Child or Baby CPR
1
Check the scene for safety, form an initial impression, obtain consent from the parent or guardian, and use personal protective equipment (PPE)
2
If the child or baby appears unresponsive, check the child or baby for responsiveness (shout-tap-shout)
- For a child, shout to get the child’s attention, using the child’s name if you know it.
 If the child does not respond, tap the child’s shoulder and shout again while checking for breathing, life-threatening bleeding or another obvious life-threatening condition
 - For a baby, shout to get the baby’s attention, using the baby’s name if you know it. If the baby does not respond, tap the bottom of the baby’s foot and shout again while checking for breathing, life-threatening bleeding or another obvious life-threatening condition
- Check for no more than 10 seconds
3
If the child or baby does not respond and is not breathing or only gasping, CALL 9-1-1 and get equipment, or tell someone to do so
Performing Child & Baby CPR
1
Place the child or baby on their back on a firm, flat surface
- For a child, kneel beside the child
- For a baby, stand or kneel to the side of the baby, with your hips at a slight angle
2
Give 30 compressions
- For a child, place the heel of one hand in the center of the child’s chest, with your other hand on top and your fingers interlaced and off the child’s chest
- Position your shoulders directly over your hands and lock your elbows
- Keep your arms straight
- Push down hard and fast about 2 inches at a rate of 100 to 120 per minute
- Allow the chest to return to normal position after each compression
- For a small child, use a one-handed CPR technique
- Place the heel of one hand in the center of the child’s chest
- Push down hard and fast about 2 inches at a rate of 100 to 120 per minute
- For a baby, place both thumbs (side-by-side) on the center of the baby’s chest, just below the nipple line
- Use the other fingers to encircle the baby’s chest toward the back, providing support
- Using both thumbs at the same time, push hard down and fast about 1 ½ inches at a rate of 100 to 120 per minute
- Allow the chest to return to its normal position after each compression
- Alternatively, for a baby, use the two-finger technique
- Use two fingers placed parallel to the chest in the center of the chest
- For a baby, if you can’t reach the depth of 1 ½ inches, consider using the one-hand technique
3
Give 2 breaths
- For a child, open the airway to a slightly past-neutral position using the head-tilt/chin-lift technique
- For a baby, open the airway to a neutral position using the head-tilt/chin-lift technique
- Blow into the child or baby’s mouth for about 1 second
- Ensure each breath makes the chest rise
- Allow the air to exit before giving the next breath
- If the first breath does not cause the chest to rise, retilt the head and ensure a proper seal before giving the second breath.
 If the second breath does not make the chest rise, an object may be blocking the airway
4
Continue giving sets of 30 chest compressions and 2 breaths until:
- You notice an obvious sign of life
- An AED is ready to use
- Another trained responder is available to take over compressions
- EMS personnel arrive and begin their care
- You are alone and too tired to continue
- The scene becomes unsafe
- You have performed approximately 2 minutes of CPR (5 sets of 30:2), you are alone and caring for baby, and you need to call 9-1-1
Be prepared for moments that matter by taking a CPR class and you could help save a life.
Find a Class
- For a child, shout to get the child’s attention, using the child’s name if you know it.
Pass to Seversk - how to do | pass office
- Details
- Posted on 02/21/2020 10:34 AM
How to get a pass to Seversk
1. To issue a pass, you must carefully read the extracts from the instructions posted on the website in the section "Restrictions" or on the website of the administration of ZATO Seversk www.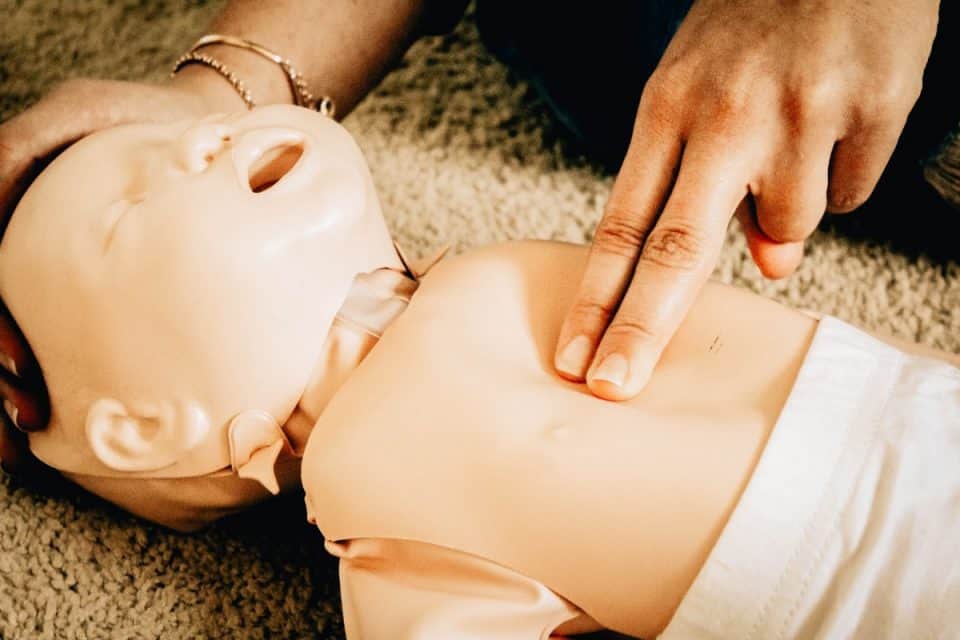 seversknet.ru (in the section "Entry to the city") . All the rules for entering and issuing a pass to the territory of the closed city are spelled out in as much detail as possible. nine0011
2. Bring or send by mail a completed application form for entry into ZATO Seversk, attaching all the necessary documents in accordance with clause 4.5 of the Instruction on entering the controlled areas of ZATO Seversk for permanent residence (temporary stay) of individuals and bring an application or send it by mail :
Extract from the Instruction on entry into the controlled areas of ZATO Seversk for permanent residence (temporary stay) of individuals paragraph 4.5. The validity of entry is confirmed by the following documents (copies): - certificate (for citizens of the Russian Federation with relatives permanently residing in the controlled area of the corresponding category of ZATO Seversk) of birth, adoption, guardianship; - certificate of registration of ownership of property located in the controlled zone of the corresponding category of ZATO Seversk; - an employment order and (or) an employment agreement (contract) concluded for an indefinite period (for persons who have concluded an employment agreement with legal entities operating in the controlled zone of the corresponding category of ZATO Seversk).nine0016
- to the department of physical protection of objects and special products (OFZOiSP) JSC "SKhK", st. Lenina 90, room 108 (for employees or veterans of the SCC, subsidiaries or an outsourcing company, for employees of the Ministry of Emergency Situations, SibFNKTs, units for ensuring the security of the SCC and ZATO Seversk), r.t. 52-50-28;
- to the regime-secret department of the ZATO Administration Seversk, Kommunistichesky Ave. 51, room 125, r.t. 77-39-53, 77-38-75 (for all other categories of citizens).
3. Wait for permission from the Pass Department to register entry to Seversk ZATO. Lists of the established format are placed on paper and duplicated in electronic terminals installed in places where passes are issued: at the Agricultural Complex (Lenin St., 90, 1st floor), in the Administration of Seversk (Prospekt Kommunistichesky, 51).
Inspectors of OFZOiSP JSC "SGChE" and the Administration of ZATO Seversk are ready to advise citizens on all issues that arise when filling out applications.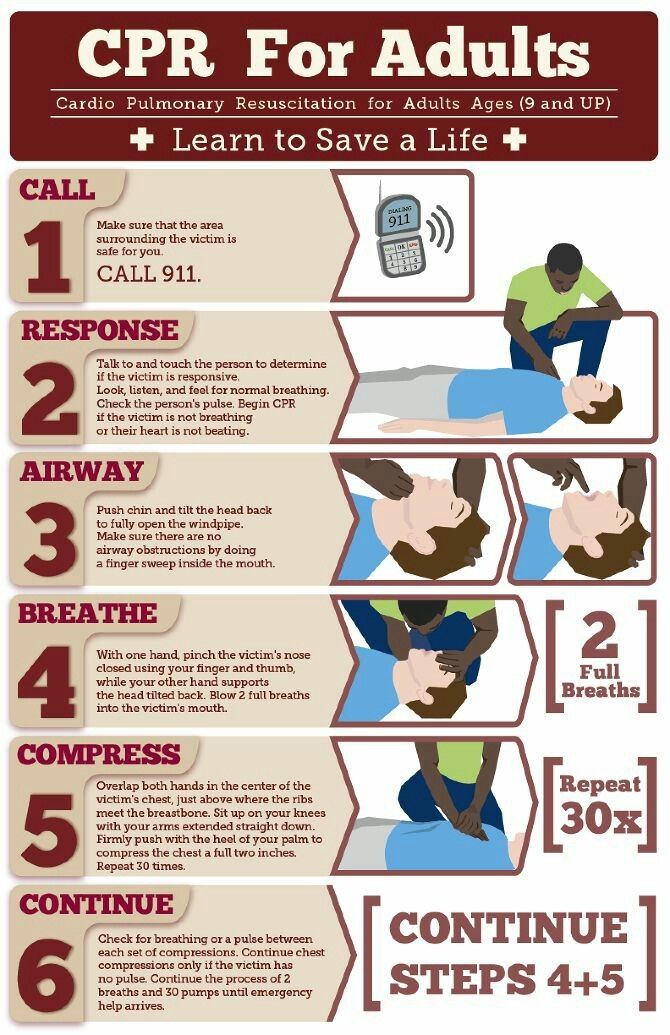
How to get a pass
A document for entry into ZATO can be obtained at the branch of the pass office at the Central Checkpoint of ZATO Seversk during business hours: from 08.00 to 22.00 (break from 18.00 to 19.00) without weekends and holidays.
For residents of Tomsk and the Tomsk region, a pass to Seversk is issued within 10 working days, for all other citizens of Russia up to 30 days. At the end of this period, a pass can also be obtained at the Central Checkpoint. More than 100 thousand people come to the closed city every year. nine0011
How does the Pass Office in Seversk work? Lenina 90
Mon., Thu. 08:00 - 18:00;
Tue, Wed 08:00 - 17:30;
Fri. 08:00 - 16:00;
Sat. 09:00 - 12:00 (on duty).
Lunch: 12:00 - 13:00
Information about the work of the regime-secret department of the Administration of ZATO Seversk at 51 Kommunistichesky Ave.
| Cabinet No. | Service direction | Phone No. | Reception hours |
| 110 | Acceptance of applications from residents of ZATO Seversk for the entry of non-resident relatives | 77-38-70 77-39-03 | Mon. 09:30-12:00; 16:00-18:30; W. 08:30-12:00; 15:00-17:30; Wed. 08:30-12:00; Thu. 09:30-12:00; 16:00-18:30; Fri. 08:30-12:00; 15:00-16:15. |
| 126 | Registration and replacement of group IV zone passes.
Making changes and additions to the personal files of residents of ZATO Seversk
Reception and execution of questionnaire material |
77-39-53
77-38-75
| Mon. W. 08:30-12:00; 15:00-17:30; Wed. 08:30-12:00; Thu. 08:30-12:00; 15:00-17:30; Fri. 08:30-12:00; 15:00-16:15. nine0011 |
| 129 | Acceptance of applications from legal entities for temporary entry into ZATO Seversk on production issues, work with seconded persons. | 77-38-76
77-23-51 | Mon. 08:30-12:00; 15:00-17:30; W. 08:30-12:00; 15:00-17:30; nine0010 Wed. 08:30-12:00;Thu. 08:30-12:00; 15:00-17:30; Fri. 08:30-12:00; 15:00-16:15. |
The child is constantly on the phone: what to do
The child is constantly on the phone: what to do - Tetrika's BlogAuthor: Team Tetrika
75
The child is constantly on the phone: what to do
It is not necessary to prohibit schoolchildren from using gadgets and the Internet, but screen time should still be dosed.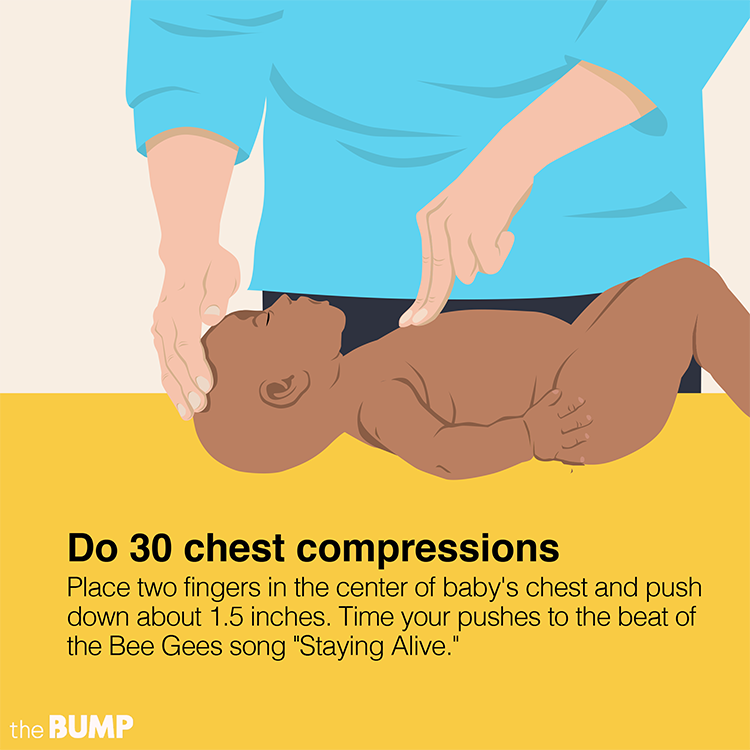 We tell why the child spends so much time on the phone and how to deal with it.
Leave a request and get a free introductory lesson
How do you like the article?
Read also
Online school Tetrika
Teachers - experts
We select a tutor for any purpose. Lessons are taught by current USE experts, candidates of sciences with experience work from 5 years. English teachers have international certificates: CAE, IELTS, TKT, CELTA, TESOL
Practice wherever and whenever you want
nine0213
We will draw up an individual training plan and a flexible schedule - you can study from anywhere and combine with school or work
Quality control of classes
Methodists of Tetrika monitor all classes, record the progress of students and evaluate the quality online lessons.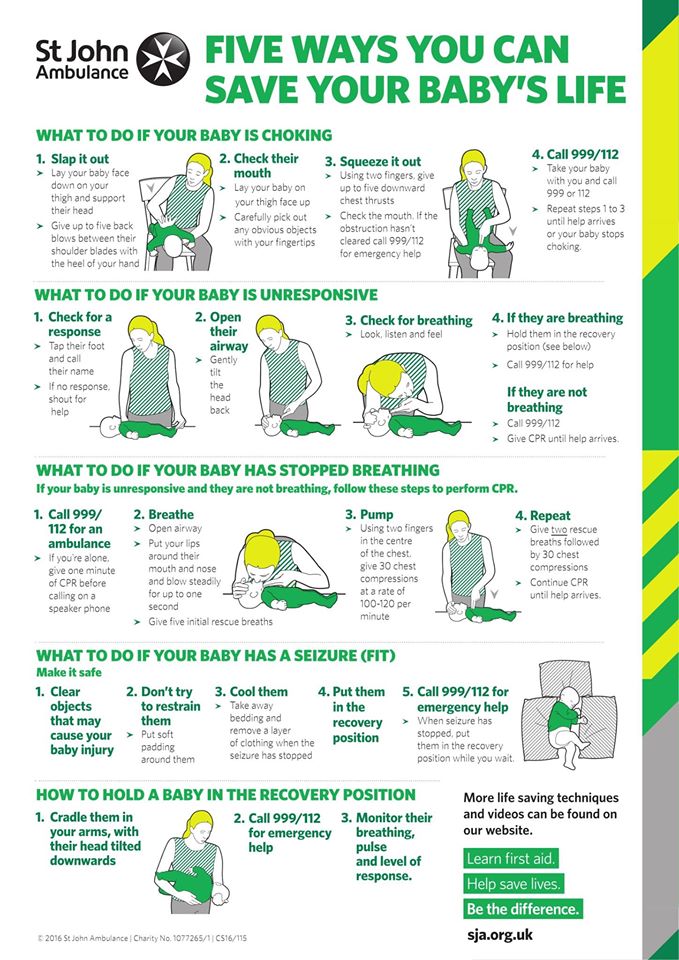 And tutors send feedback to parents after each lesson
Interactive platform
A handy tool for online classes in all school subjects
Our teachers
Try your first free lesson with one of our teachers
Try a free lesson at Tetrika online school
A trial lesson in any school subject, preparation for the Unified State Examination and the OGE or admission to the first grade nine0011
Required field
Required field
Required field
nine0010 By submitting the form, you agree to offer and consent to processing of your personal data An error has occurred, please try again later.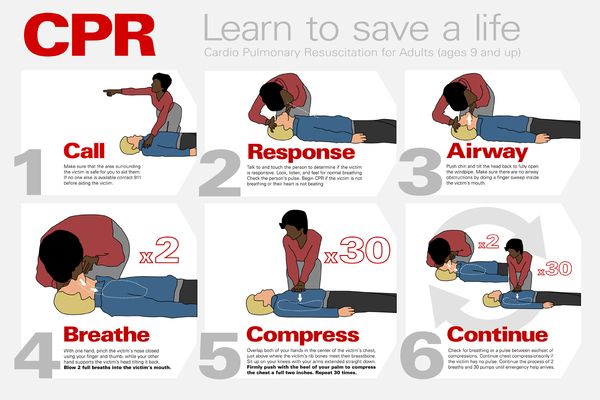
 08:30-12:00; 15:00-17:30;