How do i add another child on abc mouse
A Review of ABCmouse - Is It Worth It?
Before I tell you about ABCmouse.com, let me just point out that this is my honest review from a mom's point of view. I was not asked by ABCmouse to review their service and I paid for their service just like anyone else!! This post has become very popular, so I try to keep it updated with accurate information and suggestions.
*Added note: Be sure to read the comments left by my readers at the bottom of this post. Their experience and advice is just as helpful as mine! And feel free to add your own comments about successes (or failures) with ABCmouse. I update this post often and try to answer all questions.
**Note that I do not approve comments regarding billing or credit card issues. I do not feel this is a safe forum to discuss those matters. Thanks for your understanding!
** Scroll through for the highlighted link to ABCmouse's BLACK FRIDAY SALE happening now through midnight 11/30. $45 for a one year subscription (until cancelled), plus one year of Reading IQ included.
I keep this post updated and moderate/answer all comments, so please Pin it for future reference and share with friends!
What is ABCmouse?
I'm sure you've seen the commercials for the website called ABCmouse.com. If you haven't, it's basically an educational website for children that you subscribe to monthly. I know, I know, just like me you're probably thinking, "Why on earth would I pay for something like that? There is so much on the internet for free!" And that's true. I can tell you my son's favorite websites right off the bat, and they're all free:
- NickJr.com
-DisneyJr.com (although they recently revamped their site and took away all of his favorite games, which I just don't understand)
-pbskids.org
-sesamestreet.org (their games are GREAT, and pretty much allow him to navigate freely without much support)
But my complaints about those sites are that they have pop-up advertisements, they don't always work (games will crash unexpectedly or freeze), and sometimes my kiddo needs help finding the right games or figuring out the directions. ABCmouse is fully COPPA-compliant (Children’s Online Privacy Protection Act). It contains no pop-ups or links to other websites, eliminating access to potentially dangerous content. ABCmouse also does not feature advertising of any kind. We've yet to have a problem with it not loading, crashing or freezing (it better not if were paying for it!).
So, What Does it Have?
Well, pretty much everything. Your child gets an avatar and can then navigate through a "classroom." Subjects range from math to reading, science to art. They've pretty much got it all.
Educational Advisors. They have a curriculum board of education experts, according to their website, who help plan their games, and incorporate state standards into their lessons.
Diverse Screenshots. They like to keep the kids entertained, so they will occasionally spruce up the screen for the holidays. Here's an example of how they decorated for Halloween in October.
| ABCmouse changes their screens for holidays and to add appeal for children. |
What's Good About It?
Free One Month Trial with Subscription: Need I say more? Try it out free for a month. If you don't like it, be sure to cancel it, otherwise they will keep billing you. There are no strings attached. ABCmouse recently offered me my own affiliate link to share with you (but that in no way changes my opinion of ABCmouse- what you read here is the honest truth, I swear!). To access their 30 day free trial, feel free to follow my link here.
Free for 30 days, then $12.99 a month until canceled OR
$5 for 2 months then $12.99 a month until canceled.
****ABCmouse's Black Friday sale is going on now till midnight 11/30! This is a great deal, since you can get a year's subscription for $45 a year (until cancelled) PLUS one year of Reading IQ. Access the sale here.
Safety: ABCmouse is 100% safe and kid friendly environment that is fully COPPA-compliant (Children’s Online Privacy Protection Act). It contains no pop-ups or links to other websites, eliminating access to potentially dangerous content. They make sure it is 100% engaging fun education for kids! Additionally, ABCmouse also does not feature advertising of any kind.
Differentiation: There is literally so much on this site, and what I like is that they appeal to a large array of learning styles. They have audio pages, games, puzzles, art. They do their best to reach all types of learners.
| From the ABCmouse homepage you can choose what your child should work on. |
Leveled Learning: You choose your child's level (starting at early pre-K up to Grade 2), and you can change the levels up or down at any time.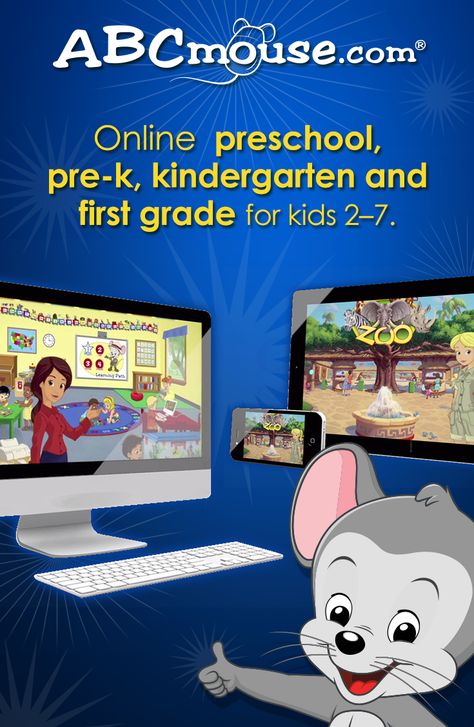 When you change levels, you get a whole new set of games/activities.
| I liked that they incorporated some of the Everyday Math techniques - this is a hundred chart in the math section. |
Easy navigation: At first when I looked at it, I thought, "geez, there's too much on here!" But it's not too bad. There's a lot to see but the tabs are easy to locate and navigate through. My 5 year old can play without much supervision, and doesn't need much help following directions or understanding what to do for each activity.
| The lady in the middle is your child's 'teacher' and this page helps you navigate your choices. |
Engaging: The games are brightly colored, fun, entertaining.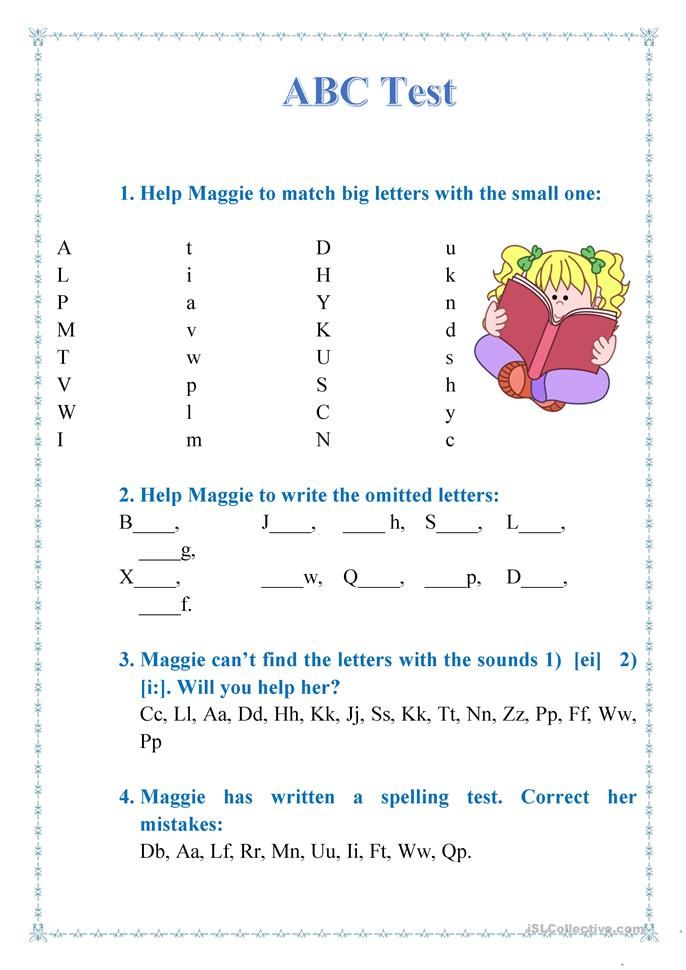 They hold my son's attention and he doesn't even realize he's learning. He has favorite games that he likes to play and I can change the level of them so he is not always playing using the same skills.
| This little monkey helps identify vowels, consonants and more. |
Incentives: Kids earn "tickets" for every activity they do on ABCmouse. They can save up their tickets to "buy" items (they're not spending real money at any time, no worries there!) for their virtual room, virtual fish tank or virtual hamster cage. My son loves the hamsters. He builds elaborate tunnels for them, which in itself can be educational in an engineering kind of way.
| My son builds elaborate tunnels for his virtual hamster. |
Assessment Center
I do not have experience with ABCmouse's assessment center option (this was not yet available when we used the service), but one of my readers offered some advice about it and gave me some insight to whether or not it's worth it. So here is her experience with the assessment option. Many thanks to Diannika for sharing this info with us (you can read more of her suggestions in the comments section at the bottom of this post):
"The assessment center has a variety of tests your child can take to help determine where they stand when it comes to certain skills. I had my nearly 5 year old take both the pre-k and kindergarten ones, simply because the things it lists as learning goals on the site for kindergarten include a bunch of things she could already do, so why not?
Some of the tests are designed for the child to take independently, others need parental assistance. Which is which are clearly labeled if you take the option to test each section individually. If you take the full assessment option, however, it does all of the tests for that level in a row, so you will need to be sure to be watching closely to know when it is time for you to step in and help... which you will probably be doing anyway while they are taking the tests.
The ones which require parental assistance include things like counting out loud (and the parent has to say how high they counted without messing up) or reading things out loud or naming shapes (and the parent has to mark if the child did so correctly). The parent instructions will clearly tell you how much assistance you can give your child on the task, if any (for example, in the how high can they count test, you are allowed to ask them "what comes after (number they last said)" if they stop to encourage them to keep going, but not otherwise coach them). Let me tell you, if your child is struggling with a particular step, it can be really hard not to step in and help them. I honestly would not recommend the assessment if your child cannot accept that you cant help them with it.
We did the pre-k in sections, and the kindergarten all in one. Definitely do it in sections... after each one, you get to see the score, and my daughter LOVED hoping she got a green circle with 100% in the middle. In the all in one, you don't see any score till the end, and then its the overall score... you have to go into a more detailed view to see the section scores. Much less engaging for the child, and it led to her being much less interested in the testing once she realized she couldn't see her scores. She did like the meter at the top showing how far into a given test she was, however. That was in both modes... a character walking toward a star. If your child gets 100% in a section, that is it. However, if they get less than that, you will get recommended activities to specifically work on the things they are weaker in."
What's Not So Good About It?
It's not free. No, but it's not overly expensive either. At $12.99 per month (their standard rate), it's way cheaper than tutoring! Access their 30 day free trial here.
****ABCmouse's Black Friday sale is going on now till midnight 11/30! This is a great deal, since you can get a year's subscription for $45 a year (until cancelled) PLUS one year of Reading IQ. Access the sale here.
Free for 30 days, then $12.99 a month until canceled OR
$5 for 2 months then $12.99 a month until canceled.
****I always try to share the most up-to-date sales in this post, which usually happen around holidays. I'll share them in this highlighted yellow area so they're easy to spot.
Too Much Independence. It's easy to let your child play for hours, but if you don't want them sitting in front of a computer all day, be sure to monitor the time they spend on there and set a limit for how long you want them to play.
Distracting Incentives. I mentioned that my son loves the hamster cage ticket incentive. Sometimes that's all he wants to do on ABCmouse, but that's not really the educational part! So I tell him "You have to play 6 games first before you hit the hamster store."
Forgetting About It. There is a possibility that you will purchase ABCmouse and then not use it too much. If that's the case, then get on there and cancel your payments! ABCmouse will automatically renew each month unless you tell it not to (you can cancel at any time). So be vigilant about how much you use it.
Can My Child Play on a SmartPhone or Tablet?
ABCmouse does have an app that is compatible with most Apple and Android devices. The app is essentially a gateway to gameplay, so you need a strong WiFi connection and the latest updates for your phone or tablet. Check their FAQ page on their website for more information. If you're specifically looking for educational apps for your child, check out my recommendations for some great educational apps for kids!
What if I Have More Than One Child?
You can register up to three children per account on ABCmouse.
How Do I Cancel ABCmouse?
It is easy to cancel ABCmouse if you decide you no longer want it. Just go to the MyAccount section on the Parents page and there should be an option there to discontinue service. You can also reactivate your account any time. Added note that down the line, when my son had grown old enough and we decided to cancel ABCmouse, I did not have any issues with cancellation.
The Bottom Line - Is it Worth It?
So will your child jump up reading levels and become the super learner they talk about on the TV commercials? I don't know about that, but it's worth a try. If you can get the free trial (or a decent sale price for your subscription- they do run multiple sales throughout the year), why not give it a shot? I especially think it's worth trying if your child is unmotivated to learn (or unwilling to learn!), and it's great for extra summer practice. If there is a particular area that your child needs help with (such as recognizing letter sounds or counting to 100), this website might be able to help. And if not, just be sure to cancel before your free trial is up!
**And as another added note, just before The Jersey Momma's Boy entered First Grade, he lost interest in ABCmouse. Although this might not be true for all learners, this was the case with my boy, so we cancelled our subscription. Since writing this post, ABCmouse has added another level, so their program now goes up to 2nd Grade. I also HIGHLY recommend Age of Learning's newest online learning platform, Adventure Academy, for those kids who have outgrown ABCmouse. See below for my review post link.
Remember: ****ABCmouse's Black Friday sale is going on now till midnight 11/30! This is a great deal, since you can get a year's subscription for $45 a year (until cancelled) PLUS one year of Reading IQ. Access the sale here.
Free for 30 days, then $12.99 a month until canceled OR
$5 for 2 months then $12.99 a month until canceled.
I also have a full review and walk-through video of Adventure Academy, which is Age of Learning's new program for kids ages 8-13 (it's awesome!). Read that review here or click the Adventure Academy image below.
*If you are commenting below about your experience with ABCmouse, please know that I often refrain from approving comments regarding billing or credit card issues. I apologize if that offends anyone, but I do not work for Age of Learning, so any discussions about their billing should be taken up with them. I do not feel the comment section is a safe forum to discuss credit card or billing matters. Thank you for your understanding!*
Transmit Data from Procare to ABCmouse.com
Add-Ons
How to transmit classroom, child, and parent information from Procare to ABCmouse.com for use with the “Parent Engagement Program” offered through Kid Orange Tech.
Before You Begin
- You must have an account for your center at ABCmouse.com that is part of the “Parent Engagement Program” offered through Kid Orange Tech. Call Kid Orange Tech at 888-906-0671 to speak with an educational consultant.
- Exclude Children? If there are specific children you’d like to exclude (not transmit to ABCMouse.
 com), you’ll want to Create a Child Tracking Item for that purpose and Assign Tracking to those children before you continue.
What information is sent to ABCmouse.com?
- A list of Classroom Names you select.
- The name of each currently enrolled child who has one of those rooms assigned as their Primary Classroom. This includes all children whose Enrollment Status is “Enrolled”, even if the child is part of a Hidden Account. (See above for how to exclude specific children using Child Tracking.)
- A default teacher for each classroom, called “Teacher Name”. You’ll enter the actual teacher names at ABCmouse.com.
- The email address of the first person marked as “Lives With” on the Child Information & Relationships screen (image below). In this example, that would be the email for the mom, Maria Adams. Since the dad, Greg Adams, is the second person listed as “Lives With”, his email would not be included.
Download the ABC Mouse/KidOrangeTech “Extra”
- Log on to your computer with local administrator privileges and close all programs, including Procare.

- Download
- When installation is complete, restart Procare.
Select a School and Open the ABC Mouse Extra
- If you have more than one location, use the Change School button at the Procare Home screen to select the location you want to transmit first to ABCMouse.com. Information is transmitted one locaton at a time.
- From the Procare Home screen go to Utilities > Procare Extras > ABC Mouse.
Using Procare’s ABC Mouse Extra
At the Procare – ABC Mouse – Connector screen:
- Enter the Email and Password used for your account at ABCmouse.com. Hint: If you forget your password, click the Forgot Password link.
- Click the Schools button, select the locations you want to be allowed to transmit, and choose Save > Exit. Note: Selecting schools here is a safeguard to make sure you can’t accidentaly transmit a school that isn’t allowed.
 Only the school you are currently logged into in Procare will be transmitted when you complete these steps.
 - Click the Classrooms button, select the classrooms you want to include, and choose Save > Exit
- Optional: If you want to exclude children who have a specific Child Tracking assigned—click the Tracking button, choose a Tracking Item, and Exit.
- Now you are ready to send the information to ABCMouse.com for the location you are currently logged into in Procare. Click Transmit.
- If you want to transmit another school:
- Exit the ABCMouse extra.
- At the Procare Home screen, use Change Schools to select the next school you want to transmit.
- Open the ABC Mouse Extra again (Utilities > Procare Extras > ABC Mouse).
- Repeat the steps above to select Classrooms, choose a Tracking to exclude (if needed), and Transmit.
how to switch the keyboard, customize the top bar, clipboard, gestures, take screenshots and uninstall applications ".
When I first bought my first MacBook almost 10 years ago, I did just that: after a short period of getting used to, I just had to enjoy how well many little things were thought out in the system. For example, I am still amazed by consistent work with files: you can simply “grab” an image in the browser, drag it onto the icon of some other application, and it will immediately open in it.
In these 10 years, I have worked on different MacBooks, iMacs, Mac minis, and even an old Mac Pro. Recently, I moved to a new MacBook again and found that I already have certain rituals - settings that I configure and applications that I install first. I will talk about them in this article and at the same time share a few more useful tricks.
You will learn how to:
- Switch keyboard layouts with a single button
- Install Alfred, the big brother of Spotlight
- Install the advanced exchange buffer
- Clean the line of the upper menu
- It is convenient to make professional screenshots
- fully delete applications
- Active angles
- set the search managers to find subject to change
- Tap the apple icon in the upper left corner of the screen.
- Go to System Preferences → Keyboard → Input Sources tab.
- Check the box "Use Caps Lock to switch to and from the ABC keyboard".
- Click the apple icon in the upper left corner of the screen.
- Go to System Preferences → Keyboard → Keyboard tab.
- From the drop-down menu under Fn Key Press (or 🌎 Key Press), select Switch Input Source.
- search and open folders;
- open websites;
- open installed applications;
- search for bookmarks in the browser;
- look up the definitions of words in the dictionary — both in Russian and in English;
- do quick calculations: multiply or add something;
- convert units and currencies;
- open the system settings or immediately a specific section in them, for example, "Monitors".

- Click the apple icon in the upper left corner of the screen.
- Go to System Preferences → Keyboard → Keyboard Shortcuts tab.
- On the left side of the list, select Spotlight, and then check the box next to Show Spotlight Search.
- Click in the area where the current keyboard shortcut is indicated, and hold down the new one on the keyboard.
This text was written for macOS Big Sur and app versions current as of October 2021. If you have an older version of macOS installed, or if you are reading this text months after it was published, please be aware that some features and settings may change or may not be available at all.
Switch keyboard layout with one button
By default, the keyboard layout is switched by pressing Control + Space. Many users change this combination to a more convenient one - Command + Space. But I go even further and switch the layout with just one key.
There are two ways to do this built into the system. The first is to assign the layout switch to the Caps Lock key, which is used to enter text in capital letters. Here's how to change settings:
Now quickly pressing and releasing Caps Lock will switch the keyboard layout, and if you hold it down for a second, you will enter the text input mode in uppercase letters.
The second way is to assign layout switching to the Fn key. Most often, it is located in the lower left corner of the keyboard and is hardly used. In this case, the path will be as follows:
Recently, I discovered an even more exotic way to switch the layout: by clicking on the left Command, the Latin alphabet is turned on, and by clicking on the right one, Cyrillic. The idea of this approach is that you initially, before typing, know exactly which layout you have set, because you previously pressed the desired button.
To do this, you need to install additional keyboard customization applications, such as Karabiner-Elements or Hammerspoon. Sometimes they need to prescribe algorithms, but if this does not scare you, you can start studying the issue from this post in English.
Installing Alfred, Spotlight's "big brother"
Spotlight is one of the most convenient things in macOS. This is a small search bar that can be called on top of all windows and start typing text into it. And then the magic happens - here are a few examples of what Spotlight can do:
By default, Spotlght is invoked by the keyboard shortcut Command + Space, but if this combination is switched languages, you will need to assign other keys:
In the past few years, I have been using a third-party Alfred application instead of Spotlight, which offers more settings and options. The basic version of Alfred can be downloaded for free, but it is of little use - all advanced features are available only after purchasing a license for 29£ (2860 R).
What's wrong with Alfred? In short, it can be configured as a single entry point to folders, files, contacts, applications, and sites.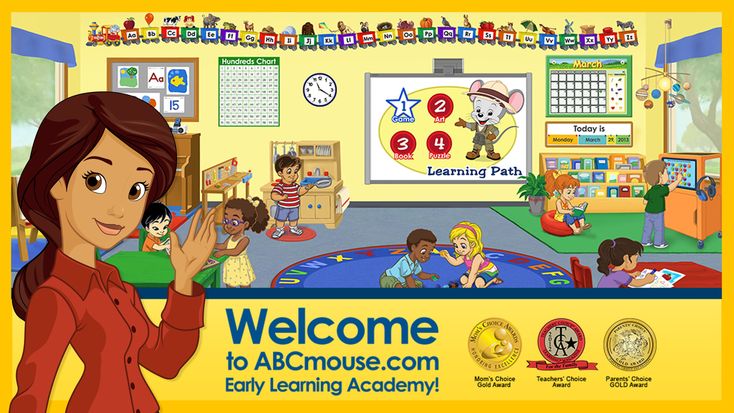 The application will not just open sites, but select one of the pages that the user has previously bookmarked, or quickly switch to advanced search - for example, search Google for pages T-Z.
Through the application, you can also control music, lock or turn off the computer and form your own command chains. For example, I taught Alfred to open the Telegram window on a separate command, and then repeat pressing the Command + K keys, which causes a search by interlocutors, and enter the name that I had previously entered in the search bar into this line.
Alfred is not the only app of its kind. There is also a young and actively developing Raycast. It's free and focused on helping you get the job done - it has integrations with Asana, Github, Jira, and Zoom.
Advanced Clipboard Setup
Advanced Clipboard is the ability to save and access clipboard history so that you can paste text or a previously copied file if needed.
MacOS does not offer this option, but there are enough applications that do the job. One of the most popular is called Paste, its free trial runs for 14 days, after which it will be possible to subscribe for 169 R per month. It allows you to press the Command + Shift + V combination to open a window with the buffer history at the bottom of the screen.
Later, I abandoned Paste and set up the advanced clipboard in Alfred, which I described above. There is not such a beautiful interface as in Paste, but there is one application less in the system.
This is how the Paste interface looks like: cards of the last copied items pop up at the bottom of the screen And this is the clipboard history interface in Alfred. Not so beautiful at all, but I'm used to itCleaning the menu bar
The menu bar is located at the top of the screen, it contains commands for managing the current application, as well as a clock and icons for various settings and applications: for example, Wi-Fi, battery, current layout keyboards, Control Center.
New applications like to add their icons to the menu bar during installation, and over time it becomes very cluttered. Here's how to fix it.
Remove unnecessary system icons. Switch Users, Wi-Fi Icon, Time Machine Icon, Spotlight, Siri - If any of these are wasting your menu bar space, turn them off by going to Settings → Menu Bar & Dock. Or just hold down Command and drag unwanted icons from the menu bar with the mouse down - if they can be deleted, they will be deleted.
All items are configurable in the menu on the sideDisable the function in application settings. This is convenient if there are only a couple of extra icons in the menu bar: in other cases, searching for the desired settings inside each application individually can be tedious.
Install an application that cleans up the menu bar. For example, I use the free Hidden Bar: it creates a "stackable" area where you can drag useful, but not so often used icons.
macOS has a great built-in screenshot tool - you can find it in Spotlight or in Launchpad by typing "Screenshot". A small pop-up window will open that will allow you to configure the shooting options: capture the entire screen, a separate window, or a specific area that the user selects with the mouse. You can also record a video there and supplement it with comments recorded on the computer microphone.
By default, screenshots are saved on the desktop, but in the same pop-up window, you can click on the "Options" button and select a different location. When you take a screenshot, its small preview will hang in the corner of the screen for a few seconds: at this point, you can click on the preview to view it, or drag it to the application window where you want to send the screenshot.
To take screenshots quickly, it doesn't hurt to learn a couple of keyboard shortcuts: Shift + Command + 3 will take a screenshot of the entire screen, and Shift + Command + 4 will prompt you to select the area you want to capture. If you press the Spacebar in the last mode, the cursor will turn into a camera icon - this is a snapshot mode for individual windows. It remains to click on the desired window, and it will be saved with a beautiful shadow around the edges.
I recently switched to a third-party screenshot app, CleanShot X. Basically, it offers the same features as the built-in one, but there are a few extras.
So, I was able to adjust how long and in what corner the screenshot preview would hang - it seemed to me that the system window disappeared too quickly. In addition, you can not only save the file to a specific folder, but also immediately copy it to the clipboard, so that you can then quickly paste it, say, into a Telegram conversation. Finally, CleanShot X can automatically upload screenshots to the cloud if you prefer to share links rather than the files themselves, but this feature turned out to be unnecessary for me.
CleanShot X costs $29 (2110 R), but I installed it with a subscription from the Setapp app store and saved - I'll talk about it below.
Complete removal of applications
Applications downloaded from the App Store are easy to remove: you need to open Launchpad, where all installed programs are presented, click on one of the icons and hold down for a few seconds - after that, a cross will appear over each application.
The problem is that you won't be able to get rid of applications installed from third-party sources, for example, downloaded from the developer's site. Usually I solved the problem simply: I opened the Applications folder in the Finder, selected the application that had become unnecessary and deleted it.
But it turned out that this is not enough: many programs store their service files in different places of the system, which remain in their places. Special uninstaller applications come to the rescue here.
One of them, AppCleaner, is free to use. To uninstall a program, you need to drag it to the application window, and it will automatically find all the service files on your hard drive.
I don't use AppCleaner because the CleanMyMac X app has the same feature. But you have to be careful with it: CleanMyMac X tries very aggressively to "optimize" the system by deleting files and folders that the app thinks are unnecessary. I don't want to accidentally break the system, so I only delete applications and their service files through this application.
CleanMyMac X starts at $39.95 (2827 R), but I also downloaded it with a subscription from the Setapp app store.
Leftovers tab in CleanMyMac X shows files from programs that are long gone from the computerCustomizing gestures and hotspots
I prefer to use the trackpad whether I'm on a MacBook or desktop iMac, and not least because of the gestures the system supports.
For example, to open the desktop, I simply spread four fingers apart, as if I were pushing the application windows apart. And with a three-finger swipe, I switch between multiple virtual desktops, another very handy macOS feature.
You can find out what gestures the trackpad supports directly in the system settings - go to the "Trackpad" section and look at the "Other gestures" tab. If these aren't enough for you and you want to do even more with your trackpad or mouse, try the BetterTouchTool app starting at $8.5 (R619). It also allows you to create separate scripts for the keyboard, touchbar - the small screen in the keyboard of the new MacBooks - and other devices. You can even control your computer by drawing gestures on the screen with your mouse.
The choice of gestures and the actions they trigger is huge. But you have to dig into the English interface Another way to "pump" the trackpad or mouse in macOS is to use hot corners. This means that every time you press the mouse cursor to one of the corners of the screen, a certain event will occur. This can be locking the computer, showing the desktop, opening the notification panel, and the like.
I do not recommend setting hot corners for the top of the screen - otherwise there will be false positives when you try to quickly click on the apple icon in the upper left corner or on the clock in the upper right. But on the lower corners you can hang the desktop display and Launchpad.
To configure hot corners, open System Preferences, go to the Desktop & Screen Saver menu, and click the Screen Saver tab. The button you need will be located in the lower right corner of the window.
Installing a window manager
I sometimes feel like macOS developers don't have more than one or two application windows open at the same time because the system is so wasteful of screen space. Fortunately, a separate class of applications has appeared that allows you to effectively arrange windows on the screen.
I'm using a primitive Magnet application - it has enough power to scatter several windows over different parts of the screen and set them to a certain size.![]() For example, the browser window can occupy two-thirds of the screen at the left edge, and I will give the rest of the territory for the task manager and calendar.
For example, the browser window can occupy two-thirds of the screen at the left edge, and I will give the rest of the territory for the task manager and calendar.
Magnet is $749 in the App Store, but you don't have to install it - there are many different options, some of which provide even more options.
Magnet hangs in the menu bar and allows you to quickly move the application around the screen and change the window size. But I learned the basic keyboard shortcuts to make it even fasterCustomizing search in Finder
Finder — the standard file manager in macOS — is quite convenient, especially if you customize the side menu: remove unnecessary sections and add frequently used folders.
But there is one annoying feature of the Finder: if you start searching for files and folders directly in the application, the search will be performed on the entire computer, and not on the contents of the folder you open.
To change this, open the Finder, then in the menu bar at the top of the screen, click Finder → Preferences, go to the Add-ons tab, and look for the drop-down menu when searching. There you need to select the option "Search in the current folder". Now Finder will not give extra results.
Installing Setapp
I'm not sure if this app will be useful for everyone, and I'm not even sure if I need it, although I've been using Setapp for several months now.
Setapp is an application that has its own "app store" inside. The idea is simple: you pay for a single Setapp subscription starting at $9.99 (715 R) per month and get access to dozens of apps from the collection. There are many tools in this collection to improve the macOS experience, including the already mentioned CleanMyMac X and CleanShot X, as well as Bartender, which allows you to clear the menu bar, and Mosaic, an application that controls the position of windows on the screen.
In addition to them, the application has many other useful programs: VPN clients, task managers, personal budgeting applications. As long as you pay for a subscription, everything remains available.
The problem is that there may not be an application that you need exactly: if you have already bought your VPN, task manager and the same Magnet, it makes no sense that in the collection Setapp has five more analogues of these applications.
Luckily, Setapp has a two-week trial period, which should be enough to find apps worth paying a premium subscription for. Or, on the contrary, decide that it does not make sense and you just need to pay separately for two or three applications from the Setapp collection.
how children were taught programming in the 90s and what was wrong with it / Sudo Null IT News
How children were taught to program
In the early 1990s, Moscow schools began to be selectively equipped with computer classes. In the premises, bars were immediately placed on the windows and a heavy iron-studded door. A computer science teacher appeared from somewhere (he looked like the most important friend after the director), whose main task was to make sure that no one touched anything. Nothing at all. Even the front door.
In the classrooms, it was most often possible to meet the BK-0010 (in its varieties) and BK-0011M systems.
Photo taken from here
The children were told about the general device, as well as about a dozen Basic commands so that they could draw lines and circles on the screen. For junior and middle classes, this was probably enough.
There were separate problems with the preservation of their creations (programs). Most often, computers with the help of monochannel controllers were networked with a "common bus" topology and a transmission rate of 57600 baud. The drive, as a rule, was one, and it often did not go well with it. Either it works, or it doesn’t work, then the network hangs, then the floppy disk is not readable.
At that time, I was carrying this creation with a capacity of 360 kB.
The chances that once again I will pull out my program from it were 50-70 percent.
However, the main problem of all these stories with computers "BK" were endless freezes.
This could happen at any time, whether it was typing code or executing a program. A hung system meant that you spent 45 minutes of your time in vain, because. I had to do everything all over again, but the remaining time of the lesson was no longer enough for this.
Closer to 1993, normal classes with 286 cars appeared in some schools and lyceums, and in some places there were even “three-ruble notes”. In terms of programming languages, there were two options: where BASIC ended, Turbo Pascal began.
Programming in "Turbo Pascal" on the example of "tanks"
On Pascal, children were taught to build cycles, draw all sorts of functions, and work with arrays. In the Physics and Mathematics Lyceum, where I “dwelled” at one time, one couple a week was assigned to computer science. And for two years there was this boring thing. Of course, I wanted to do something more serious than displaying the values of an array or a certain sinusoid on the screen.
Tanks
Battle City was one of the most popular NES clone console games (Dendy and others).
In 1996, the popularity of 8-bits passed, they had long been collecting dust in the cabinets, and it seemed cool to me to make a clone of "Tanchikov" for PC as something large-scale. Further, just about how then it was necessary to dodge in order to file something with graphics, a mouse and sound on Pascal.
Only sticks and circles can be drawn
Let's start with graphics.
In the basic version, "Pascal" allowed you to draw some figures, paint over and determine the colors of points. The most advanced procedures in the Graph module that bring us closer to sprites are GetImage and PutImage. With their help, it was possible to capture a section of the screen into a previously reserved memory area and then use this piece as a bitmap. In other words, if you want to reuse some elements or images on the screen, you first draw them, copy them to memory, erase the screen, draw the next one, and so on until you create the desired library in memory. Since everything happens quickly, the user does not notice these tricks.
The first module where sprites were used was the map editor.
It had a marked playing field. A mouse click brought up a menu where you could choose one of four obstacle options. Speaking of the mouse...
The mouse is already the end of the 90s
Everyone had mice, of course, but until the mid-90s, they were used only in Windows 3.11, graphics packages, and a small number of games. In Wolf and Doom, they were cut only from the keyboard. And in a DOS environment, the mouse was not really needed. Therefore, in Borland, the mouse module was not even included in the standard delivery. He had to be searched for by acquaintances who shrugged and exclaimed in response, “What for is he to you?”.
However, finding a mouse polling module is only half the battle. To click on the on-screen buttons with the mouse, they had to be drawn. And in two versions (pressed and not pressed). The unpressed button has a light top, and a shadow below it. Pressed is the opposite. And then draw on the screen three times (not pressed, pressed, then again not pressed). Plus, do not forget to put delays on the display, well, hide the cursor.
For example, the processing of the main menu in the code looked like this:
Sound - buzzer only PC Speaker
A separate story with sound. In the early nineties, the Sound Blaster clones were just getting ready for their triumphant march, and most applications only worked with the built-in speaker. The maximum of its capabilities is the simultaneous reproduction of only one tone. And that's exactly what Turbo Pascal did. Through the sound procedure, it was possible to “beep” with different frequencies, which is enough for the sounds of shots and explosions, but for a musical screen saver, as it was fashionable then, this was not suitable. As a result, a very tricky solution was found: in the software’s own archive, an “executable” was found that was once downloaded from some BBS. He knew how to work miracles - to play uncompressed wav-s through the PC Speaker, and he did it from the command line and did not have an actual interface. All that was needed was to call it through the Pascal exec procedure and make sure that this construction did not collapse.
As a result, the downhole Mouzon appeared on the screen saver, but a funny thing came out with it. In 1996, I had a system on a Pentium 75, upgraded to 90. Everything worked fine on it. At the university, where we were given Pascal for the second semester, there were well-worn three-ruble notes in the classroom. By agreement with the teacher, I dragged these tanks to the second lesson in order to get credit and not go there anymore. And so, after launching, a loud roar came out of the speaker, mixed with gurgling guttural sounds. In general, the 33-MHz “three-ruble note” DX turned out to be unable to rotate the same “executive” normally. But otherwise everything was fine. Of course, not counting the sluggish keyboard polling, which spoiled the entire gameplay, regardless of PC performance.
But Pascal is not the main problem
In my understanding, “Tanks” is the maximum that could be squeezed out of Turbo Pascal without assembler inserts. Of the obvious shortcomings of the final product - slow keyboard polling and slow graphics rendering. The situation was aggravated by an extremely small number of third-party libraries and modules. They could be counted on the fingers of one hand.
But what upset me the most was the approach to school education. No one then told children about the advantages and possibilities of other languages. In the classroom, almost immediately they began to talk about begin, println and if, which locked students inside the BASIC-Pascal paradigm. Both of these languages can be considered exclusively educational. Their "combat" use is a rare occurrence.
Why teaching high school students fake languages is a mystery to me. Let them be more visible. Let the BASIC varieties be used here and there. But, in any case, if a person decides to connect his future with programming, he will have to learn other languages from scratch. So why don't children set the same educational tasks, but only on a normal platform (language), within which they could develop further on their own?
Speaking of tasks. At school and institute, they have always been abstract: calculate something, build a function, draw something. I studied at three different schools, plus we had "Pascal" in the first year of the institute, and not once did the teachers set any real applied problem.